How to Fit Headphones in Ear: A Step-by-Step Guide
Learn how to fit headphones in ear for secure comfort and optimal sound. A data-driven, step-by-step guide from Headphones Info with tips on tip choice, insertion, testing, and maintenance.

Goal: learn how to fit headphones in ear for secure comfort and optimal sound. This steps-based guide covers ear tip selection, insertion technique, fit testing, and adjustments for different headphone styles. Practicing the right tips and technique will improve isolation, reduce fatigue, and deliver consistent bass and vocal clarity. According to Headphones Info, start with the correct tip size and practice the insertion motion.
Why fit matters for sound and comfort
A proper fit is the foundation of a great listening experience. When tips seal your ear canal well, you gain better bass response and noise isolation, while reducing listening fatigue over long sessions. A poor fit can cause sound leakage, which muddies the upper frequencies and makes it harder to hear subtle details in music or dialogue. According to Headphones Info, the single most impactful factor for comfort and sound is selecting the right tip size and material for your ear shape. A good fit also minimizes pressure points that can lead to ear soreness after extended use, especially with prolonged listening. By prioritizing fit, you’ll enjoy clearer mids and controlled highs without cranking the volume.
Ear tip options and how to choose
Ear tips mainly come in silicone and memory foam, with sizes ranging from XS to XL. Silicone tips are durable, easy to clean, and provide consistent seal for most users. Memory foam tips adapt to the ear canal, offering superior isolation in noisy environments but may require a moment of adjustment to insert correctly. The choice hinges on your ear canal size, comfort preference, and typical listening environment. For Headphones Info readers, trying a small set of sizes in both materials helps identify the best combination for daily use. Remember: a snug seal should not be painful, and you should be able to rotate the tip slightly without discomfort to achieve the seal.
Measuring your ears and trying sizes
There’s no universal “one size fits all.” Start by testing each tip size for seal, comfort, and ease of insertion. A good rule of thumb is to begin with the smallest size that still forms a stable seal, then gradually move up if you can’t feel the bass or if the seal is inconsistent. Before insertion, dry the tips and your ears to reduce slippage. If you wear glasses or have hair around the ear, consider tips with a slightly larger flange or softer material to accommodate movement. Headphones Info suggests keeping a small, labeled set of tips handy so you can compare fit across different listening sessions.
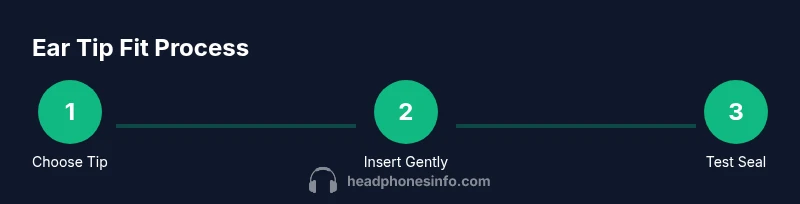
Step-by-step insertion technique
Insert the tip gently into the ear canal, then rotate slightly to seat the flange against the concha for a stable seal. Use a slow, controlled motion instead of forcing the tip; a subtle twist helps the tip align with your ear canal geometry. If you feel resistance, remove, reorient, and try again with the same or a different tip size. Once inserted, avoid touching the driver housing, which can loosen the seal. Practice this motion in front of a mirror to ensure you’re not angling the tip too high or too low.
How to test fit: seal, comfort, and sound
A proper seal should noticeably improve bass and reduce background noise when you speak softly. A quick test is to listen to a short track at a moderate volume and gently tug on the cable near the ear; if the tips stay seated, you likely have a good seal. Check comfort by wearing for a few minutes; if you experience pinching or soreness, switch sizes or switch to memory foam. If you still hear leakage or uncomfortable pressure, consider alternatives like ear fins or wings that can stabilize the housing without increasing pressure.
Common fit issues and fixes
Slippage often indicates an undersized tip or an ear shape that doesn't favor that tip design. Try a different size or a memory foam tip that fills more of the canal. Ear fatigue from long sessions can stem from rigid, hard tips; switching to a softer material can alleviate this. For sports use, add compatible ear fins or wings to improve retention during movement. If the tip becomes loose after sweating, replace it with a fresh pair to reestablish the seal.
Maintenance to keep fit long-term
Regular cleaning of ear tips prevents residue buildup that can alter seal quality. Wipe silicone tips with a mild soap solution and air dry before reattachment. Rotate tip sizes periodically to distribute wear evenly and extend tip life. Replace tips when they show cracking, discoloration, or loss of elasticity. By maintaining clean, intact tips, you preserve fit stability and sound quality over time.
Fit considerations for different headphone styles
In-ear monitors (IEMs) and true wireless earbuds often rely on smaller tips for a secure seal, whereas wired earbuds may require slightly different tips to achieve comfort. Over-ear headphones with attached in-ear pads can still benefit from a proper seal at the ear canals, though the retention strategy differs. For gym or commuting, consider tips with anti-microbial coatings or memory foam inserts that adapt to your ear canal. The goal is a consistent seal across activities without causing discomfort.
Accessories and add-ons that help fit
Accessory options like memory foam sleeves, foam sleeves, or winged tips can significantly improve fit for active use. Some brands offer dual-flange designs that provide a larger contact area for a stable seal. If you frequently switch between devices, keep a small tip kit with multiple sizes and materials so you can quickly adapt to different headphones. Remember to choose accessories compatible with your specific earphones to avoid mutual incompatibility.
Quick-fit checklist and common mistakes to avoid
- Start with the correct tip size and material for your ear shape.
- Insert with a gentle twist; avoid forcing tips into the canal.
- Test seal and comfort before long listening sessions.
- Clean tips regularly and replace worn tips promptly.
- Use accessories like wings or fins for improved retention during movement.
- Do not ignore persistent discomfort or pain; reassess tip size or design.
Tools & Materials
- Silicone ear tips in multiple sizes (XS-S-M-L)(Choose the size that forms a snug seal without pain; check for compatibility with your headphones.)
- Memory foam ear tips (optional)(Offers superior isolation; may require a small adjustment period for insertion.)
- Soft cleaning cloth and mild solution(Clean tips before insertion and after removal to maintain hygiene.)
- Tip removal tool (if supported by design)(Use only if your model supports it to avoid damaging tips.)
- Mirror or front-facing camera(Helpful for checking alignment and hygiene during initial tests.)
Steps
Estimated time: 15-25 minutes
- 1
Select tip size
Inspect available tip sizes and pick the smallest size that forms a stable seal without pain. If the seal is unstable, re-test with the next size up. Ensure tips are clean before handling.
Tip: Start small; you can always move up a size if needed. - 2
Attach tips to buds
Make sure tips snap onto the nozzle firmly and evenly. Avoid twisting while attaching to prevent misalignment that affects fit.
Tip: Confirm full insertion of the tip into the bud for a secure mount. - 3
Prepare your ears
Dry ears and tips to prevent slippage. If you wear glasses or have hair around the ear, anticipate slight changes in fit.
Tip: A quick dry-off helps maintain seal integrity. - 4
Insert with a gentle twist
Place the tip at the entrance of the ear canal and rotate slightly to seat the flange against the ear. Do not force the tip; stop if you feel pain.
Tip: Keep jaw relaxed to ease canal alignment. - 5
Check the seal
Speak softly and note if you can hear your voice clearly through the tips. A good seal reduces ambient noise and enhances bass response.
Tip: If you hear leaks, adjust size or rotate slightly to re-seat. - 6
Test with a short track
Play a brief song or test clip to verify bass, mids, and treble balance with the current tips. Listen for comfort and stability during motion.
Tip: Move your jaw side-to-side to ensure the seal remains stable. - 7
Assess comfort after a few minutes
If discomfort appears, switch to another size or material. Prolonged pressure can cause irritation, even with a good seal.
Tip: Take a short break if you feel any pinching. - 8
Try different tip types
If one material doesn’t suit you, test another (e.g., silicone vs memory foam) to compare comfort and isolation.
Tip: Keep a small kit with two sizes of both materials for quick testing. - 9
Clean and reinsert if needed
Wipe tips with a clean cloth and reinsert to refresh the seal after cleaning. Proper hygiene supports consistent fit.
Tip: Always dry tips completely before reinsertion. - 10
Record your preferred setup
Note the tip size and material that worked best for you so you can replicate it across devices.
Tip: Label tip sizes for easy reference in the future.
People Also Ask
Why won’t my headphones stay in my ears?
Common causes are an undersized tip, an ear canal that doesn’t suit the tip design, or movement during activity. Try a different size or material (e.g., memory foam) and ensure the seal is seated correctly.
If they keep slipping, switch to a larger tip or use a foam tip designed for your ear canal.
Are memory foam tips better for running?
Memory foam tips can improve isolation and stay in place during movement, but they might take longer to insert. Test in short sessions to confirm comfort during activity.
Foam tips often help with running due to better isolation and grip.
What’s a safe method to clean ear tips?
Wipe silicone tips with mild soap and water, then air dry completely before reuse. Do not soak or harshly scrub to avoid material degradation.
Clean tips with mild soap, rinse, and dry before reusing.
Can I use these tips on any headphone model?
Tip compatibility depends on the nozzle size and design of the headphone. Check the manufacturer’s guidance and try tip sizes compatible with your model.
Always verify tip compatibility with your model before buying.
How long does a good seal last?
A good seal can last for many sessions, but factors like ear shape, activity, and tip material affect durability. Inspect tips regularly and replace when wear is visible.
Expect to recheck fit after a few uses and replace worn tips.
What should I do if one ear has a better seal than the other?
Ear canal shapes vary; you may need different tip sizes or materials for each ear. Try swapping sizes or using foam tips for the looser side.
It’s common to need a different tip per ear; adjust accordingly.
Watch Video
What to Remember
- Choose the right tip size first.
- Insert with a gentle twist for a stable seal.
- Test seal and comfort before long listening sessions.
- Maintain tips and replace worn parts regularly.
- Consider different tip materials for activity-specific needs.