How to Clean Headphones: A Practical Guide
Learn how to clean headphones safely with a practical, step-by-step approach for earbuds, on-ear, and over-ear models. Preserve sound quality, avoid moisture, and extend lifespan with proven, data-informed methods.

According to Headphones Info, proper cleaning protects drivers, cables, and connectors while extending lifespan. This quick answer previews safe practices, appropriate methods for earbuds, on-ear, and over-ear models, and essential precautions to prevent moisture damage or residue buildup. Follow the steps below for reliable results and continued listening enjoyment.
Why Cleaning Headphones Matters
Regular cleaning keeps listening experiences crisp and hygienic. Earbuds collect oils, ear wax, dust, and moisture that can affect sound, micro-movements of the diaphragm, and even introduce odors. Gentle cleaning helps maintain seal and acoustic performance. According to Headphones Info, neglecting cleaning can lead to reduced clarity and potential corrosion at charging ports or connectors over time. The Headphones Info team notes that a simple routine can prevent buildup without risking damage to sensitive components. In practice, you want to distinguish between exterior surfaces, detachable parts, and open ports to decide the proper method. This section explains why each area matters and how to approach it safely.
What You Need Before You Start
Before you begin, assemble a few simple tools and set a safe workspace. Use a clean microfiber cloth to minimize lint and avoid scratching. Have isopropyl alcohol (preferably 70%) ready for sanitizing surfaces; cotton swabs or a soft brush help reach small grooves; an optional plastic spudger or soft toothpick can lift detachable cushions without tearing. Make sure your headphones are unplugged and powered off if wireless; avoid soaking or submerging any part. If your device has detachable pads, plan how you will remove and reattach them, and keep track of any small screws or connectors.
Cleaning Methods by Headphone Type
Different headphone designs require different approaches. For earbuds and in-ear models, focus on the nozzle, mesh filters, and the earpiece exterior without touching the driver area. For on-ear and over-ear headsets, clean the outer cups, headband, and cushions gently while avoiding moisture near speakers. Wireless and wired models share the same exterior cleaning rules, but avoid liquid getting into charging contacts or ports. The following guidelines summarize safe methods for each type:
- Earbuds/In-Ear: Lightly dampen a microfiber cloth with isopropyl alcohol and wipe the exterior. Use a dry cotton swab to remove debris from the mesh. Do not spray liquid directly onto any openings.
- On-Ear / Over-Ear: Remove detachable cushions if possible, clean them separately with a mild soap solution, then wipe the frame with a damp cloth. Dry thoroughly before reassembly.
- Ports & Grills: Use a soft brush or dry cotton swab to remove dust from grills. Never use metal tools inside openings. If wax or debris is stubborn, a quick puff of air from a can is sometimes helpful, but only if recommended by the manufacturer.
For all types, avoid soaking components or using high concentrations of liquid near drivers. The aim is to remove grime while preserving seals and electrical integrity.
Common Mistakes and Safety Tips
Mistakes can damage drivers, cables, and waterproof seals. Common errors to avoid include soaking cushions, using abrasive cleaners, and applying liquid directly to openings. Always test a small, hidden area when trying a new cleaner, and keep liquids away from connectors. Safety-minded handling includes unplugging devices, storing in a dry place after cleaning, and allowing ample time for components to dry. If you notice buzzing, discoloration, or lingering odors after cleaning, stop and reassess—forced drying or improper cleaning can worsen issues. Headphones Info emphasizes patience over speed, especially with expensive or delicate models.
Drying, Reassembly, and Care
After cleaning, give components time to air dry completely before reassembly. Place cushions and ear tips in a well-ventilated area and avoid direct sunlight or heat sources. Reconnect detachable parts only when fully dry, and test the fit for comfort and proper seal. Wipe away any residual moisture from connectors and outer surfaces, then store your headphones in a clean pouch or case to prevent future dust buildup. Regular checks—at least monthly—help you catch signs of wear early and maintain performance.
Maintenance Routine and Long-Term Care
Establish a simple maintenance routine to keep headphones in optimal condition. A quick weekly wipe of surfaces, a monthly check of cushions, and periodic deep-clean sessions can prevent buildup and extend lifespan. Consider a manufacturer-approved cleaning schedule or a general approach that fits your usage pattern. Use lint-free cloths and non-abrasive cleaners, and keep cables untangled to reduce strain. The goal is consistent care that minimizes damage, preserves sound fidelity, and reduces the likelihood of costly repairs. As Headphones Info Team notes, a steady care routine yields the best long-term results.
Tools & Materials
- microfiber cloth(lint-free, non-abrasive; use at least two for different stages)
- isopropyl alcohol 70%(dampen cloth lightly; never soak)
- cotton swabs(for tight seams and grills)
- soft-bristled brush(tiny brush to lift dust from grills)
- plastic spudger or wooden toothpick(gently pry detachable cushions if needed)
- detachable cushions or tips (if applicable)(remove and clean separately if your model supports it)
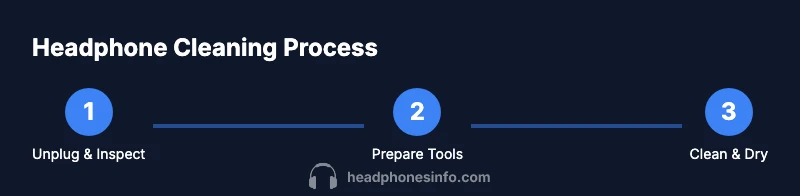
Steps
Estimated time: 25-40 minutes
- 1
Unplug and Inspect
Power off the headphones and disconnect any cables. Do a quick visual check for loose parts, damaged cushions, or moisture-prone areas. This prevents accidental shocks, preserves warranties, and helps you plan the cleaning sequence.
Tip: If cushions look damaged, replace them before cleaning to avoid trapping debris. - 2
Gather Tools and Set Workspace
Lay out your microfiber cloths, alcohol, swabs, and brush on a clean, dry surface. Have a small tray or bowl for tools and a fan to help with drying. This reduces the chance of spills on sensitive electronics.
Tip: Keep liquids away from microphones and ports; use a shallow tray to avoid drips. - 3
Remove Detachable Cushions (If Available)
If your model supports detachable cushions or tips, remove them carefully and set them aside for separate cleaning. Clean the cushions with mild soap and water if fabric, then dry completely before reattachment.
Tip: Take photos before disassembly to help reassemble correctly. - 4
Wipe Exterior Surfaces
Lightly dampen a microfiber cloth with isopropyl alcohol and wipe the exterior surfaces. Avoid getting liquid into speaker grills or joints. Use short, gentle strokes to lift oils and dust without pushing debris into crevices.
Tip: Never spray cleaner directly onto the unit; always apply to cloth first. - 5
Clean Ports, Grills, and Crevices
Use a dry cotton swab or a soft brush to dislodge dust from grills and ports. If stubborn wax is present, use a lightly damp swab and immediately dry the area. Do not insert sharp objects into openings.
Tip: Work in small sections to avoid pressure on delicate components. - 6
Dry Thoroughly and Reassemble
Air-dry all cleaned parts completely before reassembly. If cushions were removed, reattach them and perform a final exterior wipe. Test by plugging in and ensuring sound is clear and there’s no odd odor or heat.
Tip: Allow at least 30 minutes of drying time for small parts; longer for fabric cushions.
People Also Ask
Can I use water to clean headphones?
Water can damage electronics. Use a damp cloth with isopropyl alcohol and never submerge any part. Allow surfaces to dry completely before use.
Water can damage the electronics, so avoid submerging and use a damp cloth with alcohol instead.
Should I clean detachable cushions separately?
Yes. Detach cushions if possible and clean according to material. Fabric cushions may need a gentle soap solution and thorough drying.
Detach cushions if you can and clean them separately, then dry completely before reattaching.
Can I use a hair dryer to speed drying?
No. Heat can deform components and damage seals. Let parts air-dry at room temperature.
Avoid heat; air-dry at room temperature for best results.
Is it safe to clean charging ports with a cotton swab?
Use a dry cotton swab to remove dust. If you need moisture, dampen the swab lightly and be sure to dry immediately.
Use a dry swab to clear dust; if you must, dampen lightly and dry right away.
How often should I clean headphones?
Set a maintenance schedule based on usage. Regular exterior wipes and periodic deep-clean sessions help maintain performance.
Clean on a schedule that fits how you use them, with regular exterior wipes.
Watch Video
What to Remember
- Power off before cleaning to prevent damage.
- Avoid soaking; use damp cloth and dry swabs only.
- Detach cushions when possible for thorough cleaning.
- Dry all parts completely before reassembly.
- Establish a regular cleaning routine to extend life.