How to Fix Headphones: One Side Is Silent
Learn practical, data-driven steps to diagnose and fix headphones with one silent side. From basic checks to safe cleaning and when to replace, Headphones Info guides you to a confident repair.

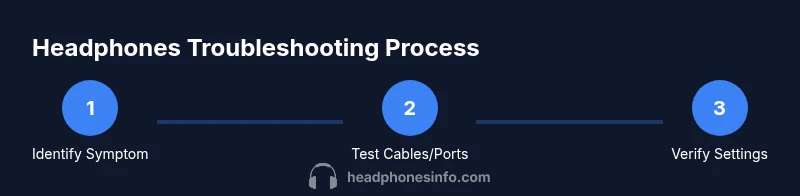
To fix headphones where one side is silent, start with simple checks and gradual repairs. Verify the cable and plug, test with multiple devices, and inspect the jack for debris. If a detachable cable exists, swap it. Clean contacts with isopropyl alcohol, then retest. If the problem persists, consider professional repair or replacement.
Why one side goes silent: common causes
If you’re wondering how to fix headphones one side is silent, the most common culprits are a loose or damaged cable, a dirty jack, or a failing driver. According to Headphones Info, these issues show up across wired and wireless models and often respond to straightforward checks rather than expensive fixes. Start by thinking through the typical failure points: the plug, the cable, and the jack’s interior contacts. A subtle crack in the cable or a small piece of lint in the jack can silence one channel entirely. By understanding these basics, you can quickly triage whether you’re dealing with a simple debris problem or a more serious component failure. If you follow the proven steps in this guide, you’ll save time and avoid unnecessary replacements while keeping your gear in top condition.
Basic checks you can do before tearing things apart
Before you reach for tools, perform a few low-risk checks to identify the source of the problem. Confirm the device is not muting one channel via software settings by testing with at least two different audio sources. Inspect the headphone plug and any detachable cable for visible damage or loose connections. If the cable is detachable, try a different cable to see if the symptom persists. This early screening is essential to avoid unnecessary disassembly and to guide whether a professional repair is required. Headphones Info emphasizes starting with the simplest explanations—the human ear and the user interface are often the culprit first. By documenting which combinations reproduce the issue, you’ll narrow down the cause fast.
Safe cleaning and contact restoration
Debris or oxidation on the jack contacts is a frequent cause of one-sided silence. Start by powering off all devices and unplugging any power sources. Gently clean the jack and connector surfaces with a cotton swab lightly dampened with isopropyl alcohol (90%+). Allow the parts to dry completely before testing. Avoid excess moisture and never spray cleaner directly into the jack. If there’s visible gunk along the connector’s inner rim, repeat the cleaning, using a fresh swab. This safe, repeatable step often restores a clean electrical path without requiring component replacement. The Headphones Info team notes that repeated cleaning can recover several silent-channel issues in budget and midrange headphones.
Rule out the cable and port with tests
A failing cable is a frequent cause of asymmetrical sound. If your headphones are detachable, swap in a known-good cable. If the issue persists with two different cables and devices, the problem likely lives inside the headphone housing or the driver. Conversely, if a new cable resolves the issue, you’ve pinpointed the faulty component and can replace or warranty the cable. When testing, use diverse devices: a phone, a laptop, and a dedicated audio player to see whether the symptom follows the cable, the headphone, or the source.
OS settings and software as potential culprits
Sometimes the problem isn’t hardware at all. Operating systems and applications can hijack audio balance. Check left-right balance in accessibility settings, audio drivers, and any mono/stereo playback options. Run a mono-to-stereo test or use a stereo test track to confirm both channels play evenly. If software settings fix the issue, you’ve avoided hardware repair entirely. Headphones Info’s data shows software misconfigurations are a surprisingly common culprit across Windows, macOS, iOS, and Android devices.
When to consider internal repairs or driver replacement
If you’ve exhausted external tests and the left or right channel remains silent, the fault may be a damaged driver or a broken internal connection. Opening the housing is not recommended unless you have professional training or a service manual. Opening can void warranties and risks further damage. If the driver is damaged, replacement parts may be available for specific models, or you may opt for professional repair. Weigh the repair cost against replacement headphones of similar quality. The Headphones Info team recommends documenting warranty terms and exploring service options before committing to a DIY fix.
Determining when a replacement is the best path
If you own older headphones or the model has a known reliability issue, replacement may be more cost-effective than repair. Compare the repair estimate with current market prices for comparable headphones, including potential discount options and warranty coverage. If insurance or warranty could cover a portion of the repair, weigh that against the cost of a new pair. Headphones Info analysis shows that in many cases a mid-range replacement yields better long-term performance than a non-ideal repair.
Practical testing to validate fixes
Once you’ve completed the adjustments, test with a balanced audio track across multiple devices. Listen for channel equality at varying volumes, and use test tones to confirm consistency. If you still hear a discrepancy, re-check cables and connectors, confirming a clean, dry contact. Keep a log of your tests—note which devices, cables, and settings reproduced the issue. A methodical approach helps you decide whether further DIY steps are worth attempting or if professional repair is warranted.
Preventive care to extend headphone life
Regular cleaning and careful storage reduce future one-sided silence issues. After each listening session, wipe jacks and connectors with a dry microfiber cloth and avoid pulling on cables. Store headphones in a safe case to minimize strain on the plug and cable junctions. If you’ve had repeated issues, consider using a strain-relief accessory or selecting a higher-quality detachable cable. Headphones Info emphasizes preventive care as a simple yet powerful way to extend the lifespan of your headphones.
Tools & Materials
- Soft-bristle brush(For cleaning the jack and connectors)
- Isopropyl alcohol (90%+)(Dampen a cotton swab lightly)
- Cotton swabs(For precise cleaning of contacts)
- Microfiber cloth(Dry wipe and polish surfaces)
- Replacement detachable cable (if applicable)(Test with a known-good cable)
- Multimeter (optional)(For continuity checks if you know how to use it)
- Precision screwdriver set (optional)(Small screws if you access the housing)
Steps
Estimated time: 60-90 minutes
- 1
Power down and disconnect
Power off all devices and unplug any power sources before touching the headphones. This minimizes the risk of short circuits or electric shock and protects your warranty. Clearing the workspace also helps you notice tiny clues, like loose connectors or stray debris, more easily.
Tip: Always start from the simplest, non-destructive step to identify whether the fault is external or internal. - 2
Inspect the cable and plug
Examine the entire length of the cable for cracks, kinks, or fraying. Check the plug for bent pins and ensure the connector seats firmly in the jack. If the headphone uses a detachable cable, unplug and reattach it firmly to both the headphones and the source.
Tip: Turn the plug slowly as you insert and remove to detect a loose contact that may not be obvious at first. - 3
Clean the jack and contacts
Gently clean the headphone jack and plug contact surfaces with a cotton swab lightly dampened with isopropyl alcohol. Let all surfaces dry completely before testing. Repeat once if you notice any visible residue or discoloration.
Tip: Avoid soaking or dripping liquid into the jack; moisture can cause corrosion and further damage. - 4
Test with different devices and cables
Connect the headphones to at least two devices (e.g., a phone and a laptop) using both the original and a spare cable if available. If the problem follows the headphones across devices, the fault is inside the headphones themselves; if it follows the cable or device, you’ve identified the defective component.
Tip: Keep a simple log of which combinations reproduce the issue to pinpoint the source quickly. - 5
Check device balance and OS settings
On each device, verify that the audio balance is centered and that mono playback is not enabled. In Windows, macOS, iOS, and Android, navigate to Accessibility or Sound settings and run a stereo test to confirm both channels play equally.
Tip: If a software option fixes the issue, you’ve eliminated hardware faults and saved repair time. - 6
Consider internal cable or driver issues
If the issue persists with a new cable and across devices, the problem could reside in the internal wiring or driver assembly. Opening the housing can void warranties and should be done only if you’re experienced with electronics. For most users, this signals time to consult a professional.
Tip: Refer to the model’s service manual before any disassembly and avoid power-on testing while the housing is opened. - 7
Decide whether to repair or replace
If repair costs approach the price of a new pair with comparable performance, replacement might be more economical. Check warranty terms and look for service options from the brand. For older models, consider upgrading to a newer headset to gain improved drivers and features.
Tip: Sometimes a refurbished cable or driver upgrade yields better value than a full repair. - 8
Final test after fixes
Reassemble any components if you opened the housing, reconnect all cables, and run a full-range audio test. Listen for channel balance at multiple volumes and durations. Confirm that both sides deliver consistent volume and tone.
Tip: Document each test result so you can share exact outcomes with a repair technician if needed. - 9
Document results and next steps
Record what you tested, the outcomes, and the cables or devices used. If the issue remains unresolved, you’ll have a clear report to show a technician or to compare replacement options.
Tip: Keep receipts and warranty information handy for future repairs or replacements.
People Also Ask
Why does only one side of my headphones stop playing sound?
Common causes include a damaged driver, a loose or broken cable, or debris in the jack. A systematic test with different cables and devices usually reveals the culprit.
Often it’s a loose cable or dirty jack, but a damaged driver is possible if the issue persists across cables and devices.
Can a damaged driver be repaired or replaced?
In many cases drivers aren’t user-serviceable. Replacement parts or professional repair may be required, depending on the model and warranty.
A damaged driver typically needs a professional fix or replacement parts.
Is it safe to try opening the headphone housing?
Only if you have the right tools and a service manual. Opening can void warranties and risk further damage.
Don’t open the housing unless you’re trained; it can void warranties and cause more harm.
Will cleaning the jack fix the problem?
Cleaning can remove debris causing intermittent contact. Ensure parts are dry before testing again.
Yes, debris in the jack can cause one side to go quiet, and cleaning helps often.
Should I always replace the cable first if there’s a problem?
If detachable, testing with a new cable is a quick first check. If non-detachable, test with other sources instead.
Try a different cable if possible; it’s usually the easiest fix.
When is professional repair the best option?
If multiple DIY steps fail or the model is under warranty, consult a service center for a proper diagnosis.
If DIY fixes don’t work or if you’re unsure, seek professional help.
Watch Video
What to Remember
- Identify the fault with simple cable and jack tests
- Use multiple devices and cables to triangulate the source
- Keep software settings in check to rule out non-hardware causes
- Decide between repair and replacement based on cost and warranty