How to Install Headphone Ear Pads: A Complete Guide
Learn how to install headphone ear pads with a clear, step-by-step guide. Discover pad types, compatibility checks, prep tips, and secure attachment for lasting comfort and sound isolation.

You’ll learn how to replace and install ear pads on common over‑ear headphones, covering leather, foam, and fabric styles. This quick guide explains removal, cleaning, choosing the right size, and secure reattachment so your cans feel like new. No special tools beyond basic replacements are required. We’ll also note common mistakes and provide safety tips to avoid damaging drivers or cushions.
Why ear pads wear out and why replacement matters
Ear pads are the primary point of contact with your headphones, absorbing sweat, oil, and daily wear. Over time, the foam inside hardens, the fabric stretches, and the glue loosens, which can reduce comfort, seal, and even sound isolation. According to Headphones Info, well-maintained ear pads can dramatically improve perceived comfort and audio containment, especially during long listening sessions. Replacing worn pads restores the original feel, helps maintain a solid seal around the ears, and can revive the perceived bass response and soundstage as the foam springs back to its intended shape. If you frequently wear headphones in hot or humid environments, consider pads with moisture-wicking covers to slow degradation. The cost of replacement pads varies by material, size, and model, but you can often find compatible options that fit your rig without breaking the bank. Assess your usage: daily commuting? Studio monitoring? Gaming sessions? Each scenario benefits from different pad materials and thickness. Headphones Info’s guidance emphasizes matching pad profile to your ear shape and head size to prevent gaps and pressure hotspots during extended use.
Before you begin, lay out a clean workspace, identify the model number on your headphones, and gather your replacement pads. Having a clean, flat surface helps you avoid losing small components like clip retainers or adhesive strips. If your pads are glued rather than clipped, you’ll need to carefully detach the glue residue and avoid scratching the headband or cup shell. Remember to unplug any detachable cables and, if necessary, power down wireless models to prevent accidental operations while you work. This preparation reduces the risk of damage and makes the process smoother and faster in the long run.
Ear pad materials and their impact on comfort and sound isolation
Ear pads come in several materials, each with distinct comfort, durability, and acoustic properties:
- Leather or vegan leather: Durable, easy to clean, and generally good at sealing; can get warm in hot environments and may feel stiff until broken in.
- Foam types (memory foam, medical-grade foam): Memory foam offers excellent isolation and a plush feel, while standard foam shifts less under pressure but may compress over time.
- Fabric (velour, microfiber): Breathable and cooler in warm climates, often gentler on sensitive ears but may compress faster and accumulate more dust.
- Hybrid or combination: Some pads blend leather exteriors with foam interiors for a balance of comfort and seal.
Choosing the right material depends on climate, usage, and comfort preferences. If you wear glasses, for example, fabric pads can reduce fogging and pressure points, whereas leather pads might feel stiffer until you break them in. Regular users may prefer memory foam for endurance during long gaming sessions or extended editing work. Headphones Info notes that the sealed boundary formed by thicker memory foam pads can enhance perceived bass, but you should balance that effect with how it feels against your ears. When in doubt, try pads with a moisture-wicking surface to keep them fresh longer.
How to measure compatibility and pick the right size and shape
Not all ear pads fit all headphones. The most important factors are the inner diameter (ID), outer diameter (OD), thickness (or profile), and the attachment method. Start by removing a worn pad and measuring the ID to ensure it fits the driver cup opening. The OD must cover the entire cup so no gaps appear around the edge. If your headphones use a snap-on system, look for pads described as “clip-on” or “snap-fit.” If they use adhesive, you’ll typically see pads labeled as “glued” or “adhesive-backed.” The thickness matters for comfort and seal; too thin pads can cause awkward pressure, while too thick pads may press against your ears and reduce soundstage. Also note the attachment style: some pads clip onto a frame, while others slide onto a lip. If you’re unsure, check the manufacturer’s compatibility list or search for model-specific reviews. When shopping, compare dimensions against your current pads and the cup depth to minimize trial-and-error.
In some cases, you might need to replace the entire ear cup if the mounting hardware is damaged or if pads are permanently glued and non-replaceable. Headphones Info recommends sticking to reputable third-party pads from trusted brands with clear compatibility notes. If you’re replacing on a premium model, consider buying two pairs to rotate while one set rests, extending their lifespan and keeping performance consistent.
Cleaning and prepping old pads before replacement
Cleaning before removal can make the process easier and reduce dust and oil transfer. Start with a dry microfiber cloth to wipe off surface residue and loosen crumbs. For pads that detach easily, remove them and use a mild cleaning solution (a tiny drop of dish soap in warm water) on a soft cloth to wipe the pad backs and rims of the cups. Avoid soaking foam pads, which can break down the material and degrade cushioning. If you’re dealing with glued pads, avoid pulling with excessive force; instead, gently work around the seam to minimize damage to the cup or grille.
Inspect the headband and cup edge for cracks or peeling in the coating. If you see cracked glue or flaking material, it’s a good time to consider replacing the entire pad set or the cup assembly. For fabric pads, a light vacuum or lint roller helps remove dust buildup that would otherwise transfer to your ears. After cleaning, ensure the surface is dry before you install new pads to prevent trapped moisture, which can promote mold or odors.
Installation considerations: orientation, seating, and securing pads
Orientation matters. Some pads have a distinct top or bottom notch to align with the headband or cup shape. Ensure the seam or label faces outward and is centered for consistent fit and aesthetics. When seating, press evenly from the outer edge toward the center so the pad seats flush along the cup rim without gaps. If the pads clip on, listen for a clear “snap” as they engage; if they slide on, confirm they’re evenly seated around the circumference.
A tight seal improves bass response and reduces ear fatigue by limiting pressure changes and external noise. Conversely, an overly snug fit can cause discomfort during long sessions. If you feel pressure or pinching, reposition the pad or consider a thinner option. Glue-based pads require a curing time; avoid moving the headphones while the adhesive sets to ensure proper bonding. For hot or humid environments, inspect the pads periodically for signs of mold or odor, and replace promptly if detected.
Care after installation and long-term maintenance
After installing, wipe the outer surface of the pads with a clean cloth to remove any fingerprints or residues. Rotate pads every few weeks if you have multiple sets to wear evenly and extend their life. Store headphones in a cool, dry place to minimize moisture buildup that degrades foam. Inspect the pad edges for cracks or separation every 2–3 months and re-seat if you notice any detachments. Avoid exposing pads to direct sunlight for extended periods, which can dry out and stiffen materials. If you wear headphones daily in sweaty conditions, consider moisture-wicking covers or removable fabric sleeves to protect the foam layers and maintain comfort and sound quality over time.
Tools & Materials
- Replacement ear pads (model-specific or universal compatible)(Choose pads that match your headphone model: same attachment method and approximate OD/ID)
- Soft microfiber cloth(For cleaning rims and pads without leaving fibers)
- Isopropyl alcohol (70% or diluted) or mild cleaning solution(Use sparingly on non-foam surfaces; avoid soaking foam pads)
- Rubbing alcohol wipes or cotton swabs(Useful for tight corners and adhesive residues)
- Small screwdriver or plastic spudger(Needed for clipped pads or to gently pry on stubborn fits)
- Adhesive remover (if pads are glued)(Follow manufacturer guidance to avoid damage)
- Tray or small bowl(Keep tiny components from rolling away)
Steps
Estimated time: 30-45 minutes
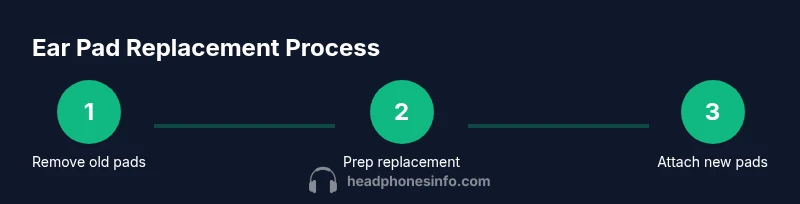
- 1
Verify compatibility and gather tools
Check your headphone model number and confirm the replacement pads match the attachment type and dimensions. Gather all tools and a clean workspace to minimize losing small parts.
Tip: Double-check the model name on the headband or ear cup before purchasing pads. - 2
Remove old ear pads
Gently disengage the pad from the cup edge. For clip-on styles, depress the clips evenly; for glued pads, work around the seam to avoid tearing the foam.
Tip: Take a photo of the pad alignment before removal to reference during reinstallation. - 3
Clean the mounting surface
Wipe the cup rim with a dry cloth, then use a damp cloth or isopropyl wipe to remove oils and residue. Let dry completely before attaching new pads.
Tip: Avoid soaking foam; moisture can degrade the cushion and glue. - 4
Prep the replacement pads
Inspect the new pads for proper orientation and ensure any adhesive backing is ready if required. If the pads have a fabric cover, check the grain direction to avoid puckering on attachment.
Tip: Lay pads face-down to confirm the inner edges align with the cup opening. - 5
Attach the new pads
Position the pad evenly around the cup and press to engage the clips or apply even pressure if glued. Ensure there are no gaps and that the seam sits comfortably around the ear.
Tip: Press and hold for a few seconds to ensure a secure bond for glued pads. - 6
Check fit and comfort
Put the headphones on and check for even pressure, seal, and comfort. If any edge pokes or feels uneven, readjust the pad orientation.
Tip: Move your head slightly to confirm there’s no rattle or loose edges. - 7
Final inspection and cleanup
Wipe away any fingerprints and verify there’s no adhesive residue on the ear surfaces. Store spare parts and pads in a dry place.
Tip: Keep a spare set of pads in the original packaging for future replacements. - 8
Test playback and note wear
Play a neutral track and listen for any discrepancies in sound due to pad position. Note how the new pads feel after a few hours of use to gauge comfort.
Tip: If you notice altered sound due to seal, consider adjusting pad thickness or material.
People Also Ask
Do all headphones use standard ear pads, and can I swap them freely?
No. Ear pads vary by model and attachment method. Always verify compatibility and fit before buying replacement pads.
Not all headphones use standard pads; check compatibility and fit before purchasing replacements.
Can I replace glued ear pads myself without damaging the cup?
Glued pads are harder to replace. If you must attempt it, work slowly along the seam and consider professional help if unsure.
Glued pads are tricky; proceed slowly or seek professional help if unsure.
Are memory foam ear pads worth the extra cost?
Memory foam pads offer better isolation and a plush feel for long sessions, but may be warmer. Choose based on climate and comfort preference.
Memory foam pads feel plush and isolate well, but can be warmer—choose based on your climate and comfort.
How long do ear pads typically last with regular use?
Lifespan depends on usage, sweating, and care. Regular cleaning and proper storage can extend comfort and seal.
Pads last longer with regular cleaning and proper storage; longevity depends on usage.
Can I wash ear pads, and how should I dry them?
Some fabric pads are machine-washable or hand-washable; leather-like pads should not be soaked. Always air-dry completely before use.
Wash fabric pads gently and air-dry; avoid soaking leather-like pads.
What tools do I need for a basic ear pad replacement?
Common tools include replacement pads, a soft cloth, and a small tool if clips are present. Avoid forceful prying.
You typically need replacement pads, a soft cloth, and a small prying tool if clips exist.
Watch Video
What to Remember
- Identify compatible pads based on model and attach method
- Choose pad material suited to climate and comfort
- Measure dimensions before buying to prevent mismatches
- Clean mounting surfaces before installation to ensure a strong seal
- Test fit and adjust for even pressure and comfort