How to Fix Headphones Cushion: A Complete DIY Guide
Learn to fix headphone cushions with a complete DIY guide covering cushion types, replacement options, safe adhesives, and maintenance. Headphones Info provides data-backed guidance for durable, comfortable ear pads.

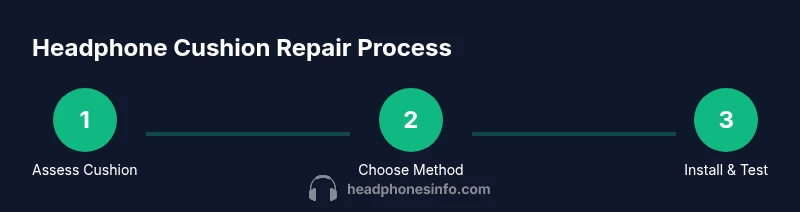
By following this guide, you'll learn how to fix headphones cushion by diagnosing cushion type, choosing repair or replacement options, and properly reinstalling a new or refurbished pad. You'll minimize friction, preserve sound quality, and extend headphone life. The steps cover leather, foam, and fabric cushions, plus safety tips and testing after repair. This approach aligns with Headphones Info's data-driven guidance.
Why Cushion Comfort Matters
Comfort isn’t just about feel; it affects long-term listening health and sound isolation. If you’re wondering how to fix headphones cushion, you’re not alone. According to Headphones Info, worn ear pads accumulate sweat and oils that degrade grip, increase heat, and can slightly alter bass response. A comfortable cushion also seals the ear cup more effectively, improving passive noise isolation. In this guide, we’ll explore how cushions wear out, what to look for, and how to choose the right repair path. This is not merely cosmetic work—bad cushions can change how you hear your music and how long you can listen in a row.
Throughout this article, we’ll reference Headphones Info analysis and put practical, model-agnostic steps that work for most over-ear headphones. The aim is a durable fix that restores comfort, maintains seal, and preserves sound quality. By addressing cushion wear early, you reduce fatigue and keep your headphones feeling as new as possible.
Cushion Types and Common Damage
Ear cushions come in several materials: genuine leather, synthetic leather, fabric/faux suede, and memory foam or polyurethane foam cores. Each has different wear patterns. Headphones Info analysis shows memory-foam cores tend to flatten with use, fabric cushions fray, and synthetic leathers crack after heavy sweating. Inspect your cushion for flattening, tearing, crumbling foam, or detached covers. If the foam feels soft and the cover no longer grips the edge, it’s time to decide between repair and replacement. The right approach depends on cushion integrity, model compatibility, and your budget.
In general, leather and faux leather cushions wear differently from fabric cushions. Leather tends to crack with sweat exposure, while memory foam inside can lose resilience. With fabric, the outer surface may fray before the foam shows wear. Look for a loss of shape, reduced clamping force, or visible gaps around the seal. These signals help you decide whether to repair (re-pad or re-cover) or replace (new pads tailored to your model).
Repair vs Replacement: When to Patch and When to Swap
Not every cushion needs a full replacement. If the foam is intact and the cover is just detached, re-covering or re-padding may be enough. If the foam feels crumbly or the cover is torn beyond repair, replacement cushions are the wiser choice. For most users, a mid-life cushion replacement offers the best balance of comfort and cost. If you’re trying to extend the life of your headphones, a careful repair can buy months to a year and delay a full replacement.
Key decision factors include cushion material, model compatibility, bond strength of any adhesive, and whether the outer cover is no longer securely attached. If the original cushion uses a common slip-on or snap-in design, you’ll likely find compatible third-party cushions that fit well and often cost less than OEM parts. When in doubt, test a small area first with low-odor adhesives to minimize risk of odor transfer or residue.
Replacement Cushions: Fit, Materials, and Sourcing
To ensure a proper fit, measure the ear-cup opening diameter and cushion thickness before buying replacements. Look for cushions with memory foam or high-density foam for durability and comfort. Check compatibility with your model’s mounting style (slip-on, snap-in, or magnetic). Many third-party pads exist; choose ones that specify exact inner diameter and depth. If you have wireless or noise-cancelling headphones, prioritize a snug seal to maintain passive isolation and bass response. Remember to verify stitching quality and the cushion’s edge finish to avoid slippage.
Pro tip: when shopping, read user reviews for fit and longevity. Some cushions advertise “universal fit” but may only suit certain sizes. If you’re uncertain, buy a single pair first to test fit before committing to a bulk purchase.
Tools, Materials, and Prep for Repair
Gather a small toolkit and the right cushions before you start. Clear your workspace of dust and moisture. Lay down a microfiber cloth to avoid snagging fabric during reattachment, and prepare a mild cleaning solution to refresh the earcups before installing new pads. Having the right tools on hand reduces the risk of accidental damage and speeds up the process. In this guide, you’ll learn how to prepare, detach, and reattach cushions without compromising the headphone clamping force or driver alignment.
Maintenance and Hygiene to Extend Cushion Life
Regular cleaning with a damp microfiber cloth helps remove oils that degrade cushions. For fabric pads, a light brush can lift dust and keep fibers fluffy. Consider a breathable storage sleeve when not in use to minimize dust buildup. After heavy use or travel, allow cushions to dry fully before reattaching. Replacing cushions every 12–24 months (depending on usage) is a good practice for most listeners with over-ear models.
Safety, Warnings, and Common Mistakes
Avoid soaking leather cushions in water or applying aggressive solvents—these can crack and discolor the surface. Do not yank delicate fabric covers when removing cushions; use gentle prying with a blunt tool to prevent tearing. If an adhesive is required, use a product compatible with headphones and apply sparingly to prevent stiffening the pad. Lastly, never ignore an uneven seal or rattling driver—these can indicate misalignment after cushion work.
Quick Test After Repair: Fit, Seal, and Sound
After installing new or refurbished cushions, check the seal around the ear cup by placing the headphones on a light source and listening for any gaps. A proper seal should feel comfortable and stable, with no noticeable movement when you press gently on the pad. Play a short track across the spectrum to verify bass, mids, and highs remain balanced. If you hear flutter or rattling, recheck the attachment or padding alignment. Regular tests ensure your fix lasts longer and preserves sound quality.
Tools & Materials
- Replacement ear pads (cushions) compatible with your model(Check inner diameter and mounting style (slip-on, snap-in, magnetic))
- Scissors or utility knife(For trimming foam or fabric edges if needed)
- Tweezers(Use to grip small fabric fibers and thread edges)
- Adhesive or double-sided tape (as needed)(Only use if cushions require bonding; check compatibility with material)
- Cleaning supplies (microfiber cloth, mild soap, isopropyl alcohol)(For pre-install cleaning and sanitizing)
- Small screwdrivers (Phillips or Torx)(Only for models with screws holding the pad frame)
- Rubbing alcohol or alcohol-free cleaner(For spot cleaning and deodorizing)
- Measuring caliper or ruler(Useful to verify cushion thickness)
Steps
Estimated time: 60-120 minutes
- 1
Prepare workspace and safety
Set up a clean, well-lit area. Disconnect headphones from any device and remove any accessories. If using adhesive, work in a ventilated space and wear gloves to minimize skin contact.
Tip: Plan your approach and lay out tools to reduce switching between tasks. - 2
Remove worn cushions
Carefully detach the old cushions from the ear cups. If covers are stitched, gently unscrew or unhook the edge without tearing fabric. Take photos from multiple angles to reference mounting positions later.
Tip: Take a photo map of how each cushion sits for easier reattachment. - 3
Assess cushion core and fabric
Inspect foam for flattening, crumbling, or moisture damage. Check fabric for tears, fraying, or looseness around the seam. Decide whether to patch with re-padding, re-cover, or replace entirely.
Tip: If foam is damaged, replacement cushions are usually the most reliable choice. - 4
Choose repair approach and gather materials
Based on your assessment, select a repair path: re-pad, re-cover, or replace. Gather cushions, adhesives, scissors, and cleaning supplies before proceeding.
Tip: Test fit non-adhesive parts first to ensure alignment. - 5
Install new foam or replacement cushions
Insert the new foam core or new cushion shell into the cover. Align the pad with the mounting holes or edge grooves. Secure the cushion with the original fastening method (slip-on, snap-in, or screws).
Tip: Do not over-tighten any screws; it can deform the cup interior. - 6
Reattach the cover and secure
Reattach the fabric cover or leather skin, ensuring edges sit flush. Trim any excess material and re-seal any seams as needed. Wipe away excess adhesive and let it dry fully.
Tip: Use a light touch with adhesive to avoid stiffness or odor. - 7
Test fit, seal, and comfort
Place the headphones on and check for even pressure and a secure seal. Play audio at a moderate level to verify sound balance and seal integrity. If anything feels off, revisit attachment and alignment.
Tip: If seal is compromised, recheck the orientation of the cushion lips.
People Also Ask
Can I wash headphone cushions?
Washing is possible for fabric cushions with gentle methods, but leather or faux leather pads require spot cleaning and conditioning. Always check manufacturer guidance and avoid soaking to prevent foam damage.
Fabric cushions can be gently cleaned, but leather pads should be spot-cleaned and avoided in water. Always check the cushion material first.
Will cleaning fix cushion issues?
Cleaning helps remove sweat and oils but won’t restore crushed foam or torn fabric. If the foam is compressed or the cover is damaged, replacement cushions are usually the better long-term option.
Cleaning helps with surface grime, but worn foam or rips usually require replacement cushions.
Do third-party cushions fit all models?
Many third-party cushions fit common mounting styles, but fit accuracy varies by model. Always confirm inner diameter, depth, and attachment style before buying.
Third-party pads can fit many models, but double-check size and mounting before purchase.
How long does cushion repair last?
Lifespan depends on usage, materials, and care. With careful maintenance, a repaired cushion can last several months to a year or more before replacement is needed.
It varies, but with good care you can expect months to a year of use.
Is repairing cushions cost-effective?
Repairing or re-padding is generally cheaper upfront than full replacement, but longevity matters. If cushion wear is extensive, replacement cushions may offer better value.
Repairing can be cheaper in the moment, but replacement may offer better long-term value.
Are memory foam cushions better?
Memory foam cushions typically provide better comfort and isolation but may compress faster under heavy use. Consider your usage pattern and fit when choosing material.
Memory foam tends to be very comfy but may wear quicker with heavy use; pick based on how you use your headphones.
What if I can’t detach the old cover without damage?
If removing the cover risks damage, consider consulting a professional or choosing a replacement cushion with an easier mounting design. For some models, professional repair is the safest option.
If the cover is stubborn, get professional help or choose cushions that mount more easily.
Watch Video
What to Remember
- Assess cushion type and wear before choosing a repair path.
- Choose replacement cushions that match your model’s fit and mounting style.
- Test seal and comfort after reassembly to ensure lasting results.
- Follow safer cleaning and storage practices to extend cushion life.