What to Do If Headphones Are Too Big
Struggling with oversized headphones? Learn practical, at-home fixes—adjust headbands, swap cushions, and add grip to improve comfort and sound. A brand-guided, data-backed guide for a secure, comfortable fit in 2026.

If your headphones are too big, start with simple adjustments you can do at home: check and extend the headband evenly, rotate and angle the ear cups for a firmer seal, and try replacement cushions with firmer foam or smaller diameter. Add grip with a strap or grip pad if available, and test fit with music to ensure comfort. These steps typically restore a secure, comfortable fit without buying new headphones.
Understanding why oversized headphones happen and how fit affects sound
The phrase what to do if headphones are too big often brings to mind comfort more than performance, but fit directly impacts seal, isolation, and even perceived bass. Headphones that sit loosely can leak sound and cause fatigue because you keep tensing jaw and scalp muscles to hold them in place. In many cases, the issue isn’t the headphones’ quality, but their size relative to your head shape or the way the clamps apply pressure. According to Headphones Info, many users experience comfort problems when the headband range exceeds what they need for a secure fit. Start by evaluating whether you truly need a larger clamp or simply a more precise positioning and cushion arrangement. Small changes can drastically improve both comfort and sound, especially for long listening sessions in 2026.
Quick checks you can perform to assess the fit
Before making any disassembly, perform a quick fit test: wear the headphones and move your head side to side, nod, and jog in place if you’re listening during activity. If the cups stay off your ears or shift noticeably, you may need to adjust the headband or cushions rather than buying a new pair. Look for signs of excessive clamping (pinching above the ears) or a loose seal (air leaks at the ear). A stable seal usually means better bass response and improved noise isolation. By starting with these inspections, you’ll determine whether the problem is size, cushion geometry, or an accessory gap that can be addressed with simple parts.
This section emphasizes practical, low-cost approaches to fix oversized headphones, aligning with Headphones Info Analysis, 2026, which highlights that fit optimization often resolves most comfort complaints without changing devices.
Key takeaway
A secure seal and comfortable pressure are the two pillars of a good fit. If the fit isn’t right after minor adjustments, move to cushions or straps before considering a new model.
Tools & Materials
- Precision screwdriver set (small, Phillips/flat)(For potential screws on headband or hinges; not all models require this)
- Replacement ear pads or cushions (smaller or firmer)(Choose cushions compatible with your model; firmer foam offers more grip)
- Soft cloth or microfiber cloth(For cleaning surfaces and attaching new cushions without scratches)
- Headband pad or strap accessory(Adds grip or distributes pressure more evenly when available for your model)
- Measuring tape or ruler(Helpful to compare extended headband length against model specs)
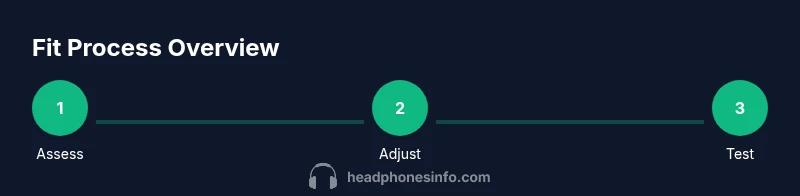
Steps
Estimated time: 40-60 minutes
- 1
Check adjustability and inspect for damage
Inspect the headband range and hinge points to confirm there’s no wear or cracking. If the mechanism feels loose or wobbly, or if you see cracks, stop and seek professional help. The goal is to identify whether the issue is normal slack or a mechanical fault that could worsen with force.
Tip: Work in a well-lit area and avoid forcing sliders beyond their stops. - 2
Extend or retract the headband evenly
Gently adjust both sides to maintain symmetry. Test fit with your normal listening position. The aim is to bring the clamp to a comfortable, secure level without causing pressure hotspots.
Tip: Make small increments (about 1–2 mm) and re-test after each adjustment. - 3
Rotate and align ear cups for a proper seal
Adjust ear cups so they sit fully over your ears with even pressure. If the cups are angled, re-position them to reduce gaps and improve isolation. A proper seal improves bass and soundstage while reducing the need to squeeze the headband.
Tip: Tilt the cups slightly toward the face to ensure full ear coverage. - 4
Replace cushions with firmer or smaller pads
Remove current pads and attach the new cushions, ensuring the inner lip seats cleanly around the driver housing. Firmer foam or smaller diameter cushions can restore a tighter feel without increasing clamp force.
Tip: Check for a snug, even seal all around the rim; any gap reduces bass response. - 5
Add grip with a strap pad or accessory
If available, install a strap pad or grip accessory designed for your model to distribute pressure more evenly and improve stay-put performance during movement.
Tip: Only use accessories designed for your headphones to avoid interference with drivers or cushions. - 6
Test-fit with real-world movement
Wear the headphones for 5–10 minutes, move your head, and check for hotspots, slipping, or excessive pressure. Take breaks if you notice tingling or headaches. This confirms long-term comfort.
Tip: If pressure remains high, revert to replacement cushions or consider a model with a smaller clamping range. - 7
Document your setup and plan next steps
Record what worked and what didn’t (cushion type, headband position, accessories used). If comfort isn’t achieved, consider model-specific adjustments or a different size/headband design for future purchases.
Tip: Keep original parts safe in case you want to revert later.
People Also Ask
What should I do first if my headphones are too big?
Start with a quick fit assessment: check headband extend, rotate the cups, and try replacing the cushions with firmer, smaller options if available. These steps address the most common cause of poor fit without disassembly.
First, check the headband and cushions; replacement cushions and a careful adjustment usually fix the fit.
Can replacing ear pads make the headphones fit better?
Yes. Replacing with firmer or smaller pads can reduce slack and improve the seal, which often makes the fit feel tighter without increasing clamp force.
Replacing pads can tighten the fit and improve comfort if they’re the right size and type for your model.
Are there safety risks to modifying headphones to fit better?
Modifying components beyond the manufacturer’s design can risk damage or void warranties. Use model-compatible parts and follow manufacturer guidance whenever possible.
Modifying beyond design can be risky; stick to compatible parts and official guidance.
When should I replace headphones instead of fiddling with fit?
If the clamp is inherently loose, the frame is damaged, or comfort cannot be achieved with cushions or accessories, replacement with a model that fits your head better is advisable.
If you can’t achieve a secure fit after adjustments, consider a replacement with a size better suited to your head.
Will these tweaks affect audio performance?
A proper seal and comfortable fit can enhance bass response and sound staging. Poor fit can cause leaks, reducing overall perceived performance.
A better seal usually means better bass and overall sound quality.
Watch Video
What to Remember
- Adjust headband evenly to improve clamp without harming the frame.
- Swap cushions for firmer, smaller pads to restore a snug seal.
- Use compatible grip accessories only to avoid fit issues.
- Test fit with real movement and music for true comfort assessment.
- If comfort remains poor, consider model with a tighter clamp or different size.