When to Change Headphone Pads: A Practical Guide
Learn when to change headphone pads, how to choose replacements, and how to swap them safely. This Headphones Info guide covers wear signals, compatibility, cleaning, and care tips for lasting comfort.

According to Headphones Info, to correctly change headphone pads, inspect for wear, hygiene issues, and comfort loss; replace pads when they feel cracked, sticky, or leaky and when sound isolation declines. Choose compatible pad types (velour, leather, or memory foam) and follow a safe swap procedure. Regular checks help maintain comfort and sound quality without surprises.
Signs That It's Time to Replace Your Headphone Pads
Pads are the most visible wear item on most headphones. Over time, foam compresses and fabric or leather cracks, leading to gaps that reduce comfort and seal. You may notice a sticky or sour odor from accumulated sweat, especially after long listening sessions. If the pads feel uneven, squish easily, or irritate your ears, it’s a strong signal to replace them. According to Headphones Info, regular inspection helps you catch wear early before it impacts listening experience. A failing pad can also alter bass response and soundstage, making music feel distant or muffled. If you travel frequently or work out with your headphones, plan more frequent checks due to higher sweat and motion.
Choosing Replacement Pads: Materials, Fit, and Compatibility
Replacement pads come in several materials, notably velour, leather, and memory foam. Velour tends to be cooler and gentler on the skin, leather offers a more durable seal, and memory foam provides a dense cushion for a snug fit. The right choice depends on comfort preferences, noise isolation needs, and how long you wear them. Fit matters more than brand; measure the pad diameter and verify the attachment style (clips, rings, or screws). The Headphones Info Analysis, 2026 highlights that wear is influenced by usage patterns and material durability, so balance comfort with longevity. Always check compatibility with your specific model before buying—pad shape, ear cup diameter, and mounting method vary widely across brands.
Cleaning and Hygiene: Extending Pad Life
Light cleaning can extend pad life, but deep cleaning should be done sparingly to avoid damaging materials. Use a soft microfiber cloth to wipe the surface and a gentle, alcohol-free cleaner if needed. Avoid soaking pads or letting liquid seep into the ear cup housing, which can degrade foam and glue. Regular quick wipe-down after use reduces oils and sweat buildup, helping maintain a clean seal. This approach preserves acoustic performance and hygiene for longer periods, a point emphasized in Headphones Info guidance.
Quick-Start Overview: What You’ll Do First
Before touching the pads, ensure you have compatible replacements ready and a clean workspace. Inspect the old pads for cracks, tears, and deformities. Prepare a microfiber cloth for cleaning and a safe tool (if your model uses clips or screws). The goal is to replace the pads with a flush seal and comfortable fit, restoring original sound and isolation without damaging the earpads or driver enclosure. The process is straightforward but requires care so you don’t tear mounting clips or crease the headband.
Final Thoughts and Practical Insight
Replacing headphone pads is a routine maintenance task that pays dividends in comfort and sound quality. A well-fitted pad creates an effective seal that enhances bass response and soundstage, while degraded pads can dull treble and muddy mids. Regular replacement schedules vary by usage; for heavy daily use, plan a check every 6–12 months, while occasional listeners may extend to 12–24 months. The Headphones Info team recommends documenting your replacement date to simplify reordering and track pad life over time.
Tools & Materials
- Replacement headphone pads(Ensure compatibility with your model (diameter and attachment style).)
- Soft microfiber cloth(For cleaning both pads and earcups.)
- Small screwdriver (optional)(Only for models that use screws or clips.)
- Isopropyl alcohol 70% (optional)(Use sparingly for stubborn grime; avoid leather pads.)
- Storage bag or envelope(Keep old pads safe for disposal or reuse notes.)
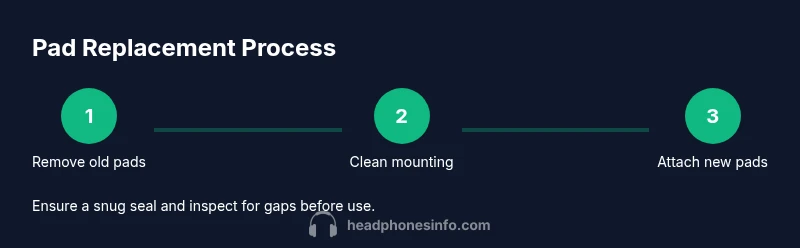
Steps
Estimated time: 30-45 minutes
- 1
Remove old pads
Gently loosen the pad from the ear cup by prying at the seam with your fingers or a dull tool. If there are clips, unclip them carefully to avoid tearing the pad.
Tip: Work slowly and avoid bending the ear cup rim to prevent damage. - 2
Measure and check compatibility
Measure the pad diameter and check attachment type (clips, rings, or screws). Confirm that the new pads match the model numbers listed by the manufacturer.
Tip: If in doubt, contact the retailer or the manufacturer for model compatibility. - 3
Clean the mounting surface
Wipe the ear cup edge and any mounting groove with a microfiber cloth. Let the surface dry completely before installing new pads to avoid moisture damage.
Tip: Do not use excessive liquid that could seep into the speaker unit. - 4
Attach new pads
Align the new pads with the ear cup, ensuring the correct orientation. Press all around the edge until the pad sits flush and secure.
Tip: Double-check that there are no gaps where sound can escape. - 5
Test fit and seal
Put the headphones on and check for a comfortable seal and even pressure. Adjust if the pad feels uneven or loose.
Tip: If it rubs or causes discomfort, reseat or choose a different pad type. - 6
Store old pads and document
Place the old pads in a bag or container and note the installation date for future reference.
Tip: Take a quick photo for reference when reordering.
People Also Ask
How can I tell if headphone pads are worn out?
Look for cracks, tears, flat foam, sticky residue, or deformities, and note if comfort or isolation has declined.
Worn pads show cracks or flattening; discomfort or reduced noise isolation means it's time to replace.
Are velvet or memory foam pads better?
Velour pads are cooler and gentler on the skin, memory foam provides a snug seal and better isolation; choose based on comfort and goals.
Velour feels softer; memory foam seals better but may be warmer.
Can I clean pads instead of replacing them?
Light cleaning can help, but cleaning won't fix worn foam or glue; replace pads when wear is visible.
Cleaning helps only for dirt, not for worn foam.
Will replacing pads change sound insulation?
Yes, new pads improve or restore seal, which can boost isolation and bass depending on material.
New pads can improve isolation and bass, depending on material.
Do all brands fit all headphone models?
No. Check diameter, attachment type, and model compatibility before buying replacement pads.
Not all pads fit every model; verify compatibility.
How long do headphone pads typically last?
Lifespan varies by use, material, and care; expect several months to a couple of years with normal use.
Life varies; with normal use, expect months to a couple of years.
Watch Video
What to Remember
- Inspect pads regularly for wear
- Choose compatible materials and fit
- Clean vs replace based on wear and hygiene
- Follow manufacturer guidance for model compatibility
- Regular replacement maintains comfort and sound quality