Replacement Earpads for Headphones: A Practical Guide 2026
Learn how to select, measure, and install replacement earpads for headphones with model-friendly steps, care tips, and maintenance to extend comfort and sound quality.

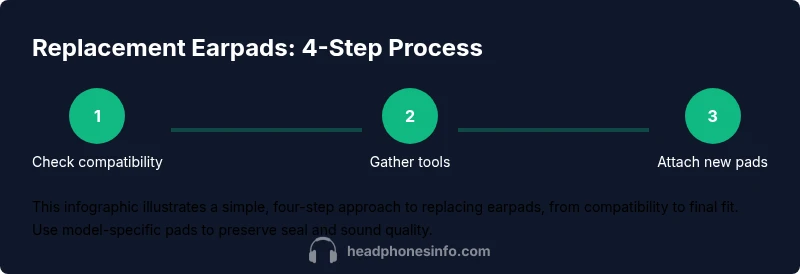
Goal: Learn how to replace earpads for headphones with compatible replacements, proper tools, and a safe installation. You’ll measure pad size, choose the right material, and attach the new pads for comfort and a proper seal. Gather replacement earpads, a small flathead screwdriver if needed, and mild cleaning supplies, then follow the steps below.
Why replacing earpads matters
Over time, the cushions on headphones can flatten, tear, or accumulate sweat and oils. Worn earpads reduce comfort, seal, and bass response, and they can even irritate the skin. Replacing them restores the original fit and acoustic seal, enhancing both listening comfort and noise isolation. According to Headphones Info, the most sustainable and cost-effective way to refresh your headphones is to replace the pads rather than buying an entirely new set. The Headphones Info team found that pads influence comfort first, but they also impact how securely the driver seal sits against your ears, which affects perceived bass and high-frequency clarity. When you start, document the model and pad type you currently have, then compare options that state model compatibility clearly. A well-chosen set of earpads can feel like a brand-new listening experience without a large investment.
Types of earpads
There are several common materials and constructions for replacement earpads. Leather or faux leather pads offer a premium look and a firm seal, but they can feel warm in hot environments. Memory foam pads provide excellent pressure relief and good isolation, yet they may compress over time and require longer break-in. Fabric or velour pads stay cooler and often feel softer against the skin, though they may not seal as tightly as leather or memory foam. Some pads are replaceable via a simple snap-on or clip-on mounting, while others require careful detachment of clamps or rings. When choosing, consider your climate, how long you wear headphones, and whether you value isolation or breathability more. The right balance will keep listening comfortable while preserving sound fidelity.
Compatibility and measuring basics
Compatibility is the most critical factor. Start by identifying the headphone model and the exact earpad mounting type. Some pads are model-specific, while others are designed as universal options with adjustable inner diameters. Measure the inner diameter, thickness, and the attachment groove to ensure a snug fit. If you own premium or branded headphones (e.g., Bose, Sony), seek pads from the same brand or verified third-party pads that explicitly state compatibility with your model. Avoid pads that appear too large or too small for the driver cavity, as improper fit can degrade seal and frequency response. Headphones Info’s guidance emphasizes that precise dimensions are the difference between comfort and air leakage that dulls bass or muddies highs.
How to choose the right pads for your use case
Your usage scenario drives pad selection. If you wear headphones for long stretches, memory foam with a soft cover can reduce pressure hotspots. For studio or critical listening, a firmer cushion with a good seal helps preserve accurate bass and mids. If you wear glasses or have sensitive skin, fabric or velour tends to be gentler on the ears. Consider maintenance needs as well—some pads are easier to clean than others and resist sweat buildup. Also, factor in climate: hot environments benefit from breathable covers, while cooler climates may pair better with denser materials. The goal is to maintain comfort, seal, and audio fidelity without sacrificing durability.
Installation overview and care after replacement
Installing new earpads is often straightforward, but a careful approach prevents damage to clips, foam, or the housing. Before starting, ensure the replacement pads are fully shaped and not misshapen from packaging. Clean the contact surfaces with a dry microfiber cloth to remove dust. When attaching, align the pad’s edge with the housing groove and work around in small sections to avoid pinching. After installation, gently wiggle the pad to confirm a secure fit and test with a quick listening session to verify seal. For care, wipe pads after use with a damp cloth if allowed by the material, and store headphones in a cool, dry place away from direct sunlight to prolong pad life.
Maintenance, hygiene, and subtle mistakes to avoid
Regular cleaning extends pad life and maintains sound clarity. Avoid harsh solvents that can degrade foam or vinyl. Never pull pads off by the foil or mounting ring, as this can tear the cushion or damage fasteners. If you notice cracking or sticky residue, it’s time to replace rather than attempt a quick repair. Rotate pads if you have multiple pairs to extend their overall lifespan. For best results, keep a small supply of replacement pads on hand so you’re ready for urgent needs without rushing to make a quick, suboptimal choice.
Tools & Materials
- Replacement earpads (model-matched or universal)(Ensure exact compatibility or clear model notes; check inner diameter and thickness.)
- Small flathead screwdriver(Optional for clip-on models; use gently to avoid damage.)
- Isopropyl alcohol wipes(Use 70% IPA to clean mounting surfaces before attaching new pads.)
- Soft lint-free cloth(For dry dust removal on housings and cushions.)
- Cotton swabs(Useful for cleaning tight gaps or grooves.)
- Measuring tool (ruler or caliper)(Helpful to verify inner diameter and pad thickness if ordering uncertain.)
Steps
Estimated time: 25-40 minutes
- 1
Identify headphone model and pad type
Locate the exact headphone model and determine whether the current earpads are held by clips, rings, or a snap-on edge. This ensures you buy compatible replacements and avoid returns. Understanding the mounting method will make removal smoother and prevent damage to the housing.
Tip: Take a photo of the original pad connection to reference during reassembly. - 2
Measure compatibility and match replacements
Measure the inner diameter, outer diameter, and thickness of the existing pads, then compare with the replacement options. Verify the attachment method and confirm the pad’s foam density matches your comfort needs. If in doubt, contact the seller with your model details for confirmation.
Tip: When in doubt, choose pads with slightly larger inner diameter rather than smaller; a snug fit is easier to adjust than an oversized pad. - 3
Gather tools and materials
Collect the replacement pads, cleaning supplies, and any optional tools. Having everything ready reduces the risk of mid-project interruptions and helps you work cleanly. Lay out a soft mat to protect the headphones during removal and installation.
Tip: Keep a dedicated workspace to prevent losing small clips. - 4
Remove old earpads
Gently detach the old pads by working around the edge with your fingers or a blunt tool. If clips or rings resist, pause and re-check the mounting type to avoid tearing. Do not force parts; misalignment can cause permanent damage.
Tip: Use slow, even pressure and avoid prying from a single spot. - 5
Clean mounting surfaces
Wipe away dust, oils, and residue from the inner edge of the housing and any clips. A dry microfiber cloth is usually sufficient, but a damp cloth with a tiny amount of mild cleaner can help stubborn grime. Allow the surface to dry fully before attaching new pads.
Tip: Never saturate foam or foam-lined surfaces with liquid cleaners. - 6
Attach new earpads
Align the new pads with the headphone edge and work around in small increments. Snap or clip into place according to the mounting design. Ensure there are no folds or creases that could cause pressure hotspots once worn.
Tip: If clips are present, listen for a subtle ‘click’ indicating secure attachment. - 7
Check fit and seal
Put on the headphones and verify the seal around your ears; you should notice improved comfort and stable sound across the spectrum. Move your jaw and nod slightly to confirm pads stay in place. If the fit feels off, re-check alignment and attachment method.
Tip: A minor readjustment is common after initial wear-in. - 8
Test and document aftercare
Test playback with a few tracks that cover bass, mids, and treble to confirm the new pads deliver expected seal and comfort. Record the model, pad type, and purchase date for future replacements. Store the original packaging and pads in case you want to revert later.
Tip: Keeping notes helps when you plan a future pad refresh.
People Also Ask
Are universal replacement earpads compatible with all headphone models?
Not always. Many pads are model-specific or require a particular mounting type. Always verify compatibility before buying.
Not all universal pads fit every model; check the mounting type and dimensions first.
Can I use third-party earpads on my headphones?
Yes, as long as they match the size and mounting method. Read compatibility notes and avoid pads that might alter the seal.
Yes, but ensure they fit the model and mounting style.
Do different materials affect sound or comfort?
Yes. Leather can seal well but feels warmer; fabric may be cooler but seal differently. Material choice influences comfort and isolation.
Different materials change comfort and how tightly the pads seal.
How do I clean earpads before replacement?
Wipe with a mild cleaner or damp cloth, then let dry completely. Avoid soaking foam or adhesive areas.
Gently wipe and let dry; don’t soak the pads.
How long do replacement earpads last?
Lifespan depends on use and material. Expect months to a year of typical daily use, with replacement sooner for heavy wear.
Durability varies; monitor wear and replace when comfort or seal declines.
What if the pads don’t fit after installation?
Re-check compatibility and orientation. If issues persist, consider returning or trying a different pad model.
If it doesn’t fit, verify compatibility and try another option.
Watch Video
What to Remember
- Check compatibility before purchasing pads.
- Choose pad material based on climate and use case.
- Install pads gently and test fit before extended listening.
- Maintain pads with regular cleaning to extend life.