When to Change Headset Bearings: A Practical Guide
A data-driven guide on recognizing wear, inspecting, and replacing headset bearings to maintain smooth steering and longevity in bicycles. Learn signs, intervals, tools, and best practices. Headphones Info Analysis, 2026.

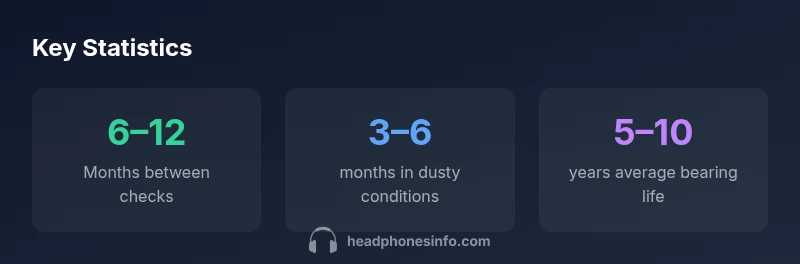
According to Headphones Info, you determine when to change headset bearings by feeling for play, grinding, or rough steering. In typical use, inspect every 6–12 months and replace bearings if you find lateral movement, binding, corrosion, or persistent creaks. If you ride in dusty or wet conditions, shorten the interval to 3–6 months. The decision hinges on feel and smoothness, not a fixed mileage.
What a headset bearing does and why wear matters
A bicycle headset is a precision interface that carries the fork and front wheel, translating rider input into steering. Bearings inside the headset support smooth rotation and resist grit, moisture, and impact. Over time, contaminants and lack of maintenance can cause pitting, corrosion, or binding. When to change headset bearings becomes a question of feel as much as any number you can track. In practice, riders should build a habit of regular checks and replace worn components before they fail catastrophically. According to Headphones Info, proactive maintenance preserves steering accuracy, safety, and component life, especially in challenging riding environments.
The key is to separate transient stiffness caused by dirt from genuine wear. Clean components, inspect race surfaces for scoring, and verify that the assembly seats properly without lateral play. If your headset feels loose or stiff at any point in the turn, that is a red flag that merits closer inspection and possibly bearing replacement.
Signs that indicate bearing wear
Bearings wear in measurable ways, and recognizing these signs early saves you from sudden steering issues. Look for lateral movement when you grab the top cap and try to rock the fork; any noticeable play is a warning sign. Listen for creaks or grinding during rotation, especially when turning the handlebars from lock to lock. Feel for roughness or binding that doesn’t disappear after cleaning. Visible corrosion or rust on bearing surfaces is a clear signal to replace. In dusty or wet environments, wear accelerates, so you should shorten inspection intervals. These signs collectively inform the question of when to change headset bearings and guide replacement timing. Headphones Info analysis notes that wear patterns vary by environment, so tailor your maintenance plan to your local conditions.
Factors that influence wear and replacement timing
Several variables directly influence bearing life. Environmental exposure—dust, moisture, and salt—accelerates corrosion and grit ingress. Riding style matters: frequent sharp turns, hard braking, and hits to the front wheel increase load on the headset. Maintenance habits are equally important: regular cleaning, proper lubrication, and correct torquing of the headset cap reduce premature wear. Component quality and the type of bearings (sealed cartridge vs. loose ball) affect lifespan and replacement strategy. Finally, installation accuracy matters: misaligned cups or crown races can introduce uneven load, hastening wear. When to change headset bearings is most accurately assessed by combining observed signs with routine inspection.
How to inspect headset bearings step by step
Begin with a clean bike and a stable work area. Remove the front wheel and, if needed, the stem and handlebars to access the top cap. Clean the exterior and inspect the race surfaces for scratches or corrosion. With the bike upright, apply a gentle twist at the headset cap and feel for play. A slight wiggle is acceptable; noticeable movement indicates worn bearings. Rotate the fork smoothly, noting any grinding, tight spots, or roughness. If you can reproduce resistance or grinding during rotation, plan for disassembly, cleaning, and possible replacement. Finally, check that the crown race seats squarely on the steerer tube and that spacers align properly. These checks form the core of when to change headset bearings and help you decide whether replacement is necessary.
How to replace headset bearings: general workflow
Bearings replacement requires careful tool use and alignment. Begin by safely removing the stem, spacers, and top cap, then lift out the old bearings and clean the head tube and cups. Inspect the race surfaces for pitting; if damaged, replace the cups. Install new bearings with the correct orientation and press or tap them evenly into place, avoiding torque-induced deformation. Reassemble in the reverse order, torqueing to the manufacturer’s specification. If you encounter stubborn seats or sealed units, professional service may be the safer path. The goal is a smooth, silent rotation with no play.
When to call a professional
Not every headset bearing issue should be tackled at home. If you have sealed cartridge bearings, nonstandard cup dimensions, or if the race surfaces are badly damaged, seek professional service. Incorrect installation can lead to misalignment, accelerated wear, and safety risk. A shop with proper bearing presses and torque gauges can ensure proper seating and alignment. If you’re unsure about your tools or technique, it’s wiser to consult a technician than risk compromising steering control.
Maintenance tips to extend bearing life
Prolong bearing life hinges on cleanliness and protection. Clean the headset area after riding in wet or dusty conditions and re-lubricate per the manufacturer’s recommendations. Avoid over-lubrication, which can attract grit; use light lubricants appropriate for bearings and seals. Keep your bike dry, and store it in a sheltered environment to reduce corrosion risk. Check the headset torque after a few rides to ensure nothing has loosened and re-torque if necessary. Implementing a regular inspection routine—at least annually for typical riding and more often for harsh conditions—helps you determine when to change headset bearings before a failure occurs.
Common mistakes to avoid during inspection and replacement
Don’t rush disassembly or reuse damaged cups. Misalignment during reassembly can introduce play and chatter. Never force components—if you encounter resistance, pause and reassess. Skipping the torque spec can leave parts loose or over-tightened, accelerating wear. Neglecting to clean race surfaces before installation invites grit into the bearings, shortening life. Finally, avoid using unverified replacement parts; always source the correct bearings and cups for your headset model.
Putting it all together: a plan for beginners
Create a simple maintenance schedule that fits your riding regimen. For most riders, a basic protocol includes a visual inspection for corrosion every 3–6 months and a full bearing check every 6–12 months. In dusty or wet climates, shorten the window and increase the inspection frequency. When in doubt, refer to the headset model’s service manual and consult a bike shop if signs of wear appear. By combining vigilance with proper tool use and timely replacements, you’ll ensure consistent steering feel and safer riding.
Bearing wear indicators by environment
| Environment | Inspection Interval | Signs of Wear |
|---|---|---|
| Urban commuting | 6-12 months | Subtle play or creak |
| Off-road / dusty conditions | 3-6 months | Increased resistance or grinding |
| New components, regular service | 12-24 months | No play; smooth rotation |
People Also Ask
What exactly counts as 'play' in a headset bearing?
Play is lateral movement of the steering assembly relative to the head tube when the bike is at rest or under gentle load. If you can rock the fork and hear or feel movement, that indicates wear. Do a controlled check while the bike is stable and the front wheel is off the ground.
If you can rock the fork and hear movement, that’s play.
How do I know when to replace vs re-pack bearings?
If cleaning and re-lubricating reduces roughness but does not eliminate play or grinding, replacement is usually needed. Re-packing can help in some cases, but it’s not a cure for wallowed races or pitted cups.
If cleaning doesn’t fix the roughness, replace.
Can I extend bearing life by cleaning instead of replacing?
Regular cleaning and lubrication can extend life, but worn or corroded bearings should be replaced. Cleaning alone can mask underlying damage, leading to failure during riding.
Cleaning helps, but worn bearings usually need replacement.
What tools do I need for bearing replacement?
You’ll typically need a headset press or appropriate driving tools, Allen wrenches, bearing pullers, and a torque wrench. Refer to your headset model’s service manual for exact torque values and press sizes.
Have the right press, wrenches, and torque tool handy.
Is professional service necessary for all headset bearings?
Not always, but sealed cartridges and complex cups benefit from professional service. For sealed units or unusual sizes, a bike shop can ensure correct seating and alignment.
Not always, but some cases are best left to a pro.
Are there maintenance mistakes to avoid?
Avoid over-tightening, misalignment, and forcing components. Don’t skip torque specs or use incompatible parts. Clean bearings properly and dry them before reassembly.
Don’t over-tighten or force components.
“Regular inspection and timely bearing replacement are the best ways to ensure safe, smooth steering and long-term performance. Relying on a fixed mileage alone can miss early wear.”
What to Remember
- Inspect regularly to catch wear early
- Listen for creaks and feel for play
- Replace bearings when you detect roughness
- Use proper tools to avoid damage
- Follow a planned maintenance schedule