Where Should Headphones Sit on Your Head: A Practical Fit Guide
Learn how to position headphones for comfort and optimal sound. This comprehensive guide covers over-ear vs on-ear fit, seal techniques, and a step-by-step approach from Headphones Info.

To get the best comfort and sound, position your headphones so the ear cups fully enclose your ears (for over-ear) or rest softly on them (for on-ear), with the headband evenly distributed across the top of your head. Start with the cups centered over your ears, then adjust clamp force and angle until the seal is even and pressure is comfortable. This foundation leads to better isolation and clearer sound.
What does correct head placement accomplish?
If you’re wondering where should headphones sit on your head, the short answer is simple: the cushions should rest around the ear for over-ear models or lightly contact the ear for on-ear models, while the headband distributes weight evenly across the crown. The exact position varies by model and head shape, but starting from a neutral posture helps. According to Headphones Info, a consistent placement makes it easier to form a reliable seal, prevents hotspots, and reduces fatigue during long listening sessions. This guide explains the rationale behind fit decisions, including cushion geometry, clamp force, and the way weight is shared across the skull. When your headphones sit correctly, you’ll experience more stable bass, clearer mids, and less listener fatigue. That doesn’t happen by guesswork: small adjustments to tilt, height, and tension can dramatically improve comfort and sound quality over time. In the sections that follow, you’ll find practical tests, reference positions for different headphone styles, and step-by-step methods to establish a repeatable fit every time you put on your cans.
Anatomy of headphones and head fit
Headphone fit starts with three interacting components: the headband, the yoke and slider mechanism, and the ear cups with their cushions. The headband distributes weight across the crown, and most models offer adjustability to accommodate different head sizes. Ear cups come in shapes and sizes that determine how completely they surround the ear and how the cushion contact feels. Cushion density affects comfort and seal: stiffer foams create a firmer seal but can press more on the ears, while softer foams may compress and reduce isolation if not positioned correctly. The yoke and sliders control the height of the cups relative to the ear, which is critical for aligning the center of the cushion with the ear canal. Understanding these parts helps you diagnose why a particular pair sits poorly and what to tweak first. Also consider clamp force—the pressure the headband exerts. If the band is too tight, you’ll feel headaches; if too loose, the cups may slip and reduce seal. Glasses, hair, or facial geometry can shift contact points; this is normal and solvable with small positional changes.
How weight distribution affects comfort and sound
Weight distribution determines how pressure is felt and how stable the seal remains during movement. If most weight rests on the ear pads, you’ll get faster fatigue and potential soreness. A well-distributed design uses the top of the head for most load, with moderate contact on the sides; this reduces hotspots and tinnitus risk. The impact on sound is real: a stable seal reduces leakage and keeps the drivers aligned with the ear canal, improving bass response and midrange clarity. This is particularly noticeable during long listening sessions or when using closed-back headphones in a loud environment. The Headphones Info team notes that you should test stability by nodding gently, checking resonance, and listening for gaps where sound leaks. If you notice wiggling or shifting, adjust the headband height a notch or two, or reposition the ear cushions slightly so that they cradle the ears without pressing the cartilage.
Positioning for different headphone types
Over-ear headphones are designed to encase the entire ear; thus, positioning should aim for complete ear enclosure with a comfortable seal around the ear. For many users, this means centering the cups directly over the ears and ensuring the cushions seal without pressing into the ear canal. On-ear headphones rest on the outer ears; the goal is to minimize clamping pressure while keeping the cups balanced. The fit can change with hairstyles or glasses; in these cases you might lower or raise the cups slightly or widen the headband to relieve pressure on the temples. If you regularly wear glasses, you may need to angle the cups a degree or two so the temple arms do not create hotspots. In both cases, ensure the microphone or controls align with your mouth or cheek for practical use in calls or gaming. Remember that fit is not one-size-fits-all; experiment with small changes to achieve your best personal result.
Practical fitting steps for daily use
To establish a repeatable fit, follow a simple routine before every listening session. Start from a neutral posture, sit upright with shoulders relaxed, and keep your neck straight. Put the headphones on with the headband centered and the cups roughly over your ears. Then fine-tune as described in the next block. Take a short break if you feel tension building, especially after longer listening periods. Maintain the cushions clean and free of oils to preserve seal quality. If you wear glasses or have long hair, consider removing accessories briefly while you check the fit, then reattach once you’ve settled on a position that stays comfortable for the duration of your session.
Authority sources
For further reading on listening comfort and ear health, consult reputable sources from health and public health organizations. National institutes provide guidance on safe listening and ergonomic considerations that influence headphone use. Here are a few trusted references:
- https://www.nidcd.nih.gov/health/hearing
- https://www.who.int/health-topics/hearing-loss
- https://www.cdc.gov/nceh/hearing_loss.html
These sources help ground practical fit advice in established guidelines about hearing safety and comfortable listening practices. Headphones Info recommends reviewing these materials if you frequently listen at high volumes or for extended periods.
Tools & Materials
- Headphones(The device to fit)
- Mirror or reflective surface(Assist with alignment checks)
- Soft microfiber cloth(Wipe cushions and headband to keep seal clean)
- Chair with back support(Promotes good posture during fitting)
Steps
Estimated time: 15-25 minutes
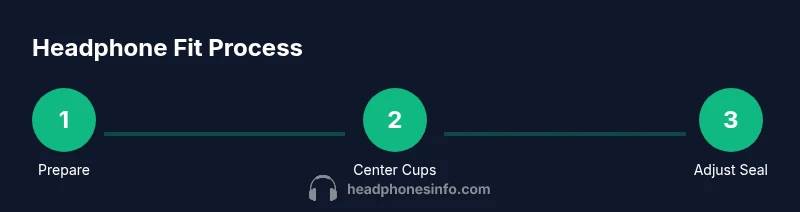
- 1
Prepare and orient
Sit upright in a comfortable chair with neutral posture. Clear distractions, inspect the headphones for padding wear, and identify left/right orientation. This helps ensure you start from a repeatable baseline and reduces the need for large adjustments later.
Tip: Use a mirror to verify the orientation and alignment before you begin. - 2
Position the headband on top
Slip the headphones onto your head so the headband sits centered on the crown. The majority of weight should be supported by the top of your head rather than pressing hard on the ears. Minor adjustments later will refine alignment with your ears.
Tip: If you notice the band slipping, adjust the sliders to raise or lower the cups slightly. - 3
Center the ear cups over the ears
Move each ear cup so it sits directly over the ear opening and begins to enclose the ear. The cushion should contact the skin without pressing into the ear canal. Avoid sideways tilting at this stage to keep symmetry.
Tip: A quick nod test helps confirm the cups stay centered during movement. - 4
Adjust clamp tension
If the band presses too hard, loosen the sliders slightly to reduce clamp force. If it’s too loose, tighten gradually until the cups feel secure but not painful. The goal is even pressure around the head.
Tip: Avoid clamping down on temples or jaw—this is a common source of discomfort. - 5
Tilt cups for seal optimization
Small tilt adjustments—one or two degrees toward your jawline—can dramatically improve the seal and reduce gaps. Recheck both ears for a balanced seal and uniform contact.
Tip: Tiny angle changes yield big gains in comfort and isolation. - 6
Test with varied content
Wear the headphones for 1–2 minutes while listening to music and then to ambient noise. Listen for any hotspots, slips, or seal breaks. If you hear leakage, revisit tilt and height.
Tip: Use tracks with strong bass, mids, and highs to test seal across frequencies. - 7
Fine-tune and memorize
Once you achieve a stable seal, record the position in your memory or note it down. If you have a memory feature, save it. This makes future wear predictable and efficient.
Tip: Keep notes handy for different environments (desk, commute, gym). - 8
Confirm long-term comfort
Reassess fit after 10–15 minutes of continuous listening. A good fit should remain comfortable with minimal adjustments. If you feel fatigue, revisit clamp tension and cushion position.
Tip: Take short breaks during long sessions to prevent fatigue.
People Also Ask
Why is proper headphone fit important?
A proper fit improves comfort, seal, and perceived sound quality by reducing leakage and ensuring the drivers sit correctly over the ears. Poor fit can cause fatigue and less accurate bass response.
A good fit makes listening more comfortable and improves sound clarity.
How can I tell if my headphones are too tight?
Signs include headaches, aching temples, and red or numb ears after short periods. If discomfort persists, loosen the headband gradually and retest.
If it hurts, loosen the clamp and try again.
Do hair or glasses affect fit?
Yes. Hair and glasses can alter the seal and pressure. You may need to adjust cup height, tilt, or headband tension to maintain comfort.
Glasses and hair can change how the cushions sit on your ears.
Should fit be the same for different headphone types?
Not always. Over-ear designs aim for full enclosure, while on-ear models require less clamping pressure and a different cushion contact point. Adjust accordingly.
Different designs need small, model-specific tweaks.
Can fit influence audio quality even at the same volume?
Yes. A better seal improves bass response, soundstage, and overall clarity by reducing leakage and external noise intrusion.
A good seal means your music sounds fuller and tighter.
Watch Video
What to Remember
- Center the ear cups over the ears for a reliable seal.
- Distribute weight across the crown to avoid hotspots.
- Use small tilt adjustments to optimize seal and comfort.
- Test fit with real listening material to verify comfort and isolation.
- Save your preferred position for quick, repeatable setups.