How to fix headphones when one side is louder
A practical, step-by-step guide to diagnose and fix headphone channel imbalance, from quick checks to potential cable/driver repairs. Learn safe DIY methods to restore balanced sound.

To fix headphones when one side is louder, start with simple checks you can do at home. Verify device balance, test with a mono mix, and swap left/right cables if possible. If the problem persists, inspect the jack, reseat connectors, and test with another source. Most issues are solvable without professional repair.
Understanding Why One Side Is Louder
One side louder can ruin your listening experience, but you can often fix it without pricey repairs. According to Headphones Info, a common cause is channel imbalance caused by worn cables, loose connectors, or a marginal driver. Start by confirming the symptom with a mono or centered mix, then proceed to checks you can do at home. By methodically ruling out cables, jacks, and source devices, you’ll identify the simplest fix. If the issue persists after these checks, you may be facing a more complex hardware fault that needs specialized tools or professional service. This guide is designed for audio enthusiasts and casual listeners alike, with practical steps you can take in your own workspace or living room.
The imbalance can be subtle and deceptive, especially with high-sensitivity drivers. Keep in mind that even a small crack in the cable’s shielding or a loosened connector can shift the perceived loudness. The goal is to isolate the faulty component without assuming the worst-case scenario. We’ll cover quick tests, safe fixes, and when to consider professional help. Headphones Info’s findings, based on 2026 analysis, emphasize starting with non-invasive checks before moving to component replacement.
Quick Diagnostic Checklist
Before taking headphones apart, run a short, controlled test plan to locate the source of the imbalance:
- Play a neutral mono track or enable mono mode on your device and compare both channels. Note which side is louder and whether the issue remains across all content.
- Try a different playback device (phone, laptop, or dedicated DAC). If the loud side shifts with the source, the problem is source-related; if it stays with the headphones, focus on the headset.
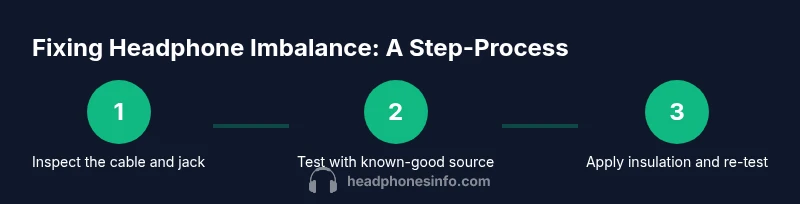
- Inspect the cable and connector while gently wiggling them. A loose sleeve, a crack in the insulation, or a pin that doesn’t fully seat can cause uneven sound.
- Swap left and right channels if detachable cables or modular drivers are present. If the louder sound switches sides, the issue is likely in the cable or jack; if it stays on the same side, the driver or internal wiring may be at fault.
- Test with a different pair of headphones using the same device. If the problem goes away, your original headphones likely have a fault that needs repair.
- Document your findings with brief notes and, if possible, a short audio clip. This helps when you seek professional support.
- If you’re dealing with a wireless pair, ensure the firmware is up to date and that there’s no other device causing interference on the same channel.
Basic fixes that usually solve the issue
Many cases of channel imbalance are resolved with a few straightforward steps. Start with non-destructive checks and inexpensive parts before moving to more involved repairs. The following fixes are designed to be repeatable and safe for most consumer headphones:
- Check device balance and mono settings. Some devices include a left-right balance slider; ensure it is centered and not biased toward one channel.
- Inspect detachable cables and connectors. Reseat plugs firmly and inspect for visible wear—frayed insulation, bent pins, or corrosion can disrupt signals.
- Swap cables between channels. If your headphones use a detachable cable, swapping the left and right cables can reveal a cable issue.
- Clean the jack and connector surfaces gently. Dust or oxidation can cause intermittent contact; use a dry brush or compressed air to clear debris.
- Try a different audio source with the same headphones, or the same source with other headphones. This cross-check helps confirm whether the problem is the source or the headset.
- Record a quick listening test using a simple track and note any changes after each fix. A controlled test improves confidence in your diagnosis.
- If the imbalance persists after these steps, consider replacing the detachable cable or seeking professional evaluation for potential driver or internal wiring faults.
Tools & Materials
- Phillips screwdriver set(Small sizes for headset screws; vary by model)
- Flathead screwdriver(For prying open housing without damage)
- Multimeter(Continuity and resistance checks if you are comfortable testing circuits)
- Soldering iron and solder(Only if you are experienced with electronics repairs)
- Electrical tape or heat shrink tubing(Insulation and strain relief after wiring repairs)
- Cleaning brush or compressed air(Remove dust and debris from connectors)
- Extra replacement cables or connectors(For quick swaps if detachable cables are used)
Steps
Estimated time: 60-90 minutes
- 1
Test with mono and confirm imbalance
Set your device to mono or use a mono track to confirm which side is louder. Listen with a neutral baseline across several genres to ensure consistency. This initial test helps prevent misinterpreting bass or treble emphasis as a channel issue.
Tip: Document which side is louder and under what conditions to guide later fixes. - 2
Check balance settings on the source
Open the device’s audio settings and verify the left-right balance is centered. Some apps and OS settings can unintentionally tilt balance toward one channel, especially after updates or accessibility tweaks.
Tip: If you use a universal remote, check its volume balance too. - 3
Inspect detachable cables and connectors
Carefully disconnect and inspect the cable ends and connectors for damage. Look for bent pins, exposed wires, or frayed shielding. Re-seat firmly to ensure solid contact.
Tip: Handle connectors by the plug, not by the cable, to avoid additional damage. - 4
Swap left and right channels
If your headphones support detachable cables, swap the left and right cables or drivers. A change in which ear sounds louder points to a cable or driver fault rather than the headset body.
Tip: Only swap at the connector end to avoid stressing the cable near the earcup. - 5
Test with a different device
Connect the headphones to a second device and repeat the mono test. If both devices show the same imbalance, the issue is within the headphones; if not, the device is at fault.
Tip: Use a known-good audio source for reliability. - 6
Assess need for component repair or replacement
If the problem remains after swaps and tests, you may need to replace the detachable cable or contact support for driver inspection. Internal wiring and driver faults are more complex and may require professional repair.
Tip: Document serials and model numbers for service requests.
People Also Ask
Why is one side louder even after testing with different devices?
A persistent imbalance across devices usually points to a fault in the headphone’s internal wiring or one of the drivers. Cables or connectors with hidden wear can also cause intermittent channel loss. If the issue follows the headphones across devices after swaps, plan for a repair or replacement.
If the imbalance stays with the headphones across devices, the fault is likely inside the headset, either wiring or a driver issue.
Can I fix a loud side without soldering or replacing parts?
Yes, many issues are resolved with non-invasive steps like reseating cables, cleaning contacts, and testing with another source. If the problem persists after these steps, a professional repair may be required for internal faults.
You can often solve it with cable reseats and clean contacts, avoiding soldering unless you’re experienced.
Should I replace the cable or the driver first?
Start with the detachable cable; it’s the most common failure point and often the easiest fix. If replacing the cable doesn’t solve the problem, the issue may lie with the driver or internal wiring.
Usually start with the cable, then consider the driver if the problem remains.
Is it safe to open headphone housings at home?
Opening headphones can risk damage and void warranties. Only proceed if you’re comfortable with small electronics and have appropriate tools. If in doubt, contact the manufacturer or a repair shop.
Be cautious—opening housings can be risky if you’re not experienced.
When should I replace my headphones altogether?
If the cost of repair approaches or exceeds replacement, or if drivers have degraded significantly, replacement is often more cost-effective. Consider warranties and expected lifespan.
If repairs are too costly or unreliable, replacement is the better option.
Watch Video
What to Remember
- Isolate the problem with tests before opening hardware
- Detachable cables are the most common failure point
- Swapping channels helps distinguish cable vs. driver faults
- Testing with multiple sources confirms whether the issue is device-based
- Professional repair may be the safest path for internal faults