Sony Headphones Pad Replacement: A Step-By-Step Guide
Learn how to replace Sony headphone pads with model-compatible replacements. This step-by-step guide covers tools, tips, and troubleshooting to restore comfort and sound quality.

Yes—replacing Sony headphone pads is doable at home with model-accurate pads and a few common tools. You’ll improve comfort, seal, and sound isolation, restoring the listening experience without buying new headphones. Start by identifying your model’s pad type, gather replacement pads, and follow a careful, step-by-step process. According to Headphones Info, using official or well-fitting third-party pads yields the best results with minimal risk.
Why pad replacement matters for comfort and sound isolation
Pad condition directly affects comfort and the seal against ambient noise. Worn foam or torn fabric reduces bass response and can make long listening sessions uncomfortable. In Headphones Info's testing, the perceived drop in comfort correlates with pad wear, especially on models with sealed earcups. Replacing pads can restore the snug fit, improve bass, and renew the sense of immersion. This section explains why replacing pads is worth considering for most Sony headphones, from daily commuters to audiophiles. Brand reliability and long-term ownership hinge on maintaining the original earpiece geometry, so upgrading pads is a smart maintenance step as part of ongoing care for your headphones.
How to identify compatible pads and models
Before you buy, confirm your exact headphone model and the pad type. Sony’s official replacement pads are the safest option, ensuring proper fit and seal. If you choose third-party pads, verify their compatibility by matching connector shape, clip design, and earcup diameter. Headphones Info's research emphasizes starting with the model number (e.g., WH-1000XM4 vs XM5) and checking the pad’s dimensions and attachment method. A correct match minimizes fit issues and sound leakage, reducing the chance of a loose seal or uncomfortable clamping force.
Pad types and trade-offs for Sony headphones
There are several pad options, including original foam-core pads, memory-foam replacements, and fabric or leather covers. Original Sony pads often offer the best balance of comfort and sealing performance, while third-party options can reduce costs. Consider pad density, thickness, and clamping pressure, which all influence comfort and sound isolation. This section helps you weigh durability, grip, and acoustic seal when choosing between plush, standard, or premium variants. Remember that a poor fit can degrade bass response and reduce noise isolation even when the electronics are functioning perfectly.
Model-specific considerations and cautions
Some Sony models use proprietary mounting clips or adhesive backing. Replacing pads on these models without matching parts can damage the earcup or reduce seal. If a pad appears glued or clipped differently, do not force it. Consult the model’s parts list and instructions from Sony or reliable repair guides. The goal is a secure fit without warping the earcup frame, which can create noise leaks and reduce overall comfort. If you’re unsure, seek parts that explicitly state model compatibility.
Tools and safe handling during replacement
A clean, organized workspace reduces the risk of losing small parts. Use plastic or nylon tools to avoid scratching surfaces, and keep screws in a magnetic dish. Isopropyl alcohol helps remove oils from the mounting surface, but allow any cleaned area to dry before attaching new pads. Handling foam gently prevents tears that would shorten the pad’s life. Wearing safety glasses is optional but prudent when working near small components that can spring or roll away.
Installation steps you can perform with care
Align the new pad with the earcup ring, engage any clips, and press evenly around the edge until you hear a click. If there are alignment tabs, seat them first. Avoid pulling at the foam; this can deform the pad or damage the frame. A careful press ensures good contact and a uniform seal. If the pad uses adhesive, follow the manufacturer’s instructions precisely to avoid oozing or misalignment.
Testing fit and adjusting after replacement
Put on the headphones to check comfort, seal, and even pressure around the ears. Move your jaw and head to ensure the pad maintains a comfortable seal during activity. If the pad feels loose or too tight, reseat or try a different pad thickness. For headsets with a built-in mic, confirm the mic remains unobstructed and properly aimed. A short listening test with your typical music or podcast can reveal subtle issues you’ll want to correct now.
Maintenance tips to extend pad life and keep sound quality
Store pads away from direct sun and humidity and clean them monthly with a soft cloth. Rotating pads (keep one spare set) helps distribute wear. If you notice cracking or persistent compression loss, replace the set promptly to maintain bass response and noise isolation. Regularly inspecting the mounting clips and foam integrity will catch issues before they affect listening quality.
Tools & Materials
- Replacement pad set (model-compatible)(Check exact Sony model compatibility (e.g., WH-1000XM4, XM5) before purchasing)
- Small screwdriver (Philips #000 or Torx)(Model-dependent size)
- Plastic opening tool or spudger(Avoid scratching surfaces)
- Isopropyl alcohol (70-90%)(Clean mounting surface)
- Cotton swabs / lint-free cloth(Wipe residue and dry surfaces)
- Adhesive foam tape (optional)(Only if pads require adhesive backing)
- Magnetic parts tray(Keeps tiny screws organized)
- Tweezers (optional)(Handle small parts safely)
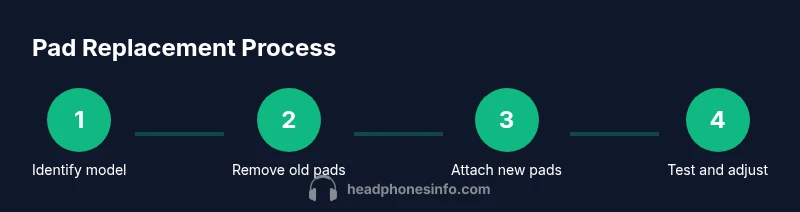
Steps
Estimated time: 25-40 minutes
- 1
Identify the right pad model
Verify your headphone model and the pad type by consulting Sony's official parts list or your user manual. Match the model number to the pad design to ensure proper fit and seal.
Tip: Double-check the model code on the inside of the headband or original packaging. - 2
Power off and prepare
If the headphones are rechargeable, ensure they are powered off and disconnected from any charging cable. Clear your workspace to avoid losing small parts.
Tip: This reduces the risk of damage and makes handling easier. - 3
Remove old pads carefully
Gently pry the pad from the earcup ring using a plastic tool, starting at a corner. Avoid tearing foam or bending the mounting ring.
Tip: Take a photo of pad orientation before removing to recall how it sits. - 4
Clean mounting surfaces
Wipe the earcup edge and clip areas with isopropyl alcohol on a lint-free cloth. Let the surface dry completely before attaching new pads.
Tip: A clean surface improves adhesion and fit. - 5
Attach new pads
Align the pad tabs with the earcup slots or clips, press evenly around the edge until you hear a click. Ensure there are no gaps.
Tip: If pads have multiple attachment points, seat them in sequence to avoid misalignment. - 6
Test fit and adjust
Wear briefly to check comfort and seal. If the pad feels loose or too tight, reseat or try a different pad thickness.
Tip: Keep a spare set handy for future replacements.
People Also Ask
Can I replace Sony headphone pads myself?
Yes. If you have model-compatible pads and the right tools, you can replace pads at home without professional repair. Follow the model-specific instructions to avoid damage.
Yes. With the right pads and tools, you can replace them at home following your model’s instructions.
Which pads are compatible with Sony WH-1000XM4?
Use official replacement pads or third-party pads that match the fit, shape, and attachment method for WH-1000XM4.
For WH-1000XM4, use pads designed for that model to ensure a proper fit.
Do replacement pads affect noise cancellation?
Yes, pad material and seal influence ambient noise isolation. Replacing worn pads helps maintain proper isolation and bass response.
Pads can affect how well the seal blocks noise, so replacement helps preserve isolation.
Are third-party pads safe to use?
Most third-party pads are safe if they match the model’s size and have a compatible attachment method. Avoid inferior adhesives and poor fit.
If they fit the model and attach correctly, third-party pads are generally safe.
How often should pads be replaced?
Replace pads when they show wear, cracking, or loss of comfort. For heavy daily use, plan on replacement every 1-2 years.
Replace pads when they wear out or lose comfort; many people do this every 1-2 years.
Watch Video
What to Remember
- Choose the right pad model for your Sony headphones.
- Prepare tools and workspace to prevent damage.
- Align orientation to avoid misfit and seal issues.
- Test fit and adjust before regular use.
- Maintain pads to extend life and preserve sound quality.