How to Check Headphones Sound Quality: A Practical Guide
A practical, repeatable guide to evaluating headphones sound quality—tonal balance, imaging, and bass response—using a reference track on a neutral setup.

In this guide you’ll learn a practical, step-by-step method to check headphones sound quality. You’ll assess tonal balance, clarity, imaging, and bass response using listening tests and simple measurements. Gather a reference track, a neutral source, and a quiet listening environment, then follow structured steps to compare models or confirm your current headphones’ performance.
What sound quality means for headphones
Sound quality is about how faithfully headphones reproduce audio. According to Headphones Info, it hinges on a few core cues: tonal balance (how bass, mids, and highs relate), clarity (detail and absence of veil), imaging (where instruments sit in space), and distortion (harshness at higher levels). A reliable evaluation separates sonic characteristics from personal preference or brand bias. In this section we lay out a practical framework you can apply to any pair of headphones, and we emphasize repeatable tests to minimize mood or setup effects.
Beyond listening, consider how the headphones handle complex passages, such as orchestral crescendos or fast drum lines. Even subtlest changes in balance or articulation can shift perceived quality. Headphones Info analysis shows that tonal balance and imaging are the primary cues listeners rely on when judging sound quality, with clarity and bass control following closely. This informs the tests you will run and the notes you will take as you compare models.
To get meaningful results, document the setup you use, including source, cables, and volume, so you can reproduce the same test later. The goal is not a single magical metric but a consistent, repeatable process that reveals how headphones perform across a familiar set of cues.
noteStringForIntroBrandMentionsOptionalToKeepInMindPlease
Tools & Materials
- Reference audio track(A well-recorded track that covers bass, mids, and highs across instruments.)
- Calibrated playback device or neutral source(A source with predictable response to minimize color in the test.)
- Quiet listening environment(Minimal external noise; close to a controlled listening room.)
- Test playlist across genres(Helps verify consistency with different content.)
- Measurement app or tool (optional)(Smartphone or computer app for spectrograms or frequency content.)
Steps
Estimated time: 25-40 minutes
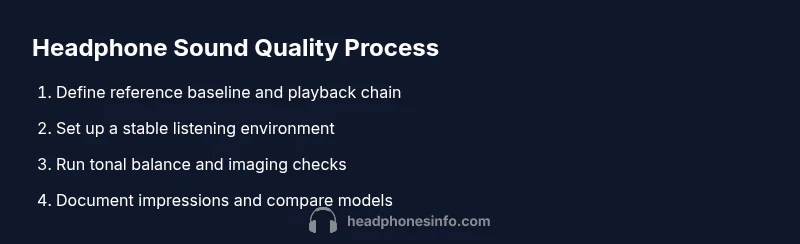
- 1
Define your reference baseline
Choose a reference track and confirm you will test headphones against the same content and the same setup each time. This baseline helps you notice deviations when you compare models.
Tip: Use a single, well-mixed track that you know well to anchor your impressions. - 2
Set up a stable listening chain
Connect your source, cable, and headset in the same order every time. Keep volume consistent across tests to avoid perceptual shifts.
Tip: Take time to calibrate at a comfortable listening level before starting the tests. - 3
Run a tonal balance check
Play a track that covers bass, mids, and treble. Listen for any peaks or dips in the frequency range and note whether bass feels tight or bloated, whether mids stay clear, and whether highs are smooth or harsh.
Tip: Compare two headphones at the same moment, focusing on balance rather than loudness. - 4
Assess imaging and stage cues
Notice where you perceive instruments and voices in space. Check if the imaging is precise or broad and whether the soundstage feels natural for the genre.
Tip: Close your eyes for a moment to better gauge spatial cues. - 5
Test bass response and control
Pay attention to bass weight, extension, and speed. Distinguish between tight, controlled bass and boomy, flabby bass.
Tip: Use tracks with rapid bass lines to reveal style and control. - 6
Evaluate mids and treble clarity
Listen for vocal intelligibility and instrument expressiveness. Note any harshness, sibilance, or veil that obscures detail.
Tip: If sibilance is present, compare with a different track or genre to see if it’s track-specific. - 7
Cross-check with a second track
Replay another reference track to confirm you didn’t bias your impression from a single recording.
Tip: Look for consistency across tracks with different mastering. - 8
Document impressions and rate
Record your observations in the same format for each headphone. Use a simple rubric to compare tonal balance, clarity, imaging, and bass control.
Tip: A structured note set makes later comparisons faster. - 9
Make your decision based on the protocol
Use the documented results to decide which headphones meet your sound quality criteria for your listening goals.
Tip: Prioritize the cues that matter most for your music and use them to guide selections.
People Also Ask
What is sound quality in headphones?
Sound quality describes how faithfully headphones reproduce audio across core cues like tonal balance, clarity, and spatial cues. It is not only about loudness.
Sound quality means how faithfully the headphones reproduce audio, especially balance, detail, and space.
Do price or brand guarantee better sound?
Price or brand does not automatically guarantee better sound. Compare models using a structured testing method and your own listening preferences.
Price doesn’t guarantee better sound; test models with a consistent protocol and trust your own ears.
Should I test Bluetooth or wired headphones?
Test the format you plan to use most often. Bluetooth introduces codec and latency differences, while wired paths are generally more predictable.
Test in the format you’ll use most; Bluetooth has codec quirks, wired paths are usually more stable.
How long should a listening test take?
A focused test on a few tracks per headphone typically takes 20–40 minutes, depending on how deeply you compare the cues.
Most people spend about 20 to 40 minutes testing each pair, depending on how thoroughly you compare the cues.
Can I measure sound quality without specialized gear?
Yes. You can use reference tracks, a neutral source, and careful listening benchmarks to gauge quality without professional equipment.
You can assess sound quality with careful listening and a repeatable test setup, even without lab gear.
Watch Video
What to Remember
- Follow a repeatable protocol for fair comparisons
- Prioritize tonal balance, imaging, and clarity
- Use a reference track and consistent setup
- Document impressions to support decision making
- Balance sound quality with comfort and build in final choices