How to Get Headphones to Work: A Practical Guide
Master the steps to get headphones to work on any device. Wired or wireless, plus OS and app settings, with practical troubleshooting tips from Headphones Info.

To get headphones to work, start with a quick check of the basics: confirm the headphones are powered on and plugged in (or paired) correctly, verify the audio output is set to the headphones, and test with another device to isolate the issue. Then follow device-specific steps for wired vs. wireless connections. Headphones Info offers a structured approach to troubleshoot common problems.
Quick Setup for Wired Headphones
The fastest way to see if wired headphones will work is to run a simple, repeatable check. Start by confirming the plug is fully seated in the jack and the cable is intact with no visible damage. If the cable is detachable, reseat it or swap in a known-good cable to rule out a faulty lead. Power on your source device and raise the volume to a safe, audible level. Play a short track or notification to verify there is sound, and listen for clear channels without crackling. If you hear nothing, test another device to determine whether the issue follows the headphones or is device-specific. Then inspect your OS or device audio settings and select the headphones as the default output. If you discover debris in the jack, remove it gently with a dry brush or compressed air—never insert metal objects. By following these steps, you can quickly isolate whether the problem is hardware, the source, or an incorrect setting. When in doubt, test with a different pair of wired cans to confirm the result.
Bluetooth Headphones: Pairing and First Use
Most headaches with wireless cans come from stale pairings, software glitches, or weak batteries. Begin by ensuring the headphones are charged and in pairing mode. Many models use a long press on the power button or a dedicated Bluetooth button; check the manual if you’re unsure. On your source device, open Bluetooth settings and initiate a scan for new devices. When the headphones appear, select them to pair. If you’re prompted for a code, most devices simply require you to accept the pairing request. After pairing, confirm the connection status shows as connected and test playback.
If the device won’t pair, try the classic reset: turn off Bluetooth on the source device, forget the headphones from the list, restart both devices, and try again. Avoid pairing with multiple devices at once if you only plan to use one at a time. Battery drain can cause intermittent cuts in audio; if you suspect this, charge overnight and perform a fresh pairing. Firmware updates from the manufacturer can also fix compatibility problems, so check the vendor site. By following a disciplined pairing routine and keeping firmware current, you’ll reduce most Bluetooth issues.
Ensuring the Correct Output Device
Whether you’re on Windows, macOS, Android, or iOS, the system audio output may be set to something other than your headphones. Start by locating the audio output control in your operating system: Windows uses the taskbar volume icon and the Playback devices panel; macOS uses Sound preferences; Android and iOS provide quick-access audio routing in the control center. Switch the active device to your headphones and perform a quick test. On computers, avoid leaving apps forcing their own exclusive output. Some apps, especially games and media players, may override system settings. If you’re using USB DACs or multi-output audio interfaces, ensure the correct device is selected for the application you’re using. After changing the output, test with different media to confirm consistent sound across sources. If problems persist, check for driver updates or OS updates that may affect audio routing.
Smartphone and Laptop Audio Settings
Mobile devices and laptops introduce a handful of settings that can mute or degrade headphone output. On smartphones, check that Do Not Disturb or accessibility audio routing isn’t forcing a mono or speaker mode. Open the app you’re using and confirm it doesn’t have an in-app output selector turned off or muted. On Windows, disable Exclusive Mode in the sound settings so apps can share the audio device; on macOS, enable Multi-Output Device only if you’re using it, otherwise keep a single primary device. For laptops with built-in quick toggles, ensure the function keys don’t mute audio. In apps, check if the app authorizes microphone access for headsets with combined mic and headphone use, as some apps disconnect microphone input when a separate mic is expected. After adjusting these controls, test again with a known audio sample. This approach ensures that software settings aren’t inadvertently blocking sound, and it also helps prevent future surprises after OS updates.
Checking for Hardware Issues and Cable Wear
Headphones can fail due to worn cables, loose connectors, or damaged drivers. Inspect the cable for visible cracks, kinks, or exposed wires; a bend near the plug is a common failure point. Check the connector pins for corrosion or misalignment; if you see greenish residue or bent pins, replace the cable or the headphones if the cable isn’t detachable. For detachable cables, try a different cable to verify whether the problem is the lead. If the headphones have a replaceable plug or module, reseat it firmly. For wireless headphones, listen for static when moving the headband or cable and check for intermittent charge connections. A failing driver or diaphragm may produce rattling or crackling sounds; if only one side is affected, the issue is often a driver. Use a magnifying glass if needed and compare with another similar model to determine whether the sound signature is off or the hardware is faulty.
Troubleshooting Common Scenarios
Encountering common issues is easier when you map symptoms to a likely cause. Here are quick, actionable checks for typical scenarios:
- No sound from any app or device: verify volume, mute, and correct output.
- Sound only on one ear: check balance, headphone orientation, or mono audio setting.
- Distorted or crackling audio: inspect cables, test with another device, try a different cable, or reduce EQ.
- Microphone not working: ensure mic is enabled, switch input in OS, and grant app permissions.
- Bluetooth disconnects: maintain within range, disable interference, reboot devices, and re-pair.
- Ports or adapters not recognized: try different host port, and re-seat.
Using Adapters and Dongles
Adapters and dongles are a practical solution when devices lack a dedicated headphone jack. Ensure you’re using a compliant adapter for your device type (USB-C, Lightning, or USB-A). After connecting, test with both music and a call to verify audio and mic paths function. If you encounter intermittent audio, avoid cheap third-party adapters and try a known-good model. Some USB-C hubs can route audio differently; in such cases, remove other peripherals and re-test. Keep a spare cable handy for the most common adapters so you can quickly rule out a faulty accessory.
Maintenance, Cleaning, and Protection
Regular maintenance extends headphone life and preserves sound quality. Wipe down ear pads with a mild, non-abrasive cleaner and a damp cloth, avoiding excess moisture near the drivers. If the headphones are over-ear, rotate cushions to even wear and replace them when they become uncomfortable or degraded. For wired models, coil excess cable loosely to prevent kinks; store headphones in a protective case when not in use. For Bluetooth models, store with a partial charge to preserve battery health and avoid high-temperature environments. Finally, inspect connectors and ports periodically for corrosion or grime buildup and clean with a dry brush or compressed air.
When to Seek Professional Help
If you have exhausted all troubleshooting steps without a solution, professional help may be warranted. Look for a service center that can test drivers, inspect for liquid damage, or evaluate internal components. If your headphones are under warranty, contact the manufacturer for RMA options and potential replacements. Document the steps you’ve taken and keep records of any firmware updates or device changes – this helps technicians isolate the issue faster. If you recently dropped or exposed the device to water, internal damage may be the culprit. In many cases, a repair or replacement is more cost-effective than continued troubleshooting.
Understanding Sound Quality and Compatibility
Sound quality is not just about volume; it’s about how headphones reproduce different frequencies and handle impedance. High-impedance models may require more power and a capable source, while low-impedance designs are generally easier to drive from mobile devices. If you notice weak bass, too much treble, or weak stereo imaging, check the source’s EQ presets and ensure there’s no loudness boost unintentionally engaged. Compatibility with your device’s DAC, audio codec, and Bluetooth version can affect latency and stability. When evaluating new headphones, consider whether you need ANC, an open-back vs closed-back design, and whether you require a built-in microphone or multipoint Bluetooth for seamless switching among devices.
Quick Summary
This guide provides a structured, device-aware approach to getting headphones to work. By starting with basic checks, then moving through connection types, OS and app settings, hardware inspection, and finally maintenance and professional help, you can diagnose most issues without guesswork. Save these steps as a checklist and adapt them to your specific headset model; with practice, you’ll resolve problems faster and protect your listening time.
Tools & Materials
- Headphones(Any model you want to test; ensure battery charge for wireless models.)
- Source device (phone, tablet, laptop, desktop)(A device with functioning audio output to test against.)
- 3.5 mm to 3.5 mm cable (optional)(Use if you need a direct wired path or a spare cable.)
- USB-C/Lightning adapter (optional)(For devices without a dedicated headphone jack.)
- Bluetooth-enabled device(Needed for wireless testing; can be the same or a different unit.)
- DAC/USB sound card (optional)(Helpful for testing digital audio paths or high-impedance cans.)
- Cleaning tools (dry brush, microfiber cloth)(For removing debris from jacks and connectors.)
- Testing media (audio files or apps)(Ensure reliable playback during tests.)
Steps
Estimated time: 45-90 minutes
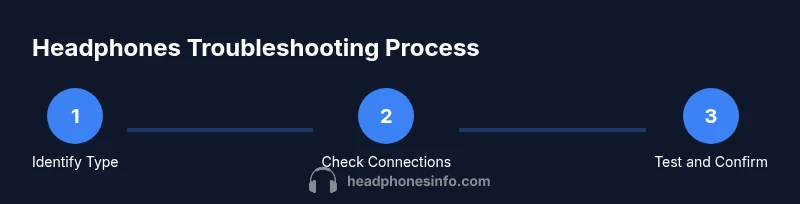
- 1
Identify headphone type and intended use
Determine whether you’re working with wired, USB-C/Lightning wired, or Bluetooth headphones. Knowing this frames the rest of the steps and helps you pick the right tests.
Tip: Document the model and any firmware version before starting tests. - 2
Check physical connections
Inspect the plug, jack, and cable for damage. Reseat detachable cables or adapters and try a different connector to rule out a faulty lead.
Tip: Use a clean, dry brush to remove debris—never use metal objects. - 3
Test with a known-good source
Play audio from a trusted device and verify output. If there is sound, gradually test other sources to identify a device-specific issue.
Tip: Keep volume at a safe level during testing to protect hearing. - 4
Set the correct output device in OS
Select the headphones as the default playback device in your operating system’s sound settings and re-test.
Tip: On Windows, disable exclusive mode to allow multiple apps to share audio. - 5
Test Bluetooth pairing (if wireless)
Put headphones in pairing mode, scan on the source device, and complete pairing. Test with a call or recording to confirm mic behavior.
Tip: If pairing fails, forget the device and re-pair after a full reboot. - 6
Update software and firmware
Check for OS updates and the headphone’s firmware on the manufacturer’s site. Updates often fix compatibility issues.
Tip: Keep a note of the current version before updating. - 7
Check app-specific settings
Some apps override system audio. Verify in-app output settings and permissions, especially for headsets with mics.
Tip: Test with multiple apps to confirm consistency. - 8
Inspect for hardware faults
If problems persist, swap components (cables, dongles) to identify a faulty part. Consider professional diagnostics for internal faults.
Tip: Document symptoms and test results to speed up diagnosis. - 9
Decide on next steps
If issues remain after all checks, decide whether to repair, replace, or seek professional help depending on warranty and cost considerations.
Tip: Preserve receipts and warranty information for future reference.
People Also Ask
Why are my headphones not producing sound?
No sound can result from a muted device, incorrect output settings, a faulty jack, or a dead battery in wireless models. Start by checking volume, the correct playback device, and tested cables. If issues persist, move through the troubleshooting steps in this guide.
If there’s no sound, first check mute and volume, then confirm your headphones are the chosen output device. If that doesn’t help, try a wired test or re-pair Bluetooth.
Why is there buzzing or crackling in wired headphones?
Buzzing often comes from a damaged cable, loose connector, or dirty jack. Inspect the cable, try a different lead, and clean the jack. If the problem persists, test with another device to isolate whether the fault is with the headphones or the source.
Crackling usually points to a worn cable or dirty jack. Swap cables and clean the jack to rule out simple causes.
My mic isn’t picking up my voice when using headphones with a mic.
First, make sure the headset mic is enabled in both the OS and the app you’re using. Check permission prompts, switch the input device, and test with a voice memo. If still silent, test with a different mic or headset to determine whether the issue is with the mic or the device.
Ensure the mic is selected as the input device and that apps have permission to access the microphone.
Should I update headphone firmware for wired models?
Firmware updates are primarily for wireless or smart headphones. For wired headphones, updates are less common, but checking the manufacturer site can still help if there’s a known hardware-specific issue.
Check the manufacturer’s site for updates, especially if you have wireless or smart headphones.
Bluetooth pairing fails on my headphones.
Reset Bluetooth on both devices, forget the device, and re-pair. Ensure the headphones are not connected to another device and that you’re within range. If trouble persists, update firmware and retry.
Forget the device and re-pair after a full reboot of both devices.
Is it safe to use high volume for long listening sessions?
Prolonged high-volume listening can cause hearing damage. Keep volume moderate and use features like volume normalization or safe listening alerts where available.
Avoid long periods at max volume; use safe listening practices.
Watch Video
What to Remember
- Identify whether the issue is wired or wireless before deep testing
- Verify the correct output device in the OS and apps
- Rule out hardware problems with cables and connections
- Update firmware and drivers to fix compatibility
- Know when to replace or seek professional help