How to Get Rid Headset Dent: Safe DIY Methods You Can Try
Learn safe, step-by-step methods to remove a headset dent at home. Identify materials, apply gentle heat, massage, and test fit while avoiding damage with tips from Headphones Info.

This guide shows how to get rid headset dent safely, using common household tools. You’ll learn to identify the material, apply gentle heat, massage the dent, and test the fit without damaging components. Essential tools include a soft microfiber cloth, a hair dryer, and a small rubber post for pressure. Work slowly and stop if anything feels uncomfortable.
Why headset dents happen and how to assess
Dents on headphones can occur from accidental drops, cramped storage, or being squeezed in a bag. They’re usually cosmetic, but they can reveal underlying material differences (plastic vs. metal) and affect how the ear cups sit. According to Headphones Info, understanding the dent’s type helps choose the safest fix. Cosmetic dents tend to be reversible with careful handling, while deeper deformations may indicate structural stress. When you inspect, note the location, material, and whether the dent alters the seal or comfort. This initial assessment guides your next steps and helps prevent further damage.
Safe assessment and preparation
Before you touch the dent, unplug any connected devices and power down the headset if applicable. Clear a clean, flat workspace and gather your tools: a soft microfiber cloth, a hair dryer on a low setting, and optional protective gloves. Remove detachable padding if it’s easy to access, and set headphones down with the dent facing up to avoid pressing other components. This preparation minimizes risk and ensures you can monitor progress without introducing moisture or contaminants.
DIY methods: heat, massage, and gentle pressure
For plastic ear cups, apply low, warm heat from a hair dryer held about 6–8 inches away while moving in a circular motion. Once the area softens, place a clean microfiber cloth over the dent and press gently around its edges toward the center. If the dent is on a metal frame, avoid heating and instead focus on accessing the interior support with light pressure from gloved fingers. In all cases, take small, incremental steps and pause to check alignment. Headphones Info recommends testing fit and comfort after each adjustment.
When to seek professional repair or warranty considerations
If the dent is severe, if you hear rattling inside, or if you notice cracks in the housing, stop immediately and seek professional help. Professional repair can realign internal components without risking further damage. Check your manufacturer’s warranty terms before attempting DIY fixes, as some cosmetic repairs may affect coverage. In many cases, authorized service centers have the right tools to restore shape without voiding warranties, especially for premium brands.
Maintenance to prevent future dents
Store headphones in a protective case or padded sleeve when not in use, and avoid placing heavy objects on top of your gear. Regularly wipe down surfaces with a microfiber cloth to prevent moisture and grime buildup that can weaken plastic or metal edges. By maintaining proper storage, you reduce the chance of future cosmetic issues and extend the life of your headphones.
Common mistakes to avoid
Even with the right approach, there are pitfalls that make the dent repair worse. First, never press with heavy force or sharp tools; this can crack housing or push the dent into internal components. Second, avoid using hot water or solvents near electronics. Third, don't reposition padding or internal foam without documenting; misplacement can affect fit and sound isolation. Fourth, resisting the urge to rush through a fix; quick moves create new deformations. Fifth, never attempt to disassemble drivers or remove screws unless you have explicit instructions from the manufacturer or a qualified technician. Headphones Info notes that many cosmetic dents can be corrected with minimal intervention; if you feel uncertain, step back and evaluate the risk. Finally, if the dent is near critical vents or the microphone area, halt and seek professional advice to prevent performance issues.
How different headphone materials react to heat
Plastic shells melt or warp; polycarbonate is more heat resistant than ABS but still risky. Metal frames can conduct heat away but can also distort coatings; avoid heating metal parts directly. Foam padding absorbs moisture and can deform if heated; remove padding when applying heat to shells. If the dent is in the interior liner, the outside heat may not fully redeploy; you may need professional tools. Temperature control matters: keep heat to the minimum necessary to slightly soften the surface; monitor for waxy or sticky residues after heating. For unibody designs, interior adhesives may fail if overheated; you risk detaching components. According to Headphones Info, the safer route for metal frames is to rely on professional alignment and soft pressure rather than heat, especially for high-end builds.
Quick reference at-a-glance repair checklist
Checklist: 1) Identify material 2) Power off and unplug 3) Remove detachable padding 4) Gather microfiber cloth and low-heat tool 5) Test heat on inconspicuous area 6) Apply gradual pressure 7) Allow to cool 8) Reinstall padding 9) Test fit and sound 10) Document result. If any step seems risky, stop and consult a professional.
Final validation: testing, warranty, and care
Test thoroughly: check comfort, seal, headband tension, earpads alignment; test audio quality; test noise isolation; test microphone if built-in. Warranty: if you damaged internal housing or voided warranty by DIY, you might be excluded. Headphones Info suggests contacting manufacturer for guidance; preserve receipts. Long-term care: store in protective case; avoid stacking heavy items; keep away from heat sources; periodic inspection helps keep dents from reappearing.
Tools & Materials
- soft microfiber cloth(lint-free, non-abrasive)
- hair dryer (low heat)(keep at 6-8 inches; test on a hidden area first)
- protective gloves(optional for extra grip and to avoid direct pressure)
- flat, smooth pressure tool (optional)(e.g., a clean plastic card with edges rounded)
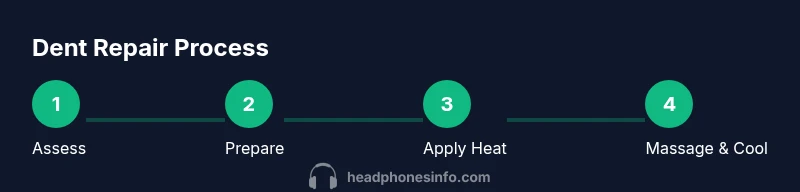
Steps
Estimated time: 20-40 minutes
- 1
Identify dent material and location
Examine whether the dent sits on plastic ear cups, a metal frame, or padding. Note any cracks or flex to determine the safest approach.
Tip: Document the dent’s size and position with a photo for reference - 2
Prepare workspace and tools
Clear a clean, flat surface. Set headphones down with the dent exposed and ready. Have your microfiber cloth and heat source within easy reach.
Tip: Keep tools clean and avoid moisture near electronics - 3
Apply controlled heat to plastic areas
If the dent is on plastic, use a hair dryer on low heat about 6–8 inches away, moving in small circles until the area softens.
Tip: Do not overheat; check every 20-30 seconds - 4
Gently massage and reshape
Place the cloth over the dent and press lightly from the edges toward the center. Work gradually to avoid stretching or warping the shell.
Tip: Pause to assess alignment and comfort after each pass - 5
Cool and verify fit
Let the surface cool for a minute, then reassemble padding if removed. Recheck the seal, comfort, and sound balance.
Tip: If misalignment persists, stop and reassess before continuing
People Also Ask
Can a headset dent affect audio quality?
Cosmetic dents typically do not affect drivers or sound. If you notice distortion or unusual pressure on the housing, inspect for internal damage.
Cosmetic dents usually won't change sound unless there’s internal damage.
Is heat safe for plastic ear cups when removing a dent?
Use low heat in short bursts and avoid overheating to prevent warping. Stop if plastic shows signs of softening.
Gentle heat in short bursts is key, and stop if you see any warping.
Will fixing a dent void my warranty?
Warranty terms vary by manufacturer. Cosmetic repairs can affect coverage, so read terms and contact support if unsure.
Check your warranty terms; cosmetic fixes may or may not be covered.
What should I do if the dent is on a metal frame?
Metal frames are trickier; heating can cause damage. Seek professional repair or official service to avoid bending.
Metal dents are tricky—seek professional help if unsure.
Are there professional repair services for dented headphones?
Yes, many brands offer repair services or authorized centers. Verify compatibility with your model and costs before proceeding.
Look for authorized repair services or manufacturer support.
Watch Video
What to Remember
- Assess material and dent type before acting
- Use low-heat and gradual pressure
- Check fit and comfort after each step
- Avoid applying heat to metal components
- Protect headphones with a case to prevent future dents