Dent-Proof Headphone Wearing: Avoid Indentation Marks
Learn how to wear headphones without leaving dent marks. This guide covers selecting low-clamp models, fitting techniques, padding hacks, hairstyles, breaks, and care to keep comfort and sound quality intact.

This quick guide shows you how to wear headphones without leaving dent marks on your scalp or hairstyle. You’ll learn how to choose low-clamp models, adjust the headband position, add padding, and schedule breaks. Follow these steps to minimize indentation, avoid headaches, and keep listening comfortably all day even during long gaming sessions.
Why indentation happens and why it matters
Indentation marks from headphones are more than a cosmetic nuisance. They can signal longer-term discomfort, headaches, and even compromised hairstyles after a day of use. According to Headphones Info, indentation is primarily a function of how the headband and ear cups contact the scalp, how much pressure is applied, and how the contact area interacts with hair texture and hairstyle. If the clamp is too tight, or if padding has worn down, the regions where the headband meets the scalp can press into the skin or push hair in ways that leave a visible mark. This is especially noticeable for people with fine hair, ponytails, or wearing hats during daily activities. The goal is not to sacrifice sound quality or comfort, but to distribute pressure more evenly across a broader area and to give the scalp space to breathe between sessions. In practice, dent-free listening requires a mix of gear choice, careful fitting, and good hair-management habits. By adopting the principles below, you can reduce indentation without compromising bass response, imaging, or stage feel. The Headphones Info team emphasizes that a comfortable listening setup is a blend of hardware design and user technique. Even small adjustments in position can translate into meaningful reductions in pressure points, making it easier to wear headphones for longer chunks of time during work, travel, or gaming sessions.
How to choose headphones that minimize dents
Selecting headphones that reduce dent marks starts with understanding clamp force, ear cup design, and padding. Over-ear models generally distribute pressure more evenly across the temples and crown than on-ear variants, which tend to press against the hairline and side of the head. Look for models advertised with a gentle clamp or adjustable headband so you can personalize the fit. Padding matters too; foam that compresses gradually distributes load and minimizes hotspots. If padding is worn, replace it or add a soft cover to lower direct pressure on the scalp. Headphones Info analysis shows that the combination of light clamp, generous ear cushion, and a plush headband sleeve can dramatically cut indentation risk while maintaining soundstage and isolation. In addition, verify that the headband is evenly contacting the head rather than resting only on the top or the back. Try different positions and test with your typical listening posture (standing, sitting, or leaning) to confirm comfort across activities like commuting, gaming, or long study sessions. The right gear choice, paired with mindful fitting, often yields dent-free listening without compromising acoustic performance or bass tightness.
Fitting techniques to reduce dent marks
Good fit begins with how you place the headphones on your head. Start by placing the crown of the headband centered over the top of your head rather than pressing down on the hairline. Gently adjust the ear cups so they cup the ears without squeezing the skull. If the clamp feels excessive, slightly loosen the headband and recheck symmetry—pressure should feel distributed rather than concentrated on a single point. Tilt the cups a few degrees if the model allows, so they rest naturally along the curve of your head. For many people, a shallow angle reduces contact with the hair and scalp, leading to fewer dents after extended use. Throughout this process, take short, deliberate pauses to assess pressure by running your fingers along your scalp and inspecting mirror evidence of indentation after 10–15 minutes of wear. The goal is a balanced seal that preserves audio fidelity (particularly bass and imaging) while minimizing surface pressure and heat buildup that can intensify marks. When in doubt, switch to a lighter model or alternative fit and test again in the same environment. Headphones Info recommends testing comfort in real-world tasks, not just static tests, to ensure dent-free performance during meetings, workouts, or long movie marathons.
Padding hacks and accessories
Padding is one of the fastest ways to reduce dent risk without dialing down audio quality. Use soft memory-foam pads or replace worn ear cushions with thicker, hair-friendly materials. Consider padding sleeves or fabric covers for the headband to distribute weight more evenly across the scalp. Silicone rings around the ear cups can also help spread contact points and reduce direct pressure on sensitive areas. If you wear hats, scarves, or ponytails, position the padding to counteract added pressure from these accessories. When you remove headphones, check for lingering imprint marks and adjust padding further if necessary. The combination of well-padded cups and a cushioned headband dramatically lowers the likelihood of dent marks while maintaining strong isolation and apparent sub-bass impact. Remember that padding affects acoustic sealing, so choose materials that preserve sound while minimizing pressure. In practice, padding upgrades are often the simplest, most effective way to achieve long-session comfort without compromise.
Hairstyle tips and wear schedules
Your hairstyle can either mitigate or exacerbate indentation. Looser hairstyles—such as a low ponytail placed under the headband, a loose bun, or simply letting hair flow—reduce the pressure on the crown. If you must wear a high ponytail or a tight bun, position the hair under the headband rather than directly in contact with the padding. Consider rotating hair between sessions, so the same hairline isn’t bearing the full weight of the clamp day after day. For those who wear glasses or choose to wear a hat, experiment with the order of items: place the glasses on after positioning the headphones and adjust the headband so the arms and temples do not squeeze the temples, which can push hair into the cushions and create dents. Break schedules matter too. Plan brief relief periods every few listening blocks. The relief pause allows temperature and pressure to normalize, reducing the chance of a lasting imprint and giving your scalp space to recover. Headphones Info suggests combining mindful wear with rest periods to preserve both hairstyle and head comfort over the course of a workday or long gaming session.
Care, maintenance, and storage to prevent dent buildup
Prevention isn’t just about when you wear headphones—it’s about how you care for them between uses. Wipe down the headband and ear cushions to remove oils that can flatten padding over time. If padding becomes shiny or compressed, replace it to keep the load distributed safely. Store your headphones in a cool, dry place away from direct sunlight and avoid bending the headband far beyond its design. When traveling, use a protective case to shield the cups and padding from pressure against other equipment. Regular inspections help catch padding wear before it starts contributing to dents. Finally, if you notice persistent indentation marks despite adjustments, consider trying a different model with a looser clamp or a design that prioritizes comfort over maximal passive isolation. Headphones Info notes that comfort-oriented design is the most reliable predictor of dent-free wear when combined with thoughtful personal fit and routine maintenance.
Quick-case scenarios: commuting, gaming, and long listening sessions
Different contexts require slight adaptations. In transit, prefer compact, lightweight over-ear headphones with soft, churn-friendly padding and a headband that distributes load across the crown rather than the hairline. For gaming, where you’ll spend long blocks of time, prioritize models that offer a broad, cushioned contact surface and a gentle clamp; consider a breathable fabric cover for the headband to lower heat buildup that can worsen indentation. During study or work-from-home sessions, maintain regular breaks and switch sides to prevent repetitive pressure from the same area. If you notice any dent formation, pause, adjust the fit, and redistribute hair away from contact points. The key is to establish a repeatable routine: check fit, test for comfort, apply padding upgrades as needed, and schedule periodic rests. The end result should be a consistent listening experience with minimal indentation and maximal comfort across all daily activities.
The Headphones Info perspective on dent-free wear
From a product perspective, the easiest way to minimize dents is to pair ergonomic design with mindful wearing habits. Prioritize adjustable headbands, plush ear cushions, and anti-sweat padding that reduces friction. Second, tailor the fit to your unique head shape and hair type. Third, implement a routine of short wear checks and adjustments. The combination of hardware and human factors—what you wear and how you wear it—determines long-term comfort and aesthetics. If you follow these guidelines, you’ll be able to enjoy hours of listening without sacrificing hairstyle or scalp health. The Headphones Info team will continue to monitor innovations in clamp pressure and padding technology to help you achieve dent-free listening with confidence.
Tools & Materials
- Low-clamp headphones(Look for models marketed with gentle clamp force and wide, flexible headbands)
- Soft memory-foam ear cushions or padding(Replace worn padding to reduce pressure hotspots)
- Padding covers or headband sleeves(Distributes load and adds hair-friendly contact surface)
- Hair accessories (hair ties, clips, or wraps)(Keeps hair away from contact points and padding)
- Portable mirror or smartphone camera(Use to check for dent marks after adjustments)
- Cleaning cloth(Maintain padding hygiene to preserve material resilience)
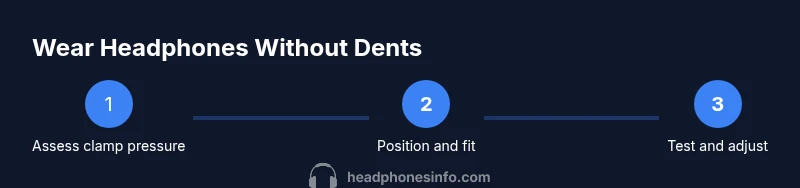
Steps
Estimated time: 45-60 minutes
- 1
Assess clamp and comfort
Put on the headphones loosely and test how evenly pressure is distributed. If you feel hotspots near the hairline or crown, plan adjustments before tightening further. The goal is to have a comfortable seal without pinching the skin.
Tip: If the clamp feels too tight, do not force it—consider different models with a softer clamp or add padding to distribute pressure. - 2
Choose the right design
Prefer over-ear designs when possible, as they typically press less directly on hair and skin. Ensure ear cups fully encircle the ears and sit flat, not at an angle that concentrates pressure.
Tip: Over-ear layouts naturally reduce forehead and hairline contact compared to on-ear variants. - 3
Position on the head
Place the crown of the headband about halfway up the scalp and align cups with the ears. Avoid resting heavy contact on the hairline or temples. Adjust so weight feels balanced across the head.
Tip: Keep the headband horizontal; small tilts can transfer load to the hairline and create dents. - 4
Adjust padding and padding placement
If padding feels worn, replace it or add a soft cover. Ensure padding cushions the top of the head and ear areas without increasing overall pressure.
Tip: Test with a simple hairstyle to confirm padding rests on hair minimally, not directly on the scalp. - 5
Manage hair and accessories
Style hair away from contact points, or wear hair under the headband. If wearing hats or glasses, adjust their positioning to avoid stacking contact points.
Tip: Loose hairstyles are generally more forgiving for long listening sessions. - 6
Schedule breaks and recheck fit
Take short breaks to relieve pressure and warmth. Recheck the fit after breaks, as swelling or movement can alter pressure distribution.
Tip: Use a simple reminder routine to recheck fit every 30–60 minutes during long sessions. - 7
Test and iterate
After adjustments, test listening for at least a few minutes, then inspect the scalp for any indentations. Iterate until you can wear comfortably for extended periods.
Tip: Document which adjustments work best for your head shape to streamline future setups.
People Also Ask
What causes indentation marks when wearing headphones?
Indentations arise when the headband or ear cups press against the scalp and hair, concentrating pressure at contact points. Worn padding and high clamp force worsen the marks. Adjusting fit and padding often reduces the marks without hurting sound quality.
Indentations come from pressure where the headband contacts the scalp, worsened by worn padding. Adjust the fit and padding to distribute pressure more evenly.
Are over-ear headphones better than on-ear for avoiding dents?
Generally, over-ear designs distribute load around the ears and crown, reducing direct contact with hairlines. On-ear models tend to press closer to the hairline, increasing indentation risk for some users.
Over-ear models usually press less on the hairline, which can help prevent dents for many people.
How long should I wear headphones before taking a break to prevent dents?
Take regular breaks based on comfort rather than a fixed timer. If you notice pressure or warmth, pause and readjust. Breaks give the scalp a chance to recover and reduce indentation risk.
Take regular breaks as soon as you notice pressure or warmth to give your scalp a rest.
Can I use hair products with headphones?
Light hair products can help coinside with padding by reducing friction, but avoid heavy gels that make hair slick against cushions. If you use products, test how they interact with padding and comfort.
A light touch of products can reduce friction, but test compatibility with padding.
Do padding hacks affect sound quality?
Padding can influence seal and isolation, which affects perceived bass and soundstage. Use padding that preserves a good seal without increasing pressure. If you notice changes, recheck fit and seal after padding upgrades.
Padding might change the seal a bit, so test sound and comfort after any upgrade.
What should I do if I still notice dents after adjustments?
Reassess fit, consider a different model with lower clamp, or add additional padding covers. If indentation persists, consult product guides or try a headset designed for comfort.
If dents persist, try a lower-clamp model or more padding; reassess fit and try again.
Watch Video
What to Remember
- Choose headphones with a gentle clamp and plush padding.
- Position and distribute load evenly across the scalp.
- Padding upgrades and hair management reduce indentation marks.
- Take regular breaks to prevent heat buildup and pressure.
- Test fit across common activities and adjust as needed.