How to Stop Headphones from Hurting Ears: A Comfort Guide
A comprehensive, data-driven guide to stop headphones from hurting ears, focusing on fit, padding upgrades, and safe listening practices for long listening sessions.

You can stop headphones from hurting ears by checking fit, switching to cushioned, larger ear cups, reducing headband pressure, and taking regular breaks. Choose models with memory-foam pads and adjustable clamps, test comfort for 10–15 minutes, and avoid wearing at high volumes. If pain persists, consider ear-friendly alternatives or a different design.
Understanding Why Ear Pain Happens
Ear pain from headphones is usually caused by a combination of clamp force, cup size, ear pad material, and prolonged pressure on sensitive areas of the outer ear. When cups press too hard or the pads are too stiff, they squeeze the ears against the head, restricting blood flow and creating heat. Over time, these micro-stresses accumulate during long listening sessions, especially if you wear glasses, have a smaller head, or use closed-back designs with tight seals. According to Headphones Info, comfort issues often arise from a mismatch between your head shape and headset geometry, plus padding materials that don’t adapt to your ears. By understanding these factors, you can diagnose what’s wrong and start with targeted fixes rather than a broad replacement strategy.
Correlation between pad density and comfort is a frequent talking point in consumer testing, and Headphones Info analysis shows that padding upgrades and better seal management consistently improve perceived comfort. This section helps you identify the main culprits and set a plan for selecting the right combination of ear cushions, cup size, and clamp tension. The goal is to minimize pressure points while preserving sound isolation and bass response, so you can enjoy long sessions without discomfort.
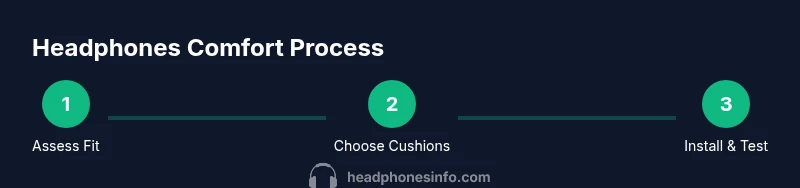
How to Assess Your Current Fit
Begin with a quick physical check of your current setup. Look for visible signs of wear on padding or hinges, and test the headset on a few key metrics: clamp force, ear cup size, padding thickness, and headband pressure. A too-tight clamp squeezes the temples and outer ears; too-loose cups let sound leaks and cause the cups to press unevenly. Pay attention to where the headset makes contact: if pain concentrates behind the ears or at the top of the head, you likely need to adjust both the clamp mechanism and pad positioning. If possible, compare your model against other sizes or shapes in-store to feel the difference in pressure distribution. Based on Headphones Info research, fine-tuning the fit often yields more relief than swapping to a more expensive model.
To evaluate comfort, perform a simple test: wear the headset for 10–15 minutes with typical listening content and note any hot spots, pinching, or numbness. If discomfort appears quickly or worsens with movement, it’s a strong signal that you should modify clamp tension, adjust the angle of cups, or change pads to a more forgiving material.
Choosing Comfort-Focused Headphones
Comfort-focused headphones prioritize ear-friendly geometry and padding over ultra-compact design or extreme noise isolation. Look for several core features: larger, plush ear cups with memory-foam or gel-infused pads; adjustable headbands and cup tilt to distribute pressure evenly; breathable materials that reduce heat buildup; and the option to replace pads easily. Over-ear designs typically distribute pressure more evenly than on-ear models, but the best choice depends on your head shape and activity. Open-back designs can reduce heat and pressure for longer sessions, though they trade some isolation for airflow. In short, seek models that let you customize pad density and clamp without sacrificing sound quality. Headphones Info’s testing indicates comfort gains come from a combination of geometry, padding material, and ease of maintenance.
If you wear glasses, consider models with deeper ear cups and rotatable cups to accommodate temple arms. Also pay attention to headband padding, as a thin band can cause pressure along the crown after extended wear. Favor brands that allow pad replacements and adjustable tension, so you can tailor the fit over time.
Upgrading Ear Cushions and Pads
The ear cushions are the most impactful factor for comfort. Memory-foam cushions adapt to the shape of your ears, providing a cushioned seal that reduces pressure hotspots. Gel-infused foams help with heat dispersion, keeping ears cooler during long sessions. When selecting replacements, verify compatibility with your model: mounting type (snap-on, screw-on), diameter, and thickness should match to avoid misalignment that causes rubbing or gaps. If your original pads are stiff or cracked, replacement pads can dramatically change the feel. Clean the metal ring and cup surface before attaching new cushions to prevent skin irritation and ensure a secure fit. After installation, gently press the cushions around the entire rim to ensure a uniform seal and even distribution of pressure.
For best results, break in new pads with a few short listening sessions of 10–20 minutes each before appraising comfort in a longer session. This helps the memory foam soften and settle, reducing the chance of new pressure points later on.
Remember to replace pads on both ears at the same time to preserve consistent clamping force and acoustic balance, as asymmetric padding can result in uneven pressure and comfort issues.
Adjusting Fit for Long Sessions
After upgrading cushions, take time to dial in the fit. Start with the clamp: loosen until you can place a finger between the headband and the skull with minimal effort, then re-tighten slightly so the cups sit comfortably without squeezing the temples. Position the cups so they completely encircle the ear, with the open area facing outward to improve airflow. Tilt the cups slightly toward the face to reduce pressure on the upper ear and outer ear canal, which are common sources of pain. If your model permits, adjust the yoke so the pads sit perpendicular to the ear, ensuring an even cushion contact around the ear rim. Finally, verify that the headband padding aligns with the top of your head, not directly on the crown, to minimize point pressure.
A well-balanced fit can lower fatigue by distributing pressure evenly across the head, reducing hotspots, and promoting better acoustics. Take notes on what works during your listening tests and apply those findings in future adjustments.
Breaks, Volume, and Hygiene Practices
Even with perfect fit, long sessions can lead to ear fatigue. Implement a routine of short breaks every 45–60 minutes, stepping away from loud environments to give your ears a rest. Keep volumes at safe levels to avoid cochlear strain; a good rule of thumb is to stay under 60–70% of maximum volume depending on your environment. Scheduling micro-breaks also reduces heat buildup and moisture buildup, which can irritate the skin around the ears. Clean pads regularly with a soft microfiber cloth and a mild, non-irritating cleaner to remove sweat, oils, and skin cells that accumulate during use. Avoid harsh chemicals that can degrade padding materials.
If you notice persistent irritation after wearing headphones for an hour or more, consider hybrid solutions such as switching to lighter, breathable designs or alternating between over-ear and on-ear models. This gives your ears time to recover and reduces the likelihood of chronic discomfort.
Troubleshooting Common Scenarios
Pain behind the ears or at the top of the head is commonly caused by concentrated pressure from headband hooks or by narrow cup openings that don’t accommodate larger ears. In such cases, adjust cup tilt and spacing to create more room around the ear rim. If you experience heat buildup, opt for open-back designs or memory-foam cushions that promote airflow. For persistent soreness in the outer ear, look for pads with softer edges and lower-density foam; this reduces friction against the skin. If you wear glasses, ensure the temple arms don’t press against the pad edge. Dynamics between seal and comfort are often model-specific, so trying a slightly larger cup or a pad with slightly different material can make a meaningful difference.
When pain persists despite adjustments, consider changing headphones to a model known for comfort, or consult an audiologist or hearing-care professional for personalized guidance. Headphones Info emphasizes comfort testing as part of a responsible listening approach.
How to Maintain Comfort Over Time
Comfort isn’t a one-time fix; it requires regular maintenance. Inspect ear cushions every 6–12 months for signs of wear, cracking, or flattening, and replace them as needed. Pads lose density and elasticity over time, reducing cushioning and seal quality, which can reintroduce pressure points. Clean all padding as recommended by the manufacturer—usually with a gentle wipe and mild soap solution—being careful to avoid saturating foam components. If you notice changes in sound balance or seal integrity, re-check clamp tension and cup alignment. Finally, store headphones in a dry, cool place to prevent padding degradation and material fatigue. Regular maintenance extends comfort and preserves acoustic performance.
Practical Comfort-Centric Comparisons
When evaluating a new headset for comfort, look beyond bass and impedance numbers. Compare how each design distributes pressure on the head, the ease of replacing pads, and the adjustability of cups and headband. Write down your priorities (e.g., open-back airflow, larger ear cups, easier pad replacement) and score candidates against them. If possible, test in-store while wearing glasses or hearing devices to simulate real-world conditions. Remember, the best headset for comfort is the one that maintains good seal and balanced sound without causing fatigue after 30–60 minutes of use.
Tools & Materials
- Replacement memory-foam ear cushions(Choose cushions compatible with your model; verify mounting type and size.)
- Replacement headband padding(Gel or foam padding options; ensure compatibility with your headband design.)
- Soft microfiber cloth(For cleaning before and after cushion replacement.)
- Mild cleaning solution(Non-irritating cleaner suitable for padding (avoid harsh chemicals).)
- Precision screwdriver (if needed)(Some models require screw-on pads or disassembly for replacement.)
Steps
Estimated time: 45-60 minutes
- 1
Inspect existing pads
Visually inspect ear cushions for wear, cracks, or loss of padding. Check the mounting clips and the headband pads for wear. This helps determine if replacement is necessary before attempting any removal.
Tip: Document any damage with photos to avoid ordering the wrong replacement parts. - 2
Select compatible cushions
Identify cushions that match your model in size, mounting method, and thickness. Prefer memory-foam or gel-infused options for comfort and heat management. If in doubt, contact the manufacturer or a reputable retailer.
Tip: Choose cushions with replaceable rings to ensure long-term maintainability. - 3
Remove old cushions
Gently release clips or pry off edge covers with a soft plastic tool. Avoid pulling on the foam itself to prevent tearing. Disconnect any attached cables only if instructed by the manufacturer.
Tip: Work over a clean surface to catch small clips that may drop during removal. - 4
Install new cushions
Align the new cushions with the rim and secure the clips evenly around the circle. Ensure the pad edges sit flush with the cup and there are no gaps. Refit the headband pad if it was replaced simultaneously.
Tip: Press firmly around the entire edge to confirm an even seal. - 5
Adjust fit and position
Put on the headset and assess clamp force and cup positioning. Tilt cups to distribute pressure away from the crown and temples. If possible, rotate cups slightly to follow ear contour for a balanced feel.
Tip: Aim for a snug feel without pain or pinching after a 5–10 minute test session. - 6
Test and finalize
Run a 10–15 minute listening test with typical content. Check for hotspots and adjust again if needed. Record how comfortable you feel and whether any adjustments are still required.
Tip: If discomfort persists, repeat steps 3–5 with different cushion densities or materials.
People Also Ask
Why do some headphones hurt my ears even at low volumes?
Pain at low volumes is usually a fit issue rather than an ear-rate problem. Tight clamps, small ear cups, or stiff pads can press on the ear and cause discomfort regardless of volume. Adjusting clamping force, upgrading pads, and ensuring a proper seal often mitigates this pain.
Pain at low volumes is often due to fit issues like clamp force and pad stiffness. Adjust the fit and replace pads to improve comfort.
Are over-ear headphones more comfortable than on-ear?
Generally, over-ear headphones distribute pressure around the ear rather than directly on the ear, making them easier to wear for long periods. However, comfort depends on cup size, padding density, and headband design. If you wear glasses, ensure the cups clear the temples.
Over-ear models usually feel more comfortable for long sessions, but it depends on the cup size and padding.
How often should I replace ear cushions?
Replace cushions when they become flat, cracked, or lose padding. Worn cushions compress the seal and create pressure points, increasing discomfort. Regular inspection helps you maintain comfort.
Replace cushions when they look worn or lose padding.
Will using open-back headphones help with ear pain?
Open-back designs improve airflow and reduce heat buildup, which can reduce ear fatigue. They sacrifice some isolation, so choose based on your environment and noise tolerance.
Open-back designs can reduce heat buildup, potentially easing ear fatigue.
Can ear pain indicate a medical issue?
Persistent ear pain after adjusting fit and pads could indicate irritation or an underlying condition. If pain continues, consult a clinician or audiologist to rule out medical concerns and get personalized guidance.
If pain persists after adjustments, seek medical advice.
Should I avoid using headphones entirely if they hurt?
Not necessarily. Try different designs, sizes, and padding options. If pain continues, take longer breaks or switch to in-ear monitors or other listening methods until you find a comfortable option.
Don’t give up on listening; try alternative designs and breaks to find comfort.
Watch Video
What to Remember
- Assess fit before buying replacements
- Choose cushions that suit your ear shape and head size
- Regular breaks and safe volumes protect hearing
- Pad upgrades and proper alignment reduce pressure points
- Maintenance extends comfort and lifespan