Repairing Headphones: A Practical DIY Guide (2026)
Learn how to diagnose and repair common headphone faults with practical, data-driven guidance from Headphones Info. A step-by-step DIY guide to save money and extend your gear.

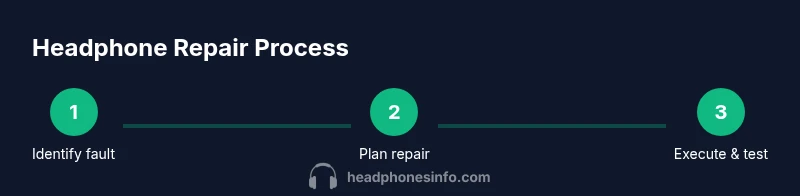
This guide helps you repair common headphone faults at home, focusing on wired models. You'll learn how to diagnose the fault, gather the right tools, and execute safe fixes such as cable or jack replacements, cable re-soldering, and reassembly. By following these steps, you can extend headphone life without buying new gear.
What repairing headphones involves
Repairing headphones is a practical skill that extends the life of your gear and can save money over time. According to Headphones Info, most issues arise from simple wear-and-tear on cables, jacks, or connection points rather than catastrophic damage to drivers. The core idea is to diagnose the fault, gather the right tools, and perform careful, reversible fixes whenever possible. This section sets the stage for safe, effective repair work by outlining typical fault patterns and realistic expectations for what can be repaired at home versus what should be outsourced to a professional. You’ll discover how everyday use—tugging on cables, bending the headband, or exposing headphones to moisture—contributes to faults and what to inspect first when you start.
Common failure modes in headphones
Headphones fail for a few predictable reasons. The most frequent are frayed or broken cables, worn or loose 3.5 mm plugs, and damaged connectors at the earpiece or inline remote. Inside the housing, solder joints can crack, especially on cheaper models with flexible wires. Wireless headphones add a different layer of complexity—battery wear, stuck buttons, and faulty Bluetooth modules are common, though many fixes still revolve around the physical wiring and module access. Understanding these failure modes helps you decide whether you can fix it yourself or should seek a professional repair.
Safety and preparation before you begin
Before you touch any components, unplug devices and work in a well-lit, static-free area. Use an anti-static mat or wrist strap if available. Keep a clean workspace and take photos as you disassemble so you can reassemble accurately. Label wires and note where each connector belongs, especially if you are working with multi-conductor cables. Remember that some repairs involve soldering; if you’re uncomfortable with heat or electronics, practice on a cheap cord first to build confidence. This preparation reduces the risk of permanent damage and helps you work more efficiently.
DIY repair approaches by issue type
Cable or plug faults: This is the simplest category to tackle. You can replace a damaged section of cable, upgrade to a higher-quality strain-relief, or swap the 3.5 mm plug. Driver-related faults are more complex; if a cell or diaphragm is damaged, replacement parts are rare and you may opt to replace the whole driver assembly or the headphones themselves. Earpad wear doesn’t affect sound but impacts comfort and hygiene, so consider replacing pads as a low-risk improvement. When you choose to repair, plan for a step-by-step approach and test incrementally to avoid over-wiring or mis-wiring.
Testing after repair
Testing should be methodical. Use different devices to rule out source issues, check stereo balance by listening for left-right channel equality, and test with both high- and low-impedance sources. Use a multimeter to check continuity if you suspect a broken wire. Reconnect the jack and conduct a final listening test with several genres to verify bass, mids, and treble are balanced. Document results so you can compare future repairs and gauge whether your fix holds up over time.
Long-term maintenance and cost considerations
DIY repairs are economical when you can source common parts and leverage basic tools. Over the long term, consider investing in a high-quality replacement cable or modular plug to extend life, and use protective cases or sleeves to prevent wear. Compare repair costs to the price of new headphones; if the fault recurs or affects the driver, battery, or wireless circuitry, replacement may be the smarter choice. Regular inspections after each use can catch wear early and prevent big failures. Headphones Info emphasizes that proactive upkeep often yields the best balance of sound quality and durability.
Beginner-friendly repair plan and when to seek help
If you’re new to electronics, start with the simplest fix—cable or plug replacement—before attempting soldering or driver work. Practice soldering on spare cables and keep solder properly fluxed to ensure solid joints. If the headphone model is under warranty, check terms first, as DIY repair can void coverage. For stubborn problems or premium models, a certified technician or authorized service center may offer the safest, most reliable option. Regardless of path, maintain clear records of repairs and keep your toolkit organized for future projects.
Maintenance checklist for extending life
Create a routine to check cables for fraying, inspect connectors for corrosion, and clean ports with a non-residue contact cleaner. Use soft brushes to remove dust from driver grills and avoid pressing hard on the diaphragm. Store headphones in a protective case when not in use and avoid twisting cables tightly. This proactive maintenance reduces the likelihood of avoidable faults and makes future repairs easier and less risky.
Tools & Materials
- Multimeter(Verify continuity and resistance on cables and switches)
- Soldering iron(Adjust to 350-400°C for audio wires)
- Solder (rosin-core)(0.7-1.0 mm diameter works for most wires)
- Heat shrink tubing(Various diameters for strain relief)
- Wire cutters/strippers(Clean, precise cuts and wire prep)
- Replacement cable or pigtail(Match gauge and impedance to your headphones)
- Replacement 3.5mm plug (stereo)(Nickel or gold-plated, right-angle if possible)
- Small screwdrivers (Phillips/flat)(For opening housings without damage)
- Electrical tape or heat shrink (additional)(Insulation and strain relief)
- ESD wrist strap(Reduce static risk on sensitive components)
- Contact cleaner spray(De-oxidize connectors without residue)
- Hot glue gun(Optional for strain relief and mounting)
Steps
Estimated time: 60-120 minutes
- 1
Identify the fault and safety check
Power down and unplug any connected devices. Inspect the cable and jack for visible wear, then use the multimeter to test continuity from plug to driver lead. Document the fault to guide the repair path.
Tip: Take photos during teardown to keep track of wire routing. - 2
Gather parts and set up workspace
Collect the replacement cable/plug, heat shrink, and basic tools. Clear a warm, well-lit area and lay out components in an orderly manner to avoid cross-wiring.
Tip: Organize wires by color and position to prevent mis-wiring. - 3
Open the housing safely
Carefully remove screws and pry joints without stressing the grille or driver. Note how the driver and cable enter the housing to avoid reassembly mistakes.
Tip: Work slowly; forceful prying can crack plastic housings. - 4
Replace damaged cable or plug
If the cable is damaged, cut back to sound conductors and install heat shrink; attach a new plug if necessary. Ensure solder joints are clean and well-insulated.
Tip: Avoid sharp bends near the solder joints to prevent future breaks. - 5
Re-solder and insulate connections
Reflow solder joints with a steady hand, avoid excess solder, and cover with heat shrink. Check for bridged connections before sealing the housing.
Tip: Test continuity after each joint heat-set before final assembly. - 6
Reassemble with care
Place the driver and cable back into the housing, secure screws, and restore any protective padding. Reconnect the cable routing to prevent stress.
Tip: Use a small amount of glue or foam to hold wires away from moving parts. - 7
Test across devices
Power on and test with multiple devices and genres. Listen for channel balance, distortion, and volume consistency; re-check any loose components.
Tip: If you hear intermittent audio, re-check solder joints and cable strain relief.
People Also Ask
Can I repair wireless headphones at home?
Yes, some wireless issues relate to cables or external components, but many wireless repairs involve internal batteries or Bluetooth modules that are best handled by a professional or manufacturer service. Start with simple checks like charging, reset procedures, and software updates before attempting hardware repairs.
Yes, you can try basic checks at home, but for battery or module issues, professional service is usually safer.
Do I void warranty by repairing headphones myself?
Opening the chassis or replacing components typically voids the warranty unless the manufacturer specifies DIY repair options. Check your warranty terms and consider authorized repair centers for expensive or newer models.
DIY repairs can void warranties; review terms and consider authorized service for new models.
Is soldering headphones safe for beginners?
Soldering is a precise skill. With proper temperature control, flux, and a steady hand, it can be safe. Practice on spare cables first and use safety gear to avoid burns or inhalation of fumes.
Soldering is doable for beginners with practice and safety precautions.
What if the driver itself is damaged?
Driver replacement is often impractical for consumer headphones. If the driver is damaged, consider replacing the entire headphone unit or opting for a warranty replacement if eligible.
Driver damage is usually a sign to replace the unit or check warranty.
How can I prevent future headphone damage?
Use protective sleeves, avoid yanking cables, store properly, and inspect joints regularly. Gentle handling and timely maintenance reduce the risk of recurrent faults.
Handle cables gently, store them properly, and inspect joints often.
When should I replace rather than repair?
If repairs recur or affect critical components (driver, battery, Bluetooth module), replacement may be more cost-effective. Compare repair costs with new headphone prices and consider warranty status.
If repairs keep failing, replacement may be the wiser choice.
Watch Video
What to Remember
- Diagnose faults before repairing to save time.
- Use proper insulation and strain relief to prevent future failures.
- Test thoroughly with multiple sources after each repair.
- Know when to replace versus repair for cost efficiency.