How to Get Headphones to Work on iPad
A practical, step-by-step guide to connecting wired, Lightning, USB-C, and Bluetooth headphones to iPad, with troubleshooting tips and expert guidance from Headphones Info.

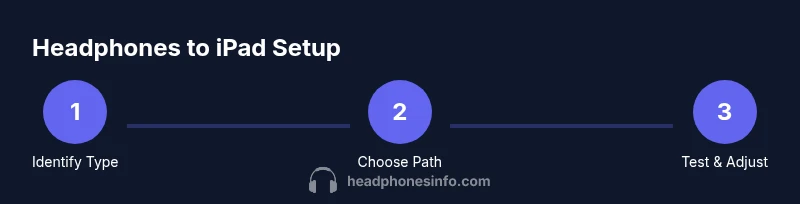
By following a short sequence of checks and connections, you can get any headphones to work with iPad, whether wired, Lightning, USB-C, or Bluetooth. This guide covers compatibility, adapters, pairing, and routing settings for iPadOS. According to Headphones Info, start by identifying your headphone type and confirming your iPad model before proceeding with the steps.
Quick compatibility checks for iPad and headphones
Before you connect anything, identify your headphone type and check iPad compatibility. If your iPad has a USB-C port (common on newer iPad Pro and iPad Air models), native USB-C headphones or USB-C adapters will work. If your iPad relies on a Lightning port, you’ll typically use Lightning-to-3.5mm or Bluetooth instead. Some iPads still include a 3.5mm jack in older models; if yours does, you can plug in wired headphones directly. Headphones Info analyses emphasize confirming model ports and iPadOS version before selecting adapters or starting pairing. Also ensure your devices are charged and ready. By starting with a clear port plan, you reduce trial-and-error steps and frustration.
In practice, set aside a dedicated moment to test each path (wired, Lightning, USB-C, Bluetooth) so you know which route is fastest for your typical listening scenario. This upfront clarity saves time during commutes or work sessions. If you’re unsure which port your iPad uses, double-check the official specifications for your model and note whether your headphones require power from the device or can operate independently.
Wired headphones: using the 3.5mm jack or adapters
Wired headphones can be the simplest option when your iPad includes a 3.5mm jack or when you have an adapter. If your iPad lacks a native 3.5mm port, you’ll rely on either a Lightning-to-3.5mm adapter (for older iPad models) or a USB-C-to-3.5mm adapter (for newer models). When selecting adapters, prioritize certified or reputable brands to minimize signal loss or hum. Plug the headphone jack firmly and test with a familiar track to confirm sound across both left and right channels. If you experience crackling or no sound, try unplugging and reinserting, testing with a different cable, or using a different app to rule out software routing issues. Some older adapters may not support microphone input; if you need mic input for calls, look for an adapter labeled “with mic support.” Headphones Info analysis, 2026, notes that many wired issues stem from loose connections or cheap adapters, so investing in a quality adapter can pay off in reliability.
Tip: Always keep a spare compatible adapter in your bag so you’re prepared for travel without hunting for accessories.
Bluetooth headphones: pairing and common issues
Bluetooth headphones offer wireless convenience but require a clean pairing process. Start by turning on Bluetooth on the iPad (Settings > Bluetooth) and ensuring your headphones are in pairing mode. If the iPad doesn’t see them, turn Bluetooth off and back on, then retry. Forget the device on the iPad, then re-pair from scratch to clear any stuck connection. Ensure your headphones are charged; some models refuse to pair when battery levels are very low. After pairing, select the headphones in the AirPlay/Output menu if you don’t hear sound by default from the iPad speakers.
If you still have issues, check for interference from other Bluetooth devices, proximity to the iPad, and whether the headphone has multiple profiles (A2DP for audio, HFP for calls). Headphones Info Analysis, 2026, indicates many users resolve stubborn Bluetooth problems by updating iPadOS and performing a full reset of Bluetooth settings on the device. In addition, ensure that the headphones support the iPad’s Bluetooth audio codec. Some older or cheaper models may use codecs that are not ideal for high-fidelity audio on iPadOS.
Tip: Keep your headphones and iPad within a few feet during pairing to avoid dropouts; if interference persists, try a different room with fewer wireless devices.
USB-C headphones and iPad Pro era
USB-C headphones provide a direct, high-fidelity connection on compatible iPads. If your headphones are USB-C, simply plug them into the USB-C port and select the output in the Control Center’s audio menu. If you own USB-C headphones without a dedicated dongle, you won’t need an adapter; however, some USB-C headphones require power from the iPad and may not function if the iPad is charging. For iPads without USB-C, you can still use USB-C headphones with a USB-C to Lightning adapter, but performance may vary; using the native port is generally more reliable. If you do encounter issues, try a different USB-C cable, reset the iPad, or check for firmware updates for the headphones if available.
Note that some USB-C devices negotiate power differently with iPadOS; if you notice the iPad charging slowly while headphones are connected, try another port or disconnect non-essential peripherals during testing. This path is particularly common for new iPad Pro units and iPad Air models, where USB-C is the standard port for audio and charging.
Headphones Info analysis, 2026, emphasizes testing both USB-C and adapters in real-world usage scenarios to ensure consistent audio when watching videos or joining calls.
Check iPadOS audio routing settings
Audio routing is not always obvious, especially if you use multiple outputs (speakers, Bluetooth, headphones) across apps. On iPadOS, access the Control Center to check routing: swipe down from the upper-right corner (iPad with gesture-based navigation) or up from the bottom (older iPads) and tap the AirPlay icon to select the headphones as the output device. In Settings > Accessibility > Audio/Visual, verify settings like Mono Audio or Balance, which can affect perceived loudness or directional audio. Some apps may override the system output and route sound to internal speakers or a different Bluetooth device; ensure you test across at least two apps to verify universal routing. If issues persist across apps, a full restart of iPadOS can refresh the audio stack and clear misrouted sessions.
From Headphones Info's perspective, a clean routing setup is the foundation of reliable listening, especially in work or video conferencing scenarios where audio must consistently reach the correct device.
How to test audio quality and confirm success
Once a headphone path is connected, verify audio quality across content types to ensure balance, fidelity, and channel integrity. Play music with a range of frequencies to detect any imbalance or distortion. Check for synchrony between lip movement and audio in video apps; lip-sync issues often indicate a processing lag rather than a true output problem. If a microphone is involved (headset with mic), test both playback and mic input in a note-taking app or a call app to confirm bidirectional audio. Use a known audio sample that includes highs, mids, and lows so you can evaluate bass response and clarity. Document any anomalies (static, drops, or uneven volume) and test after rebooting the iPad and re-pairing the headphones. This method helps confirm that the issue is not app-specific and guides the most efficient troubleshooting path.
Pro tip: If sound is clear in music apps but not in calls, check the specific app settings for microphone permissions and select the headphones as the input device within that app.
Troubleshooting quick checklist for stubborn problems
If you still can’t get sound, run through this quick checklist in order: (1) try a different headphone pair to rule out a faulty headset; (2) verify the headphone is selected as the output device in all relevant apps and iPadOS; (3) test with another iPad or another device to isolate whether the issue is the headphones or the iPad; (4) reset network settings to clear Bluetooth caches (Settings > General > Reset > Reset Network Settings) and revert to default audio settings; (5) update iPadOS to the latest version; (6) consider a professional diagnostic if hardware damage is suspected. Following these steps usually resolves most hardware or software conflicts that prevent audio output to headphones.
Note: If your device continues to fail after trying the above, it may be time to replace the adapter or consider a different headphone model compatible with your iPad. Headphones Info recommends keeping a small set of tested adapters and headphones for quick troubleshooting.
When to consider alternatives or professional help
If you frequently switch between devices or rely on high-fidelity audio for professional work, consider investing in headphones known for strong iPad compatibility and robust drivers, especially for long listening sessions. If you cannot solve the issue with standard adapters or Bluetooth, you may want to consult Apple Support or the headphone manufacturer’s service channels. In rare cases, a hardware fault in the iPad’s audio jack or Bluetooth module requires a professional diagnosis. Keeping documentation of your attempts (adapter types, firmware versions, and iPadOS updates) will help support staff diagnose the problem more quickly and accurately.
Tips for reliable daily use and long-term maintenance
- Keep your iPad and headphones charged; low power can impact Bluetooth performance or mic sensitivity. - Use high-quality adapters and cables from reputable brands to reduce signal loss and noise. - Regularly update iPadOS and headphone firmware if available, as updates often fix compatibility issues. - Store adapters and cables in a protective pouch to prevent damage; a damaged connector is a common cause of intermittent sound. - For travel, keep a compact headphones case and a USB-C/Lightning adapter set to ensure you can connect in different environments. Headphones Info suggests establishing a consistent routine: check output in Control Center before important meetings, then test with a quick audio sample to avoid last-minute surprises.
Tools & Materials
- iPad (USB-C or Lightning, with the latest iPadOS installed)(Ensure the OS is up to date for best compatibility with headphone standards.)
- Lightning to 3.5mm adapter(Needed for older iPads that lack a 3.5mm jack.)
- USB-C to 3.5mm Adapter(For USB-C iPads that don’t have native 3.5mm support.)
- USB-C headphones(Native USB-C headphones are ideal for USB-C iPads.)
- Bluetooth headphones(Useful across all iPad models; ensure they are charged.)
- 3.5mm headphones with detachable cable(Good as a backup option with adapters.)
- Quality audio adapters(Prefer certified brands to minimize latency and noise.)
Steps
Estimated time: 20-40 minutes
- 1
Identify headphone type and port
Inspect your headphones to determine whether they are wired (3.5mm), USB-C, Lightning, or Bluetooth. Check your iPad model to know which port it uses (USB-C vs Lightning) and confirm you have a compatible adapter if needed.
Tip: Knowing the port type first speeds up the rest of the process. - 2
Gather required adapters or prepare Bluetooth
If wired, collect the appropriate adapter (Lightning to 3.5mm or USB-C to 3.5mm). If wireless, make sure the headphones are charged and in pairing mode.
Tip: Having adapters ready reduces on-the-spot shopping trips. - 3
Enable output path on iPad
Open Settings, confirm Bluetooth is on for wireless devices, or insert the adapter and verify the 3.5mm line is detected. Use Control Center to confirm the current output device.
Tip: Always test with a quick audio clip after selecting the device. - 4
Pair or connect the headphones
For Bluetooth, place headphones in pairing mode and select them from the list. For wired, physically connect the adapter and plug in the headphones.
Tip: If pairing fails, forget the device and retry once after a restart. - 5
Test across apps
Play audio in at least two apps (music and video or a call app) to ensure consistent output and check for mic functionality if using a headset.
Tip: Some apps override system output; test multiple apps to confirm universal routing. - 6
Verify sound balance and routing
Ensure the audio is not routed to internal speakers by mistake and check balance settings to avoid stereo imbalance.
Tip: Tiny changes in the Balance control can dramatically affect perceived audio quality. - 7
Update and reset if needed
If issues persist, update iPadOS and the headphone firmware if available. As a last resort, reset network or audio settings on the iPad.
Tip: Back up settings before a full reset to minimize reconfiguration time. - 8
Re-test and finalize setup
Re-test after updates and note which path works best for your typical use cases (commute, work, or home).
Tip: Document your preferred setup for quick future re-creation.
People Also Ask
Can I use wired headphones with an iPad that has only a USB-C port?
Yes. Use a USB-C to 3.5mm adapter to connect traditional 3.5mm wired headphones. If you have USB-C headphones, you can plug them directly in.
Yes. You can use wired headphones with a USB-C iPad by using a USB-C to 3.5mm adapter, or connect USB-C headphones directly if supported.
Why is there no sound in my Bluetooth headphones?
Check that Bluetooth is enabled on the iPad and that the headphones are in pairing mode. Forget and re-pair the device if needed, and test with another app to rule out app-specific routing.
First, verify Bluetooth is on and the headphones are paired. If still silent, forget and re-pair, and test in a different app to isolate the issue.
Do iPadOS updates affect headphone compatibility?
Updates can change audio routing behavior or Bluetooth codecs. If you experience issues after an update, check for another update or adjust audio settings; a reset can also help.
Yes, updates can affect compatibility. If issues appear after an update, check for new settings or restart the device.
How do I reset audio settings on iPad?
Go to Settings > General > Transfer or Reset iPad > Reset > Reset Network Settings or Reset All Settings. Note that this won’t erase personal data but will reset saved Wi-Fi networks and Bluetooth devices.
You can reset audio-related settings by resetting network settings from the iPad’s general reset options.
What should I do if headphones keep disconnecting?
Ensure the headphones are charged, remove interference by turning off other nearby Bluetooth devices, and re-pair. If problems persist, test with another device to determine if the issue is headset or iPad related.
If disconnections keep happening, recharge the headset, minimize interference, and re-pair. Test another device to isolate the cause.
Are AirPods the easiest option for iPad use?
AirPods are highly compatible with iPadOS and offer seamless pairing and automatic device switching. However, other high-quality Bluetooth headphones may perform just as well depending on your needs and budget.
AirPods provide excellent compatibility, but other Bluetooth headphones can also work very well with iPad.
Watch Video
What to Remember
- Identify headphone type and port first
- Use certified adapters for wired connections
- Test audio across multiple apps
- Keep devices updated for best compatibility