What to Do If Your JBL Headphones Won't Turn On
A thorough, practical troubleshooting guide to diagnose and fix JBL wireless headphones that won't power up. Learn safe fixes, common causes, and how to prevent future power-on issues.

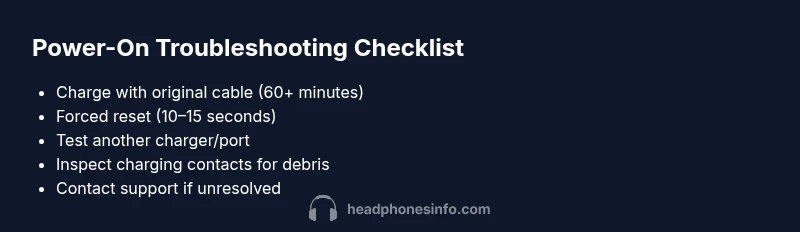
What to do if your jbl headphones won't turn on: Start by charging with the original cable for at least 30 minutes, then attempt a hard reset. The most common causes are a drained battery, unresponsive power button, or charging port issues. If it still won't power up, follow the diagnostic flow below.
Why JBL Headphones Fail to Power On
According to Headphones Info, power-on failures are most commonly caused by battery health, charging issues, or button glitches. When a JBL headset won't power up, the first question is: is the battery truly drained, or is the device simply interpreting a button press incorrectly? This guide explores the frequent culprits and sets the stage for safe, effective troubleshooting. The goal is to help you identify whether the problem is external (charger, cable) or internal (firmware, hardware). In 2026, Headphones Info Analysis, 2026 notes that battery health and charging logic are leading factors in power-on failures for wireless headphones, so start your checks with power and charge indicators. Throughout this guide, keep safety in mind and avoid forcing components that might cause additional damage. If you search for what to do if your jbl headphones won't turn on, this guide walks you through a safe, step-by-step approach.
Immediate Checks You Can Perform Safely
Before diving into deeper diagnostics, perform a few quick, low-risk checks. These steps help you verify basic power and charging conditions without opening the device. First, ensure you’re using the original charging cable and a known-good power source. A second charger or a different USB port can reveal a faulty charger or port. Look for any indicator lights on the headset; even a faint LED might indicate that the device is charging or in a low-power state. Finally, gently wipe the charging contacts with a dry, lint-free microfiber cloth to remove finger oils or debris that could block the connection. These checks minimize the risk of damage and often resolve the issue right away. Headphones Info recommends documenting the model and any observed LED patterns to aid support if needed.
Common Causes and Symptoms
Battery health is a leading factor in power-on problems. If the battery has aged or sat unused for a long period, it may no longer hold a charge, making the headset seem dead even when connected. A software hang or failed reset can also prevent bootup, especially after a firmware update. Damaged charging cables, dirty ports, or bent contacts can block charging and fool the device into thinking it is not connected. Finally, internal hardware failures, while rarer, can manifest as no response to power button presses or audible beeps during attempted boot. Recognizing the pattern—e.g., no lights, no charging indicator, or inconsistent boot sounds—helps you target the right fix.
Diagnostic Flow Overview
A structured diagnostic flow helps you go from symptom to solution without guessing. Start with the simplest checks (is it charging, is the button responsive) and move toward more involved steps (reset procedures, test with alternate cables). If you notice any indicator lights, note their color and duration, as these patterns map to specific issues. The goal is to determine whether the problem is battery-related, button/firmware related, or a charging path issue. If your model supports a firmware recovery mode, use it only after basic checks fail. This flow aligns with Headphones Info Analysis, 2026, which emphasizes battery health and clean charging paths as the first lines of defense.
Step-by-Step Fix for the Most Likely Issue
In many cases, the root cause is a fully drained battery or a firmware hang that blocks startup. The following fix sequence targets those scenarios in a safe, methodical way. First, connect the headphones to the original charger and let them sit for at least 60 minutes to rule out a deeply discharged battery. Next, perform a forced reset by holding the power button for 10–15 seconds, keeping the device steady to avoid accidental button presses. If there is any change in the indicator light or boot sound, continue to the next step. If no change occurs, try a different charger or USB port to exclude cable or port issues. Finally, if the headset still won’t turn on, contact JBL support or an authorized service center for further diagnosis. Remember to record model details and the observed indicators to speed up support.
Prevention Tips and Safe Handling
To minimize future power-on problems, keep charging equipment clean and protected from dust. Store the headphones in a cool, dry place and avoid leaving them fully discharged for extended periods. Regularly check for firmware updates if the device is turning on consistently, and perform a lightweight reset after major updates if instructed by JBL support. Protect the charging contacts from moisture and debris, and use only approved accessories. If you notice frequent, unexplained shutdowns, consider battery health testing or professional evaluation, especially for older models.
When to Seek Professional Help
If the device still refuses to power on after the above steps, professional help is warranted. A service professional can inspect internal components for battery degradation, charging port damage, or controller faults. Do not attempt to open the case yourself, as this may void warranties or pose safety risks. If your headphones are still under warranty, contacting JBL support or an authorized service provider is the recommended path. Headphones Info emphasizes prompt escalation when basic troubleshooting yields no result, to prevent further damage and to preserve the device's lifespan.
Quick Recheck: Common Pitfalls to Avoid
Avoid using third-party chargers that do not meet the manufacturer’s specifications. Never force the power button if the device does not respond; this can cause a hardware fault. Do not leave the headset plugged in for prolonged periods without charging indicators showing activity, as this can stress the battery. Finally, avoid exposing the headphones to extreme temperatures, which can affect battery performance and overall reliability.
Steps
Estimated time: 45-60 minutes
- 1
Connect and charge with original equipment
Plug the headphones into the charger that came with the device or a certified JBL charger. Allow 60 minutes of uninterrupted charging and watch for any indicator lights. This step confirms whether the battery is recoverable from a deep discharge.
Tip: Use a wall outlet instead of a computer USB port for faster, more reliable charging. - 2
Perform a forced reset
While the device is connected or after disconnecting, press and hold the power button for 10–15 seconds. If there is a combination button sequence for your model, apply it as documented in the user manual. Release and wait a moment to see if the device boots.
Tip: If there is a LED pattern, note it before and after the reset to help support diagnose. - 3
Check the cable and port integrity
Inspect the charging cable for any frays, kinks, or damaged connectors. Try a different certified cable or adapter, ensuring the port on the headphones is clean and free of debris. A poor connection can mimic a dead battery.
Tip: Clean ports gently with a dry, microfiber cloth; avoid liquids. - 4
Test with alternate power sources
If available, try charging the headset from a different outlet, power bank, or USB charger with a known good performance. This helps determine if the original power source is at fault.
Tip: Avoid high-current fast chargers that are not recommended for your model unless specified by JBL. - 5
Seek professional assistance if needed
If the headphones still won't power on, contact JBL support or an authorized service center. Provide your model, serial number, and a description of the symptoms observed.
Tip: Document the date of purchase and any warranty information to expedite service. - 6
Document and monitor resilience
Keep notes on charging times, LED patterns, and reset outcomes. If power-on issues reoccur, schedule a battery health check and evaluate long-term reliability.
Tip: Regular maintenance improves reliability and helps catch issues early.
Diagnosis: Headphones won't power on after charging
Possible Causes
- highBattery completely discharged or degraded
- highFirmware hang or failed reset
- mediumCharging cable/port issue blocking power
- lowInternal hardware failure
Fixes
- easyCharge with the original cable and a reliable power source for at least 60 minutes
- easyPerform a forced reset by holding the power button for 10–15 seconds
- easyTry a different charger or USB port to rule out cable/port problems
- mediumIf still not on, contact JBL support or an authorized service center
People Also Ask
Why won't my JBL headphones turn on even after charging?
Common reasons include a deeply discharged battery, a firmware hang, or a faulty charging cable/port. Start with a full charge using the original cable, then perform a forced reset. If the issue persists, proceed with a diagnostic flow to identify whether it needs professional service.
The most likely causes are a drained battery, a firmware issue, or a charging path problem. Start with a full charge and a reset, then follow the diagnostic steps if needed.
How long should I charge JBL headphones before trying to power on?
Generally, allow at least 60 minutes of charging with the original charger to rule out a deeply discharged battery. If the LED indicators show activity sooner, you can test powering on earlier, but avoid interrupting charging unnecessarily.
Charge for about an hour with the original charger before testing power.
What is the correct reset procedure for JBL headphones?
The reset method varies by model but typically involves holding the power button for 10–15 seconds until the indicator flashes. If your model uses a separate button sequence, refer to the user manual or JBL support site for model-specific steps.
Hold the power button for 10–15 seconds to reset, or check your model’s instructions.
If reset doesn’t fix the issue, what should I do next?
If a reset doesn’t resolve the problem, try a different charging cable and port to exclude cable faults, then consider a firmware recovery or contacting JBL support for service.
If reset fails, test another charger and contact JBL support if needed.
Could moisture or debris cause a power-on failure?
Yes. Clean the charging contacts gently and ensure the port is dry. Moisture or debris can block charging and prevent turning on. If cleaning doesn’t help, seek professional assessment.
Moisture or debris can stop charging; clean gently and re-test.
When should I replace JBL headphones instead of repairing?
If the battery health is poor or hardware faults persist after professional inspection, replacement might be more cost-effective than repair, especially for older models.
If battery health is bad or repairs are costly, replacement may be best.
Watch Video
What to Remember
- Charge with original cable first
- Reset the device to recover from firmware hang
- Test with a different charger to rule out cable/port issues
- If unresolved, contact JBL support with details