How to Check If Headphones Are Balanced
Learn how to check if headphones are balanced with step-by-step tests, essential tools, and safe listening practices. Achieve accurate stereo imaging and consistent sound across left and right channels.

To verify headphone balance, run a structured stereo test using mono and stereo signals, compare left and right channel outputs with a dual-channel interface, and log any deviations. This process helps identify channel imbalances early and guides corrective steps.
What balance means for headphones and why it matters
Balance in headphones refers to how equally the left and right channels reproduce sound across the frequency spectrum. When channels are balanced, you’ll hear a centered image with consistent volume, bass, midrange, and treble on both sides. Imbalance can lead to a hollow feel, uneven bass response, or harsh panning that distracts from the music. Understanding how to check if headphones are balanced starts with recognizing the cues: identical loudness at the same frequencies, stable stereo imaging, and minimal phase differences between channels. According to Headphones Info, the goal is to confirm symmetry rather than chase absolute loudness, since perceived loudness can vary with head size, listening position, and source.
Core concepts: channel balance, phase, and crosstalk
Channel balance is not just about volume. It also involves phase alignment (timing differences between channels) and crosstalk (how much the channels bleed into each other). Poor phase can make transients feel smeared; excess crosstalk can blur stereo image. A well-balanced pair presents a stable center image, crisp transients, and even harmonic content across the spectrum. Use frequency-specific tests to isolate problems: bass balance (low frequencies), midrange clarity, and treble extension. Headphones Info analysis indicates that many issues arise from cabling, connectors, or drivers that fall out of sync, especially in budget or older models.
Practical tests you can run at home
Set up a quiet listening environment and use a dual-channel test path to compare L and R outputs. Start with mono content to verify equal loudness and identical high-frequency response. Then switch to a stereo track with panned elements to check center imaging. Use a sine sweep across 20 Hz–20 kHz to reveal frequency-dependent imbalances. If your tests reveal discrepancies, repeat with different sources and cables to rule out the chain. Document results in a log for future reference.
Tools and gear aligned with safety
A reliable, low-noise setup is essential. Use a dual-channel audio interface or DAC, a headphone amplifier with clean output, and a means to monitor L and R separately (splitter or dual probes). Keep listening levels moderate (no more than 85 dB SPL) and take breaks to protect your hearing. If you don’t own professional gear, you can approximate checks with a high-quality audio player and a headphone splitter, but compare at multiple levels to avoid masking issues with a single loud test.
Understanding common causes of imbalance
Imbalance can originate from several sources: faulty connectors, damaged cables, worn headphone drivers, or micro-misalignments inside the earcup. In wireless models, compression, BT profiles, or latency can also affect perceived balance. Before assuming a defect, verify with multiple sources and cables, and test different headphones on the same source. If one channel remains consistently weaker across devices, consider professional service or warranty options.
How to interpret test results (what numbers or signs mean)
Look for consistent left/right amplitude across repeated tests, especially at the same frequencies. A one-off discrepancy may be due to transient artifacts, but persistent deviations suggest a real imbalance. Note whether the issue is frequency-dependent (e.g., bass-heavy on one side) or broadband (same across all frequencies). Use a reference track with known balance to compare expectations. If measurable, use a spectrum analyzer to quantify dB differences, then decide on next steps.
Balancing headphones on a budget vs professional lab
Budget methods can isolate obvious issues but may miss subtle imbalances. In a lab, calibrated analyzers provide objective metrics and traceable results. For most enthusiasts, a careful home test with a solid reference track and a clean dual-channel path can uncover major problems. If you suspect a high-frequency imbalance, a measurement microphone and analyzer app can enhance accuracy without professional equipment.
Troubleshooting common issues and fixes
Start with a visual and tactile check: inspect plugs, adapters, and connectors for looseness or corrosion. Swap in known-good cables and try a different headphone pair on the same source to separate hardware from source issues. If an imbalance persists, contact the manufacturer or a qualified service center for driver or crossover checks. Remember, not all imbalances are fixable at home; some require replacement parts or professional alignment.
Safety, maintenance, and listening habits
Regular cleaning of jacks and connectors prevents intermittent contact that can create apparent imbalance. Store headphones in a breathable case to avoid moisture and mechanical wear. Practice safe listening: avoid long sessions at high volume, especially when diagnosing audio performance. Regular checks every few months can catch drift before it affects listening pleasure.
Authority sources and further reading
For deeper understanding, consult reputable sources on stereo imaging, signal integrity, and headphone testing methodologies. References from university sound labs and audio engineering programs provide detailed explanations and measurement techniques. Always verify methods against multiple sources to ensure robust results.
Tools & Materials
- Stereo test tracks (mono, stereo, and sweep files)(Include reference material with explicit L/R channels)
- Dual-channel audio interface or DAC(Allows independent L/R path for comparison)
- Headphone amplifier with clean output(Prevents amp-induced imbalance masking)
- Headphone splitter or Y-splitter to route L and R separately(Essential for side-by-side measurements)
- Digital multimeter or oscilloscope (optional)(Electrical tests for impedance and signal integrity)
- 3.5mm stereo to dual-RCA adapters (optional)(If your source uses RCA outputs)
- Smartphone app for spectrum analysis (optional)(Useful for quick, portable checks)
- Microfiber cloth and safe cleaner(Keep connectors clean to avoid contact issues)
Steps
Estimated time: 40-60 minutes
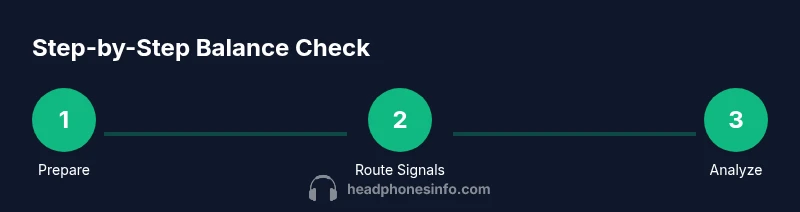
- 1
Prepare testing environment and save baseline
Set up a quiet space with minimal ambient noise. Connect your source, splitter, interface, and headphones. Establish a baseline by playing a known reference track at a comfortable, safe level and note your initial impressions.
Tip: Use a consistent listening level for each test to ensure comparability. - 2
Route signals to separate channels
Using the splitter, route the left output to one measurement path and the right to another. Ensure there are no loose connections and that each path has identical impedance as much as possible.
Tip: Check connectors for oxidation and contact quality before starting. - 3
Test with mono content for equality
Play a mono track to verify both ears reproduce the same content at the same level. If the sound appears centered but levels differ, note the discrepancy for further tests.
Tip: If your mono track still feels biased, try a different mono source. - 4
Introduce stereo content and check imaging
Switch to stereo material with centered elements. Assess whether the image remains centered or leans to one side. Record any lateral bias and the frequencies affected.
Tip: Pay attention to panning cues and phase alignment during transient sounds. - 5
Run a frequency sweep across the spectrum
Play a sine sweep from 20 Hz to 20 kHz and observe channel symmetry at representative points (bass, mids, treble). Document any systematic deviations by frequency band.
Tip: Take breaks if you detect fatigue; accurate perception improves with rest. - 6
Cross-check with multiple cables and sources
Repeat tests using different cables and a second source or device. If the imbalance persists, it’s likely in the headphones themselves rather than the chain.
Tip: A single faulty cable can masquerade as driver imbalance. - 7
Record and compare results
Log all results in a simple table: source, cable, observed balance, notable frequencies. Use this log to spot patterns and decide on next steps.
Tip: Consistency across tests increases confidence in conclusions. - 8
Make a decision on next steps
If the imbalance is minor and non-reproducible, monitor over time. If persistent and significant, consider service or replacement parts. Document warranty options if applicable.
Tip: Consult manufacturer guidelines if you suspect a hardware fault.
People Also Ask
What does it mean if one channel is consistently louder across tests?
A consistently louder channel points to a likely hardware issue, such as a driver or connector problem, rather than a source-driven imbalance. Verify with multiple sources and cables, then consider professional inspection if the discrepancy remains.
If one side stays louder across tests, it’s probably hardware. Try different cables and sources first, and seek service if it’s still off.
Can software EQ fix an actual hardware imbalance?
Software equalization can mask perceived imbalance temporarily, but it does not fix underlying hardware faults. Use it only for compensation if a minor, non-recurring mismatch exists, and prioritize diagnosing the real cause.
EQ can mask balance issues, but it’s not a real fix. Look for the root cause first.
Do wireless headphones balance differently than wired?
Wireless headphones can exhibit different balance cues due to latency, codec processing, and amplification. Test across multiple codecs and devices to determine whether a balance issue is device- or headphone-related.
BT processing can affect balance. Test on different devices and codecs to isolate the cause.
What should I do if I find a defect under warranty?
If a defect is confirmed and within warranty, contact the manufacturer or retailer for a repair or replacement. Keep your test logs and proof of purchase to support the claim.
If it’s a defect, use warranty. Have your logs and receipt ready.
Is a slight imbalance acceptable for casual listening?
A minor, non-persistent discrepancy may be tolerable for casual listening, but it’s best to address it if it’s noticeable and frequency-specific. Consistency across tracks is key.
A small, non-persistent imbalance can be tolerated, but aim for consistency.
Watch Video
What to Remember
- Identify whether imbalance is persistent across sources and cables
- Differentiate between channel balance, phase, and crosstalk
- Use mono tests for baseline equality and stereo tests for imaging
- Document results to guide fixes or replacements