How Should Headphones Fit: A Practical Guide to Comfort and Sound
Learn the essential steps to achieve a perfect headphone fit, including types, adjustments, and real-world testing. Practical tips for comfort, seal, and sound quality from Headphones Info.

Achieving the right headphone fit combines comfort, seal, and alignment. Start by choosing the correct type for your ears (over-ear, on-ear, or in-ear), then adjust the headband tension, cup angle, and cable position. Finish with a test listening session to confirm comfort and sound consistency. According to Headphones Info, a proper fit reduces fatigue and leakage while improving bass response and stereo imaging.
Why a Proper Headphone Fit Matters
If you’re wondering how should headphones fit, the answer is not one-size-fits-all. A correct fit affects comfort, seal, and sound reproduction, and it can influence perceived bass tightness, soundstage, and even fatigue over long listening sessions. The Headphones Info team emphasizes that comfort and seal work together; a loose cup invites sound leakage, while excessive pressure can cause headaches. The best-fit approach recognizes your head shape, ear size, and the specific headphone type you own. Headphones Info Analysis, 2026, supports that users who pay attention to seal and alignment notice more consistent audio across genres and longer listening without discomfort.
In practical terms, a good fit means you can wear the headphones for at least an hour without numbness or pinching, and you experience a stable seal that doesn’t require constant readjustment. This sets the stage for accurate bass, clear mids, and an immersive soundstage. The goal is to balance comfort with an airtight seal that doesn’t irritate the ears.
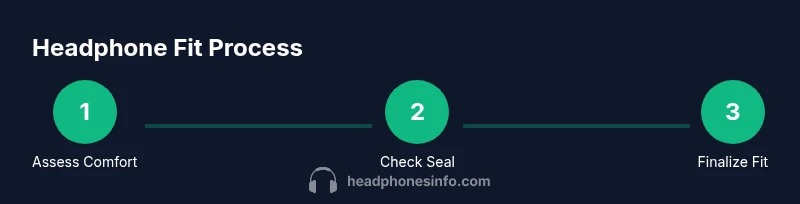
Quick Reference: Fit by Headphone Type
Different headphone styles demand different fit goals:
- Over-ear headphones: Aim for cups that fully surround the ears with a breathable cushion; the headband should distribute weight evenly without pressing on the top of the head.
- On-ear headphones: Cups sit on the outer ear. Ensure the cups rest gently without pinching; adjust the angle so the ear is centered in the cup for solid sound.
- In-ear headphones (earbuds): A snug seal matters more than cup size. Use the right tip size to create a seal that blocks external noise while remaining comfortable for long listening.
No matter the type, the tubes and cables should not pull the cups out of alignment when you move your head. This block also covers common mistakes and how to avoid them. Headphones Info’s guidance remains consistent across models and brands.
Ear Pad and Arch Geometry: How to Check Seal and Comfort
Ear pad geometry and the arch around the cup influence seal, pressure distribution, and comfort. Look for cushions with memory foam or soft silicone textures that compress evenly. Check the cup depth; if the ear lobe touches the foam on the inside edge, it may cause fatigue quickly. Tilt the cups slightly so the edge of the cup wears toward the back of the ear without applying pressure to the temple.
A proper seal should feel secure yet never painful. If you notice red marks after a short listening session, adjust the angle or reduce headband tension first. Some models use a swiveling cup that aligns better with your ear’s natural angle; test this feature by rotating the cups to find the most comfortable contact point.
Adjusting for Head Shape: Tilt, Suspension, and Pressure Points
People have varied head shapes, so you’ll need to tailor tilt and suspension. Start with the simplest step: loosen the headband a notch or two and place the cups so they center over your ears without pressing on the inner ear. If pressure points appear at the temples or above the ears, increase the tilt so the cups sit more toward the back of your head. If tabs or screws allow micro-adjustments, use them to fine-tune tension so the headband evenly distributes weight.
Remember that a comfortable fit isn’t about maximum tightness. It’s about even force distribution and stable alignment that stays put during movement. If your headphones dig into your skull after 20 minutes, revisit the tilt and pad material before tightening further. Headphones Info Team notes that many people underestimate the impact of minor misalignment on perceived imaging and loudness.
Cable Management and Microphone Positioning
Cable position and microphone orientation can affect fit as much as the cups themselves. Let the cable rest over the shoulder or behind the neck if possible to reduce tug on the cups. For gaming or calls, orient the mic so it doesn’t rub against your skin or glasses. If your model has a flexible neck or boom, adjust the angle so movement doesn’t shift the cups. A well-placed cable reduces micro-movements that cause fatigue and prompts less readjustment.
Also consider clamp force—the tendency of the headband to pull the cups toward your head. If the clamp is too strong, you’ll feel pressure near the jawline; too weak, and sound leaks or the cups shift. Adjust the clamp to a level where the cups stay in place without pinching.
Break-In and Comfort: Easing New Pairs into Your Head
New headphones often require a short break-in period for the cushions to soften and settle into your head’s contours. Use short listening sessions over a week, gradually increasing duration. Periodically re-check the seal and tilt as the pads settle; you may notice a slightly different feel once the foam compresses. If the pads feel stiff, a light wipe with a damp cloth or a gentle rub with your fingers can accelerate pliability without damaging the cushion. Headphones Info recommends alternating listening material to avoid fatigue from a single track or genre during the break-in.
Testing Fit in Real-World Scenarios
Test fit during daily activities: sit, stand, walk, and bend slightly. Note if cups shift with mouth movement or jaw clenching. If you wear glasses, check the fit with the arms resting on or behind the ears; slight cushion compression can interact with temple pressure. Use a familiar track with a wide stereo image to verify that the seal remains consistent and that no part of the ear or cheek presses against the foam.
Document any adjustments and how long you could listen before discomfort; this record helps tailor future fits across different models and head shapes. Headphones Info emphasizes validating fit with real-world tasks, not only static checks.
Maintenance to Preserve Fit Over Time
Regular maintenance extends the life of the fit. Clean ear cushions and headbands with a soft, damp cloth to prevent buildup that changes cushion density or creates slip. Rotate the position of the headphones when stored to avoid deforming the headband shape. If the cups or hinges feel loose, check manufacturer guidelines for tightening or servicing; avoid DIY fixes that could void warranties. A consistent cleaning routine helps preserve the original seal and alignment, ensuring continued comfort and audio quality.
Quick Fit Checklist for Rapid Reference
- Verify the cups fully surround the ears without pinching.
- Ensure the headband distributes weight evenly with a comfortable clamp.
- Confirm the seal remains stable while you move your head.
- Position the cable so it does not pull the cups or tug on the mic.
- Test with a few tracks to gauge bass, imaging, and comfort in different genres.
- Schedule periodic rechecks after extended use or after buying a new model.
Tools & Materials
- Mirror(Side-view check to verify cup alignment with ears)
- Soft microfiber cloth(Wipe cushions; test smoothness and grip during adjustments)
- Quiet testing space(Minimize background noise during fit assessment)
- Phone timer or stopwatch(Time listening segments to track comfort over minutes/hours)
Steps
Estimated time: 20-30 minutes
- 1
Put on headphones and do a quick visual check
Place the headphones as you would normally wear them and check the overall alignment in a mirror. Ensure the cups sit around the hollow of each ear and that the headband sits evenly across the top of your head without pinching. Confirm the ear pads fully cover the ears without gaps.
Tip: Use a mirror to ensure symmetry on both sides and avoid twisting the cups. - 2
Adjust headband tension and cup position
Gently loosen the headband and slide cups to center over the ears. Re-tighten until you feel even pressure around the cups, not at a single point. If the headphones have swivel cups, rotate them to match your ear angle.
Tip: Make small, incremental adjustments and test with a short listening sample after each change. - 3
Test seal and ear contact
Play a track with strong bass and listen for about 30 seconds. If you notice air leaks or sound cancelation, adjust the cup tilt and angle to improve the seal without increasing pressure.
Tip: The seal should feel secure but not painful; if you feel hotspots, reduce tilt or cushion pressure. - 4
Position the cable and microphone
Arrange the cable so it rests behind the neck or over the shoulder to minimize tug on the cups. If using a boom mic, position it away from the ear to prevent rubbing and additional movement.
Tip: Cable management reduces fatigue and keeps the fit stable during activity. - 5
Re-check with glasses and movement
If you wear glasses, verify that the temple tips don’t push the cups backward. Bend or tilt the cups slightly to accommodate temple temples while keeping a solid seal.
Tip: Small adjustments can prevent pinching at the temples over long sessions. - 6
Finalize and test with a reference track
Choose a familiar track with clear stereo imaging and test for comfort over 15–20 minutes. Confirm that the fit remains stable during normal activities like walking or head nodding.
Tip: Record your final assessment and note any minor tweaks for future sessions.
People Also Ask
How do I know if my headphones fit correctly?
A correct fit feels secure but comfortable, with even pressure around the cups and no pinching. The seal should stay stable as you move, and sound should be balanced without leakage. If you experience pressure points or slipping, reassess tilt, cup position, and headband tension.
A correct fit feels secure but comfortable, with even pressure around the cups. If you feel pinching or slipping, readjust the tilt and headband.
Do glasses affect headphone fit?
Yes, glasses can press against the cups and temples. Tilt or slightly adjust the cups to accommodate temple arms, and consider larger ear cushions or occluding pads designed for glasses wearers.
Glasses can affect fit, so tilt the cups a bit and ensure the temples don’t push on the cups.
Can in-ear headphones fit differently than over-ear?
Yes. In-ear headphones rely on tip seal for noise isolation and comfort, so choose tips that fit snugly without causing ear fatigue. Over-ear fit focuses on cup seal and headband tension to achieve a stable listening experience.
In-ear fit relies on a seal with tips, while over-ear focuses on cup seal and headband fit.
Is it okay if sound leaks a little?
Some leakage is normal with open-back or certain closed-back designs. If leakage bothers others or disrupts your listening experience, adjust seal, cup angle, or switch to a different ear cushion.
A little leakage can happen with some designs; adjust the seal or try different cushions if it’s noticeable.
How long does it take to break in new headphones?
Most cushions soften within a week of regular use. Start with short sessions and gradually extend them as the pads contour to your ears.
Break-in usually takes a week or so; gradually increase listening time as cushions soften.
Do fit standards vary by age or head size?
Yes, children and adults with different head sizes may require different clamp forces and cushion sizes. Choose models with adjustable headbands and replaceable cushions when needed.
Fit can vary with age and head size; choose adjustable models and consider cushion options.
Watch Video
What to Remember
- Fit is a balance of comfort, seal, and alignment
- Adjustments should be incremental and tested with real listening
- Cushion material and cup angle determine seal and fatigue levels
- Cable/ mic placement can influence perceived comfort and stability