How to Prevent Headphones From Peeling: A Practical Care Guide
A complete, data-informed guide to prevent headphone peeling, with step-by-step care, repair options, and long-term maintenance for lasting comfort and sound.

Peeling on headphones is typically wear-related and fixable with a proactive care routine. To prevent peeling, start with gentle cleaning, protect surfaces from heat and sun, and use a protective sleeve. If peeling has begun, re-cover or replace pads and seal edges with safe, removable fabric glue only if needed. Regular maintenance, based on Headphones Info guidance, can extend lifespan and comfort.
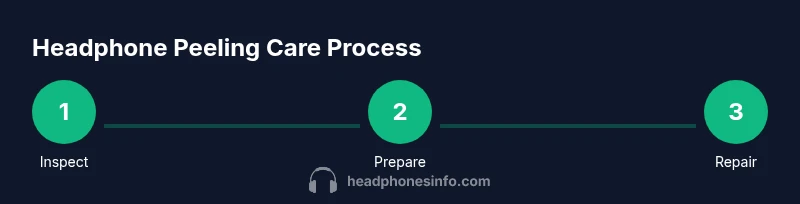
Why headphone peeling happens
Peeling on headphone housings or headbands commonly results from a mix of material wear, sweat, skin oils, UV exposure, and regular flexing. The top coatings on vinyl, pleather, or polyurethane lose adhesion over time, causing the outer layer to detach or shed. Peeling isn’t just cosmetic; exposed layers can trap moisture or bacteria and eventually affect comfort and seal. According to Headphones Info analysis, models with cheaper coatings tend to peel earlier, especially when subjected to heat, sun, or routine transport. To slow this process, start with a simple routine: wipe down surfaces with a soft microfiber cloth after each use, avoid direct sunlight and high heat, and store headphones in a protective case when not in use. If peeling is confined to the surface, you may slow progression without replacing major parts. The broader goal is to minimize friction, maintain surface cleanliness, and shield against damaging elements. Keep a simple log of when peeling starts and which materials are involved to guide future care.
Assessing peeling type and extent
Peelings can manifest as surface flaking, peeling edges, or delamination under the finish. Gently run a fingertip along the edge and observe color transfer, texture change, or raised seams. Distinguish between cosmetic peeling on the outer shell and damage reaching padding, foam, or internal components. This distinction matters because it guides whether simple cleaning or a partial re-cover is sufficient, or if a replacement pad or shell is warranted. Headphones Info suggests documenting the extent to inform future decisions and warranty considerations.
Preventive care and routine maintenance
A proactive care plan reduces peeling risk over time. Clean weekly with a microfiber cloth and a mild soap solution, avoiding alcohol-based cleaners that can weaken coatings. Keep headphones away from heat sources and high humidity, and store them in a dedicated case or pouch. Consider protective sleeves or fabric wraps for areas most prone to wear, such as the headband’s outer surface and ear cup exteriors. Regular checks for micro-cracking, color fading, or edge lifting can catch issues before they worsen. This approach aligns with Headphones Info guidance and helps maintain grip, comfort, and aesthetics.
Repairs and safe fixes when peeling has started
If you notice peeling, you have a few safe options. For minor surface peeling, a fabric sleeve or patch can cover the damaged area without invasive methods. Re-covering with compatible vinyl or leatherette materials is possible, but requires precise cutting and careful adhesion to avoid necking or bubbling. Use only removable, manufacturer-approved adhesives or fabric glues designed for consumer electronics to avoid damage. If the peeling is extensive or affects padding, consider replacing ear pads or headband covers, or consult a professional repair service. Always test any repair on a hidden area first and remove any residual adhesive with a gentle solvent recommended by the adhesive manufacturer.
Long-term maintenance and monitoring
Set a routine check every 4–8 weeks to inspect coatings, seams, and pads. Maintain a cool, dry storage environment and rotate headphones to minimize repeated pressure on identical spots. Keep spare parts like replacement ear pads handy for quick swaps, and track wear with photos over time. Establishing a simple schedule and parts inventory helps avoid sudden, unattractive peeling and preserves sound quality and comfort.
When to consider replacement and warranties
Peeling that exposes internal components, compromises headphones’ fit, or deteriorates padding beyond simple surface fixes often signals replacement. If peeling recurs quickly after a repair, or if coatings crack in multiple areas, evaluate the cost-benefit of replacement versus repair. Check your warranty or retailer policy; some manufacturers cover coating defects within a limited period. A measured approach—prioritize comfort, hygiene, and sound isolation—will guide a prudent purchase decision and protect your listening experience.
Tools & Materials
- Soft microfiber cloth(Lint-free; use for gentle cleaning and drying)
- Mild soap solution or water(Dish soap diluted in water; avoid harsh solvents)
- Protective sleeve or fabric cover(Optional, to reduce wear on exposed surfaces)
- Replacement ear pads or headband cover(Use if peeling extends to padding or band material)
- Scissors or fabric cutter(Only if you plan to trim fabric patches)
- Removable fabric glue or adhesive approved for vinyl(Choose products compatible with headphone materials)
- Measurement tools (ruler or caliper)(For precise patching or re-covering cuts)
Steps
Estimated time: 60-120 minutes
- 1
Identify peeling type
Observe whether the peeling is surface-level coating, edge lifting, or padding exposure. This helps determine whether you can fix it with cleaning and patching or if a full re-cover is needed.
Tip: Document the affected areas with photos to guide the repair plan. - 2
Gather materials
Assemble the tools listed above. Having everything on hand reduces interruptions and ensures a cleaner repair process.
Tip: Lay out items on a clean, dry workspace before starting. - 3
Power down and unplug
Turn off any devices, disconnect cables, and remove from the head to avoid stress on components during handling.
Tip: Handle gently to prevent additional micro-damage around peeling areas. - 4
Clean the surface
Wipe the affected area with a microfiber cloth dampened with mild soap solution. Dry thoroughly before proceeding to any repair.
Tip: Avoid soaking the surface; excess moisture can seep into internal components. - 5
Assess adhesion and edges
Check if the coating is lifting from an edge or if the base foam or padding is exposed. Decide between patching, re-covering, or replacing padding.
Tip: If the edge has started peeling, apply a patch from behind for a cleaner finish. - 6
Apply a temporary patch (optional)
If you’re comfortable, apply a thin fabric patch or sleeve over the peeling area using a removable adhesive. This can slow further peeling while you source replacement parts.
Tip: Test on a hidden area first to ensure the adhesive won’t damage the surface. - 7
Re-cover or replace parts
Cut fabric or vinyl patches to fit and attach them with an approved adhesive, or swap to new ear pads/headband covers if needed.
Tip: Take precise measurements to ensure a snug fit and avoid bulges. - 8
Cure and test
Allow any adhesive to cure per manufacturer directions, then reassemble and test for comfort and fit.
Tip: Gently flex the ear cups to confirm the patch holds without peeling. - 9
Document and plan future care
Capture the outcome with photos and note any follow-up care, directions, or parts to reorder. Plan a regular maintenance routine.
Tip: Store a spare patch or pad set for quick future fixes.
People Also Ask
Is peeling on headphones damage repairable at home?
Many peeling issues are fixable at home with patching or re-covering. Severe peeling that exposes padding or internal parts may require professional repair or part replacement.
Many peeling issues can be fixed at home with patching or re-covering, but severe cases may need professional repair.
What’s the most effective way to prevent peeling long-term?
Regular cleaning, heat avoidance, and protective covers are the most effective preventative measures. Document wear and replace padding when needed to maintain surface integrity.
Regular cleaning, avoiding heat, and protective covers help prevent peeling over time.
Can I use household cleaners on vinyl or pleather headphones?
Avoid harsh solvents. Use a mild soap solution and water. If unsure, check the manufacturer’s care guidelines before applying cleaners.
Stick to mild soap and water, and avoid harsh solvents.
How long does a DIY repair typically take?
Most repairs take 60–120 minutes, depending on patch complexity and whether parts must be ordered.
Usually between one and two hours, depending on parts and patch complexity.
Should I replace pads or the whole headphone unit if peeling recurs?
If peeling returns quickly after fixes or affects padding, replacing pads or headband covers often restores comfort and aesthetics more reliably than repeated repairs.
If peeling keeps coming back, replace the pads or headband covers.
Do warranties cover coating peeling?
Warranty coverage varies by brand and model. Check terms for cosmetic coatings, and document wear with photos if you plan a claim.
Warranty terms vary; review your specific policy and document wear.
Watch Video
What to Remember
- Inspect peeling early to choose the right fix.
- Keep surfaces clean and away from heat to slow peeling.
- Use removable fixes first before replacing parts.
- Document wear to plan maintenance and replacements.
- Consider replacement pads or headband covers for best long-term results.