How to Deal With Peeling Headphones: Repair & Prevention
Learn practical, step-by-step methods to handle peeling headphone exteriors, repair pads, and extend life. Practical guidance from Headphones Info on repair options, materials, safety, and care.

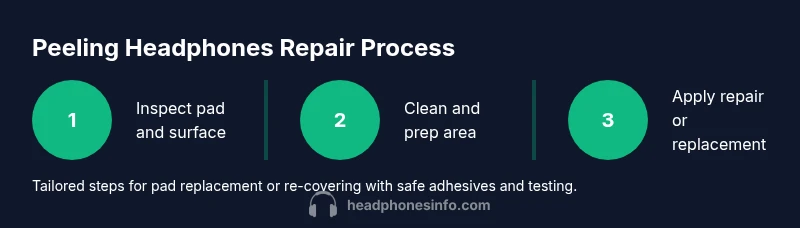
Peeling headphones can be fixed or slowed with practical steps. Start by assessing the pad material and adhesive age, then decide between replacing pads or re-covering the shell. Gather basic tools, follow a careful cleaning and prep routine, and test comfort and sound after repairs. This guide shows safe, data-informed options from Headphones Info.
Understanding Peeling Headphones: Why It Happens
Peeling on headphone exteriors is a common wear issue across many over-ear and on-ear models. When you ask how to deal with peeling headphones, the answer starts with understanding where the damage comes from. The outer materials—vinyl, leatherette, or foam coverings—and the adhesives that hold padding and shells together age over time. Sweat, oils from skin, and exposure to heat also accelerate breakdown. According to Headphones Info, most peeling stems from a combination of adhesive aging and material fatigue, not a single incident. By recognizing the failure points, you can decide whether a repair or a replacement is the most economical and durable option. This section lays the groundwork for choosing a repair path that preserves sound quality and comfort while avoiding rushed, bezel-deforming fixes.
Causes, Materials, and Wear Patterns
Different headphone lines use varied construction. Cheaper models often rely on pressure-sensitive adhesives that degrade with heat and humidity. Mid-range and premium models may use stronger films, but repetitive flexing near the hinge or ear cup can still peel the surface. Foam underlays can flatten, causing the outer cover to peel or crack more readily. The key is to identify which layer failed—outer vinyl finish, foam padding, or the adhesive bond—so you can target repairs without overhauling the entire ear cup.
Repair vs Replacement: Making the Call
Deciding whether to repair or replace hinges on several factors: the extent of peeling, padding integrity, and your budget. If the foam beneath is compressed or moldy, replacement is usually the best long-term choice. If the peeling is cosmetic and the padding remains comfortable and intact, a re-cover or pad replacement can extend life at a lower cost. Headphones Info recommends weighing the expected lifespan of the repair against the cost and compatibility of replacement parts. In many cases, a targeted pad swap or re-cover can restore comfort and aesthetics without losing acoustic alignment.
Cleaning and Prep: The Foundation of a Successful Repair
Before you fix peeling headphones, clean the surfaces thoroughly to remove skin oils, dirt, and old adhesive residues. Use a microfiber cloth dampened with a small amount of isopropyl alcohol (70–90%) and avoid soaking materials. Let all surfaces dry completely—this typically takes a few minutes. Proper cleaning reduces the chance that adhesive bonds will fail again and helps you gauge how much material actually needs replacement. If old glue remains stiff, gently gently lift it with a plastic tool to avoid gouging the shell.
Steps to Choose the Right Repair Method
If you’re wondering how to decide between pad replacement and re-covering, start by inspecting the foam’s integrity and the outer surface’s damage. If the foam feels soft and the damage is only on the cover, re-covering can work well. If the foam is crushed or odors persist, replacing the pads or cushions is wiser. For models with removable pads, you may be able to upgrade to higher-grade cushions for comfort and longevity. For non-removable pads, consider a full cover replacement kit or professional re-covering service if available.
Prevention: How to Extend Headphone Pad Life
Prevention is easier than repair. Regular cleaning after workouts and avoiding prolonged heat exposure can dramatically reduce peeling. Use a soft cloth to wipe away sweat and oils, and store headphones in a cool, dry place. If you wear headphones during workouts, consider models with washable pads or protective covers. Rotate or replace pads on a schedule that matches usage to spread wear evenly. Small maintenance actions sustain sound quality and comfort over time.
Authority sources and further reading
For consumer safety and repair guidance, see authoritative sources on electronics and consumer products. These references provide general safety guidance and industry standards that can inform your at-home repair decisions without replacing professional advice. Always follow the manufacturer’s guidelines for your specific model.
Tools & Materials
- replacement headphone earpads (model-compatible)(Choose velour or leatherette based on comfort and breathability; verify size and attachment style (clip-on, screw, or adhesive).)
- microfiber cloth(For cleaning surfaces without abrasion.)
- isopropyl alcohol (70-90%)(Use to remove oils and old adhesives; ensure surfaces dry before proceeding.)
- plastic opening tool or spudger(Gently pry pads without scratching or cracking shells.)
- adhesive remover or mild solvent (optional)(Only if stubborn old adhesive remains; use in a well-ventilated area.)
- electronics-safe adhesive or double-sided bonding tape (optional)(Choose heat-resistant and label-specified for the pad material.)
- hair dryer or warm air source (optional)(Can help soften adhesives during removal; use on low heat.)
Steps
Estimated time: 60-90 minutes
- 1
Detach ear pads
Power down devices and carefully detach removable ear pads using a plastic tool. Note how padding attached to the frame so you can reassemble correctly. Take a photo if needed to guide reattachment.
Tip: Work slowly to avoid tearing the fabric or foam; handle the shell with both hands. - 2
Clean and prep surfaces
Wipe the shell and pad surfaces with a microfiber cloth lightly dampened with isopropyl alcohol. Remove all oils and old adhesive residue. Allow surfaces to dry completely before proceeding.
Tip: Do not use excessive liquid; stop if you notice moisture near drivers. - 3
Choose repair path
Decide between pad replacement or re-covering based on padding integrity and surface damage. If foam is crushed or odorous, choose pad replacement.
Tip: Test fit replacements without adhesive first to verify alignment. - 4
Apply replacement pads or re-cover
If using new pads, attach them according to your model’s design. If re-covering, apply a thin, even layer of adhesive or tape and press firmly into place.
Tip: Apply adhesive in small amounts and avoid seepage toward the driver area. - 5
Reassemble and test
Reattach any previously removed components. Power on and test comfort, seal, and sound across a few tracks. Check for hot spots or unbalanced fit.
Tip: Let any adhesive cure as recommended by the product guidelines before extended use.
People Also Ask
Why do headphone pads peel in the first place?
Peeling is usually caused by aging adhesives, heat, sweat, and heavy use. The outer cover can separate from foam and glue over time, especially at joints or where the pad flexes. Inspecting the extent helps you decide between repair and replacement.
Peeling happens due to aging glue and wear at the pad joints. Inspect the damage to choose repair or replacement.
Is it safe to repair headphones at home?
Yes, with caution. Use proper tools, avoid liquids near drivers, and follow manufacturer guidance if you can. If the device is under warranty, check terms before attempting repairs.
Yes, but be careful and follow instructions. If under warranty, check terms first.
When should I replace pads vs re-covering?
If foam is crushed or pads are tattered, replacement yields the best comfort and durability. If the foam is fine and only the outer cover peels, re-covering or pad covers can work well.
Replace pads if the foam is worn; re-cover if only the outer cover is peeling.
Will DIY repairs void the warranty?
DIY repairs can void warranties depending on the manufacturer. Check your warranty terms before proceeding, and consider official service options if available.
DIY repairs may void the warranty; verify terms or seek official service.
How long will a repair last?
Durability depends on materials, adhesives, and usage. A well-done repair with quality pads often lasts significantly longer than the initial peeling, especially with proper care.
Durability varies, but quality repairs tend to last longer with proper care.
Are there universal pads that fit most headphones?
Some universal pads exist, but fit depends on cup size, clip style, and ear geometry. Always confirm compatibility with your model before buying.
There are some universal pads, but check compatibility first.
Watch Video
What to Remember
- Assess the pad and adhesive condition before repairing.
- Choose replacement or re-cover based on foam integrity and wear.
- Clean and prep thoroughly to improve adhesive bonding.
- Test fit and comfort after repair, and store headphones properly to prevent future peeling.