Wired Headphones Stop Working: Quick Troubleshooting Guide
Urgent guide to diagnose and fix wired headphones that stop working. Step-by-step checks, safe cleaning tips, and when to replace.

If your wired headphones stop working, start with simple, high-probability causes. The most common issues are a dirty or partially inserted jack, a worn or frayed cable, or a faulty adapter. Begin with quick checks: reseat the plug firmly, inspect the cable for damage, and test with another device or another cable. If none of these fix it, continue with the full guide for deeper fixes.
What to do when wired headphones stop working: quick assessment
When you search for a fix for the problem described by the keyword what to do when wired headphones stop working, you want fast, reliable guidance. According to Headphones Info, the first steps are about basic checks and non-destructive tests. Look for obvious symptoms like a loose connection, a crack in the cable, or a plug that doesn’t seat cleanly in the jack. This quick assessment helps separate the handful of likely causes from rare hardware failures. As you read, keep in mind that audio issues often involve both the headphones and the source device, so plan to test across different devices and cables to isolate the fault. The goal is to identify whether the problem is in the plug, the cable, the jack, or the device output.
Immediate checks you can do in seconds
Before you dive into hardware fixes, run a few fast checks that almost always reveal the issue. Ensure the device is not muted and the volume is set high enough. Reinsert the 3.5mm jack firmly and listen for any change in audio. If you use a USB-C or Lightning adapter, try a different adapter or connect directly if possible. Inspect the headphone plug for debris, dust, or a bent tip. Finally, try the headphones with a different device to see if the problem follows the headphones or stays with the original source. These steps are safe, quick, and often solve the problem without tools.
Isolate the problem: hardware, cable, or jack
To avoid unnecessary repairs, you must find the faulty component. If sound is completely absent on all devices, the problem is likely upstream (cables or jack). If only one device has audio, the issue may be with that device’s output or settings. A crackling or intermittent sound usually points to a damaged cable or loose internal connections. If the inline mic or controls don’t work, the issue might be the dedicated microphone line or a faulty remote. By isolating the component, you can save time and money and move quickly to the right fix.
Step-by-step fixes for common issues
- Reseat and test: Remove and reinsert the plug firmly, ensuring a clean contact. 2) Clean the jack and plug: Use a dry microfiber cloth and, if needed, a small amount of isopropyl alcohol on a cotton swab, never dripping liquid into the device. 3) Inspect for visible damage: Look for kinks, fraying, or crushed cables near the plug; avoid bending or pulling hard. 4) Swap cables or adapters: If you have a spare 3.5mm cable or adapter, test with it to confirm whether the cable or adapter is the fault. 5) Test with a different device: If the problem persists, it’s likely the headphones themselves. 6) Consider professional repair or replacement: If you’re comfortable with basic wiring, you can attempt a simple fixed connection; otherwise, replace the headphones or seek a professional.
Safety, tips, and precautions
When working with audio hardware, avoid liquids near ports and never force a plug into a jack. Use gentle, steady pressure when reseating connectors. If you hear a crackling sound or see visible damage, stop using the headphones to prevent further harm to the device or your ears. Do not attempt to solder or open the headphone housing unless you have proper training. If you opt for repairs yourself, ensure you work on an unplugged source and in a static-free environment.
Preventive maintenance and long-term care
Treat your wired headphones as a precision instrument. Use protective sleeves or strain-relief covers at the plug to reduce wear. Coil cables loosely and store headphones in a case or pouch to avoid kinks. Clean the contacts periodically and keep ports free of dust. Keep replacements—like spare cables or adapters—handy so you can swap quickly if wear happens. Regular checks can prevent most common failures and extend headset life.
When to replace or seek professional help
If you’ve exhausted all quick fixes and the issue remains, the problem is likely a deeper internal fault or driver damage. If the headphones are under warranty, contact the manufacturer for a repair or replacement. For out-of-warranty devices or when you’re uncomfortable attempting repairs, a professional repair service can diagnose and repair the internal connections. In many cases, a reliable replacement cable or a new pair of headphones provides the best balance of cost and performance.
Steps
Estimated time: 15-40 minutes
- 1
Power off and unplug sources
Power down devices and unplug anything connected to the headphones to avoid static discharge and accidental short circuits. This step keeps you safe while you inspect connections.
Tip: Always start with the simplest step when troubleshooting. - 2
Inspect the plug and jack
Look for bending, corrosion, or debris in the jack and on the plug. A clean, undamaged contact is essential for reliable audio.
Tip: Use a flashlight to check for tiny particles. - 3
Test with multiple devices
Try the headphones with a different phone, PC, or audio player. If sound works on one device but not another, the issue is device-specific.
Tip: Document which devices work to help isolate the fault. - 4
Clean and reseat
Gently clean contacts with isopropyl alcohol and reseat the plug. Avoid soaking or pouring liquid into ports.
Tip: Let surfaces dry completely before testing again. - 5
Swap cables or adapters
If you have a spare cable or adapter, connect it to the same source to determine whether the problem is with the original cable/adapter.
Tip: Use quality, known-good accessories for testing. - 6
Decide on repair or replacement
If tests point to internal damage, weigh repair cost against replacement. Consider warranty status and total cost of repair.
Tip: In many cases, replacing the headphones is more economical than a repair.
Diagnosis: Wired headphones stop producing sound or have intermittent audio
Possible Causes
- highDirty or loose headphone jack/contact
- highWorn or frayed headphone cable near plug
- mediumFaulty adapter or source port
- lowDamaged internal driver or connector inside headphones
Fixes
- easyReseat the plug firmly and test on multiple devices
- easyClean jack and plug contacts with isopropyl alcohol and a cotton swab, then re-test
- easySwap in a spare cable or adapter to rule out accessory failure
- easyInspect for visible cable damage; replace the cable if needed
- mediumIf the problem remains, consult a professional or replace the headphones
People Also Ask
Why do wired headphones stop working suddenly?
Common causes include dirty or loose jacks, worn cables, or damaged adapters. Isolating the fault with tests across devices helps identify the most likely culprit.
Common causes are a dirty jack, a worn cable, or a faulty adapter. Run a few tests to identify the faulty part.
How can I tell if the problem is the headphones or my device?
Test the headphones with another device. If the second device works, the issue is with the original device or its port. If not, the headphones are the likely culprit.
If another device also has issues, the headphones are likely at fault.
Is it safe to repair a frayed headphone cable myself?
Basic fixes like replacing the cable or adapter are safe if you have basic tools. Do not attempt complex internal repairs unless you have proper training.
You can swap the cable if you’re comfortable, but avoid tricky internal repairs.
When should I replace wired headphones instead of repair?
If damage is extensive, costs exceed replacement value, or warranty is available, replacement is often more practical.
If repairs are too costly or risky, replacing is usually best.
Do mute or mic controls affect audio quality?
Microphone and inline controls can fail separately from the audio driver. If the mic stops working but the audio is fine, focuses on the mic path.
The mic can fail even if sound works, so test channels separately.
Does warranty cover wired headphone failures?
Warranty depends on the brand and model. Check the original purchase date and coverage terms; contact the manufacturer for service options.
Check your warranty and contact the maker if it’s still valid.
Watch Video
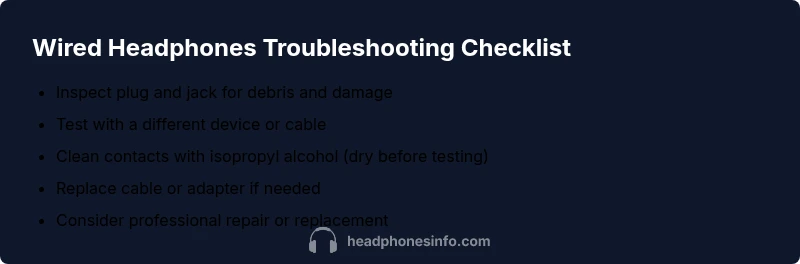
What to Remember
- Check the jack and plug first
- Test with multiple devices to isolate issues
- Clean contacts safely and reseat connections
- Swap cables/adapters before assuming headphone failure
- Consider repair vs replacement based on warranty and cost
- The Headphones Info team recommends proactive maintenance to extend life