How to Deal with Wired Headphones: Care & Repair Guide
A comprehensive, step-by-step guide to dealing with wired headphones — from diagnosing common issues and cleaning connectors to DIY repairs and smart storage habits that extend life and save money.

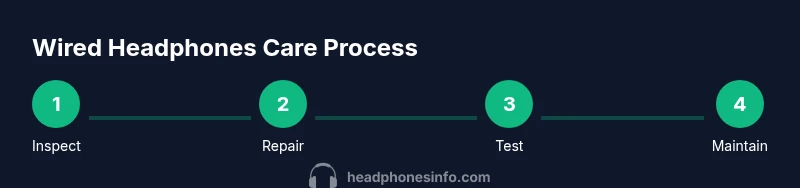
Learn how to deal with wired headphones by diagnosing common issues, untangling cables, cleaning connectors, and choosing between DIY repairs or professional fixes. This guide explains practical steps, safety tips, and when replacement is more cost-effective. Start with a quick inspection, then decide on repair parts, storage habits, and ongoing maintenance to extend headset life.
Understanding wired headphones and why they fail
Wired headphones offer reliable sound with low latency, but their cables and connectors are mechanical parts that endure lots of movement. If you’re asking how to deal with wired headphones, start by recognizing the most common failure modes: a frayed or cracked cable, a loose 3.5mm plug, intermittent audio when the plug is bent, or crackling due to dirty contacts. According to Headphones Info, most wear stems from bending, twisting, and tugging near the plug, coupled with sweat and dust exposure. Identifying the exact point of failure helps you decide whether a quick fix will work or if you should plan a more thorough repair or replacement. This section sets the stage for practical, actionable steps you can take today without specialized tools.
Inspect the cable and plug before you do anything
Before you dive into repairs, perform a careful external inspection. Look for visible kinks, cuts, or abrasions along the cable, and check the plug for bent pins, corrosion, or loose fit in the jack. Rotate the plug slowly while listening for crackling or intermittent sound, which signals a marginal connection. Test across multiple devices to rule out a source problem from your phone or computer. If you notice damage at the plug or near the connector, plan for a plug replacement or cable retermination. This upfront check saves time and helps you estimate costs more accurately.
Cleaning and contact maintenance for better sound
Dirty contacts are a common source of crackling and partial audio. Start by unplugging the headphones and using isopropyl alcohol (at least 70%) on a cotton swab to gently clean the metal contact surfaces of the plug and the receiving jack. Avoid soaking the cable or ports and let everything dry completely before reconnecting. A small amount of dielectric grease on a metal contact can help with corrosion resistance, but use sparingly. Regular maintenance, including periodic cleaning after workouts or outdoor use, reduces the chance of poor contact over time and keeps signals crisp. Wear a gentle touch; forceful scrubbing can worsen the connector.
Basic DIY fixes you can try safely
If the issue seems localized to the plug or the cable near the connector, you may perform a DIY repair without specialized equipment. Carefully cut back the cable to remove damaged sections, then reterminate with a replacement 3.5mm plug or a robust crimp connector. Use heat shrink tubing to insulate the new joint and add a strain relief sleeve to prevent future stress. If soldering is required, work slowly, keep joints clean, and avoid cold joints that create intermittent connections. For many users, a simple plug replacement is enough to restore full function without buying a new pair.
When to replace the cable vs the whole headset
If the damage is extensive or the drivers themselves show signs of wear, replacing the cable or even the entire headset may be more economical than a high-effort repair. If the drivers are in good condition and the housing is sound, a new cable with proper shielding can restore performance at a fraction of the cost of a new headset. Evaluate the warranty status and the availability of compatible cables from reputable brands. In some cases, upgrading to a higher-quality shielded cable with better strain relief yields a longer service life and improved durability.
Cable management to prevent future damage
Preemptive care matters. Use cable organizers or soft ties to prevent tangles and reduce bending stress near the plug. Avoid wrapping cables tightly around devices; instead, use loose loops and a gentle spiral to distribute stress across the length. When coiling for travel, use the “over-under” method to minimize memory and kinks. If possible, store headphones in a dedicated pouch that protects the plug from impact and moisture. Simple habits here dramatically extend life and reduce the need for repairs.
How to store wired headphones for longevity
Storage should minimize tension on the cable and protect the drivers. Keep headphones in a cool, dry place away from direct sunlight and high humidity. For travel, choose a rugged case or a soft pouch that cushions the earpieces and keeps the plug end from bending. Detach the cable from devices when possible and avoid tugging on the plug during storage. Keeping a regular routine of gentle cleaning before storage helps prevent dust buildup and corrosion on the connectors. Consistency in storage behavior yields noticeable gains in reliability over time.
Tools and parts you should keep on hand
Having a basic repair kit ready reduces downtime when issues arise. Essentials include a precision screwdriver set, a soldering iron, rosin-core solder, heat shrink tubing, electrical tape, and a spare replacement 3.5mm plug. A multimeter is optional but useful for checking continuity if you’re comfortable with electronics work. Keep cleaning supplies such as isopropyl alcohol and lint-free wipes handy. With these tools, many common failures can be addressed at home, enabling quick fixes without professional service.
Budget and time expectations for repairs
DIY cable fixes can be inexpensive, typically under the cost of a replacement headset, while professional repair fees vary by region and scope. For simple plug replacements, plan for about 15-45 minutes, plus parts. For more complex cable rewiring or driver issues, estimate 60-120 minutes and consider the value of your time against replacement costs. Headphones with premium drivers or specialized housings may not be worth the repair investment. In many cases, a partial repair followed by longer-term maintenance yields the best balance of cost and performance.
Real-world scenarios and maintenance routines
In daily use, you’ll encounter a few recurring scenarios: a crackling plug after heavy gym sessions, a frayed cable near the connector, or intermittent audio when moving your head. Build a routine that includes a quick visual check before each use, a monthly clean of contacts, and a yearly review of cable integrity. For frequent travelers, invest in a sturdy cable with reinforced strain relief and a protective case. By combining preventative care with occasional repairs, you’ll keep wired headphones sounding bright and reliable for longer.
Tools & Materials
- Screwdrivers (precision set)(Phillips #00-#0 and flathead small sizes)
- Replacement 3.5mm plug or replacement cable(Choose compatible TRS plug or modular cable; match conductor count)
- Soldering iron(25-40W fine-tip iron)
- Rosin-core solder(Lead-free preferred; 0.8-1.0 mm diameter)
- Heat shrink tubing(Different diameters to cover joints)
- Electrical tape(For insulation and strain relief)
- Desoldering braid (optional)(Useful for clean joints)
- Multimeter (optional)(Continuity and resistance checks)
- Isopropyl alcohol(70% or higher for contact cleaning)
- Lint-free cloth(For dry cleaning and wipe-downs)
Steps
Estimated time: 60-120 minutes
- 1
Disconnect and inspect
Power off and unplug from any device. Visually inspect the cable, plug, and housing for obvious damage. Look for cuts, kinks, bent pins, or loose parts that indicate where the fault originates.
Tip: Document any damage with a photo to help plan repairs. - 2
Untangle and straighten
Gently untangle the cord and straighten the cable along its length. This helps reveal hidden wear and ensures you don’t snugly bend joints during testing.
Tip: Avoid pulling hard; use slow, even motions to minimize stress. - 3
Test across devices
Plug into multiple devices and note where the issue occurs (left, right, both ears, or only during movement). This isolates whether the fault is in the cable, plug, or the driver.
Tip: Use a known-good device for reliable comparison. - 4
Open housing if needed
If you suspect a bad connector, carefully open the housing near the plug. Inspect solder joints and the shield to identify loose connections or broken wires.
Tip: Take photos during disassembly to guide reassembly. - 5
Replace damaged sections
Cut away visibly damaged cable sections, then reterminate with a new plug or replace the entire cable. Ensure bare wires are properly tinned and insulated.
Tip: Use heat shrink and strain relief to secure the new joint. - 6
Reassemble and insulate
Carefully reassemble the housing, ensuring no wires are pinched. Apply heat shrink and electrical tape to insulate exposed conductors.
Tip: Double-check that the plug fits snugly in the jack. - 7
Test thoroughly
Reconnect to devices and test at various volumes and movements. Listen for crackling, intermittent sound, or loss in one channel.
Tip: If issues persist, consider a full replacement or professional repair. - 8
Decide on maintenance plan
Based on your test results, decide whether to continue DIY fixes or to replace the headset. Keep a routine maintenance schedule to prevent future failures.
Tip: Set a monthly cleaning and inspection reminder.
People Also Ask
What is the fastest way to diagnose a broken wired headphone?
Start with a quick external check of the cable and plug, then test on multiple devices to see if the issue follows the plug or the cable. Look for crackling when moving the plug and inspect for visible damage. If the problem is localized, a repair is likely feasible.
Do a quick plug-and-device test to see where the fault lies, then decide if a repair is practical.
Can you repair a frayed headphone cable at home?
Yes, if the fray is limited to the outer jacket and the inner conductors are intact. You can trim back damaged sections and reterminate or replace the entire cable. If the wires inside the cable are damaged near the connector, replacing the plug or the whole cable is often easier.
You can fix a frayed cable locally, but if the damage is close to the plug, replacing the cable is usually simpler.
Is it worth repairing expensive wired headphones?
Weigh repair costs against replacement. If parts are affordable and the headset has desirable drivers or build quality, a repair can be worthwhile. For very high-end models, professional repair might still be a good option, but compare with new models.
Consider the cost of parts and labor versus replacement price to decide.
What tools do I need for a DIY repair?
A precision screwdriver set, a soldering iron, solder, heat shrink tubing, electrical tape, and a replacement plug or cable. A multimeter is optional but helpful for verifying continuity. Have isopropyl alcohol on hand for cleaning.
You’ll need basic tools like a soldering iron, replacement plug, tape, and shrink tubing.
How should I clean headphone connectors safely?
Unplug devices and use isopropyl alcohol on a cotton swab to clean the plug and jack contacts. Avoid moisture near drivers and allow ample drying time. Cleaning regularly prevents corrosion and ensures reliable contact.
Clean the plug and jack with a small amount of alcohol and let it dry completely.
Will DIY repairs affect warranty?
DIY repairs can void warranties, especially if you open the housing or alter the plug area. Check the manufacturer’s policy for your specific model and consider professional repair if under warranty.
Opening the device might void the warranty, so verify policy before proceeding.
Watch Video
What to Remember
- Inspect cables and plugs before repair.
- Clean contacts to restore signal quality.
- Decide between DIY repair and replacement based on damage and cost.
- Use proper tools and insulation to extend life.
- Adopt a maintenance routine to prevent future failures.