What to Do If Your Headphones Are Broken: A Practical Guide
Learn how to diagnose, troubleshoot, and decide whether to repair or replace broken headphones. This expert guide from Headphones Info covers safety, common causes, step-by-step tests, warranty tips, and type-specific advice.

If your headphones are broken, you can diagnose the issue, decide between repair or replacement, and follow a safe troubleshooting sequence. This quick guide helps you identify common causes, test components, and plan next steps with practical checks and warranty options. It covers wired and wireless models, explains when to DIY, and when to contact support. According to Headphones Info, a methodical approach reduces cost and frustration.
Quick Diagnosis and Safety
If you’re wondering what to do if your headphones are broken, start with a safety-first diagnostic check. Unplug any detachable cables, disconnect from devices, and power down if rechargeable units are involved. Do not force openings or expose circuitry if you’re unsure; this can void warranties or create safety risks. Visually inspect for obvious damage like cracked housings, frayed cables, or loose connectors. Gently wiggle the cable near the jack and earcups to spot intermittent faults. This initial assessment helps you decide whether the problem is cosmetic, electrical, or related to the signal path. According to Headphones Info, many issues stem from simple, testable causes rather than a failed driver, so a calm, methodical check is worth the effort. The goal is to preserve usable parts and avoid unnecessary repairs when a replacement is more economical or safer to pursue.
Common Causes of Headphone Failure
Headphones can fail for a variety of reasons, and understanding the most common ones helps you target the right solution. The most frequent culprits are cable damage (fraying, loose solder joints, or a broken jack), worn connectors, and strain on the driver enclosure from tight bending. Wireless models often suffer from battery degradation, Bluetooth pairing quirks, or firmware glitches. Moisture exposure, accidental drops, or exposure to extreme temperatures can also degrade drivers or circuitry. Headphones Info analysis shows that diagnosing the root cause quickly improves repair odds and reduces costs; many issues are resolved by a simple cable swap or a firmware reset rather than a full rebuild. Keeping spare cables, pads, and a basic toolkit handy supports faster fixes when problems appear.
Step-by-Step Troubleshooting Overview
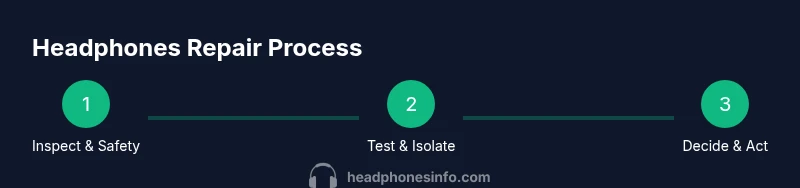
This section provides a high-level roadmap to guide you through what to do if your headphones are broken. The process typically starts with baseline checks (cables, connections, and power), moves to swap tests (different cables, devices, or Bluetooth sources), and ends with evaluating repair vs replacement. If symptoms persist after basic checks, you’ll emerge with a clear decision: repair, part replacement, or new headphones. This overview is designed to align with the subsequent step-by-step instructions and to help you gather necessary information for warranty requests or service quotes. Remember, systematic testing increases your odds of a successful repair and minimizes downtime.
Repair vs Replacement: Making the Call
Choosing between repair and replacement hinges on cost, availability of spare parts, and the item’s age. If the repair estimate approaches or exceeds a practical fraction of a comparable new model, replacement is often wiser. Warranty status dramatically influences this decision: if the device is still under warranty, service through the manufacturer or authorized service centers is typically preferred. Consider the long-term perspective: battery life for wireless models degrades with time, and even a successful fix may be temporary if internal components continue aging. Headphones Info emphasizes weighing comfort, safety, and ongoing support when deciding the best path forward.
Warranty, Repairs, and Safe Handling
Before you attempt any fix, review warranty terms and service options. Most manufacturers offer limited warranties that cover manufacturing defects but may exclude cosmetic damage or water exposure. Save your receipt and check the model and serial numbers; these simplify claims. When handling internal components, work on a clean, static-free surface and use non-conductive tools. If you’re unsure about the repair, prefer professional service or authorized repair partners to avoid warranty voidance. Safe handling also reduces the risk of short circuits or further damage during troubleshooting, saving you time and money.
Tailored Tips for Different Headphone Types
Different headphone types demand distinct approaches. For wired headphones, focus on the 3.5mm or USB-C/Lightning jack, the cable, and the plug housing. For over-ear and on-ear wireless models, battery health and Bluetooth stack reliability are common pain points. In-ear headphones often suffer from cable strain at the yoke or broken earbuds, where replacement parts are more affordable than full unit repairs. If noise-cancelling features fail, ensure the firmware is up to date and verify that the corresponding app settings are correct. Across all types, maintain a simple maintenance routine: clean ports, replace worn pads, and store devices in a protective case to extend life. Headphones Info recommends documenting symptoms and timing to help service providers reproduce the issue and provide accurate quotes.
Tools & Materials
- Screwdriver set (precision)(Small Phillips and flat-head for headphone housings)
- Electrical tape or heat shrink tubing(Insulate exposed connections)
- Replacement cable or jacks (as needed)(Keep on hand for frayed cables or bent jacks)
- Multimeter (optional)(Check continuity in suspected cable faults)
- Soldering iron and tin (optional)(Only for minor internal repairs with care)
- Soft microfiber cloth(Clean surfaces without scratch risk)
- Safety gloves(Protect hands when using sharp tools)
Steps
Estimated time: 20-60 minutes
- 1
Inspect physical condition
Begin by visually inspecting the headphones for obvious damage. Check the cable, plug, ear cups, and headband for cracks, kinks, or loose components. Gently move connectors to identify intermittent faults. This helps determine whether the issue is cosmetic, cable-related, or structural.
Tip: Document visible damage with photos for warranty or repair quotes. - 2
Test with alternative inputs
If wired, try a different cable and device. If wireless, pair with a different phone or computer. Testing multiple inputs isolates whether the problem is the cable, device, or headphones themselves.
Tip: Avoid forcing connections; misaligned jacks can mimic a defect. - 3
Isolate the fault area
Try swapping the cable near the plug and near the earpiece. If sound drops only when flexing a certain spot, the fault is likely in the cable or the connector. Use a multimeter if you have one to check continuity.
Tip: A small crack in the insulation can cause intermittent audio issues. - 4
Reset and update (if applicable)
For wireless models, reset Bluetooth pairings and check for firmware updates from the manufacturer’s app or website. Re-pair the device after updates to ensure a clean connection. This step often resolves software-related dropouts.
Tip: Forgot the device on both ends before re-pairing to avoid stuck pairings. - 5
Assess repair viability
If the fault persists after tests, calculate whether repair costs are reasonable. Consider part availability and whether a complete replacement would be more economical in the long run. Stay mindful of potential warranty coverage.
Tip: If replacement parts are scarce, replacement units may offer better performance and reliability. - 6
Prepare for service or warranty claim
Gather the purchase receipt, model and serial numbers, photos of damage, and a concise summary of symptoms. Contact the manufacturer or a licensed service center to obtain a formal quote or return authorization. Keep all correspondence for reference.
Tip: Having a clear symptom timeline speeds up the process.
People Also Ask
What should I do first when my headphones stop working?
Start with safety checks, unplugging devices and powering down. Inspect for obvious damage, try another cable or device, and test basic connectivity before pursuing repairs. This quick triage often reveals simple fixes.
First, unplug and inspect for damage, then test with a different cable or device to identify the likely faulty component.
How can I tell if the problem is with the headphones or my device?
Test the headphones with multiple devices and cables. If the issue remains across devices, the problem is likely in the headphones; if it changes with the device, the fault is device-related.
If it happens on multiple devices, the problem is probably in the headphones; if it only happens with one device, the fault may be there instead.
Is repairing headphones always cheaper than buying new ones?
Not always. Compare the repair cost, part availability, and expected remaining lifespan with the price of a comparable model. Warranty status can shift the decision toward repair if covered.
Repair isn’t always cheaper; compare costs and remaining lifespan with a new model, and consider warranty coverage.
Will opening the headphones void the warranty?
Opening the unit can void warranties unless the manufacturer explicitly allows internal fixes. Check the warranty terms or consult an authorized service provider before proceeding.
Opening can void the warranty unless stated otherwise, so check terms before you begin.
What should I do if my headphones are still under warranty?
Contact the manufacturer or authorized service center for a no-cost repair or replacement, following the claim process and preserving proof of purchase.
If under warranty, contact the maker for a repair or replacement per their claim process.
How long does a typical headphone repair take?
Repair duration varies by issue and service channel. Factory repairs may take days to weeks, while in-store diagnostics and minor fixes can be completed in an hour or two.
Repairs can range from a few hours to a few weeks depending on the issue and service channel.
Watch Video
What to Remember
- Diagnose safely before opening any device
- Cable and connector faults are the most common culprits
- Firmware and pairing issues often mimic hardware faults
- Weigh repair vs replacement based on cost, warranty, and part availability