How to Clean Headphones After Gym: A Practical Guide
Learn how to safely clean your headphones after the gym, removing sweat, salt, and moisture, while protecting cushions and drivers. Step-by-step methods cover over-ear and in-ear models, plus drying and maintenance tips for long-lasting performance.

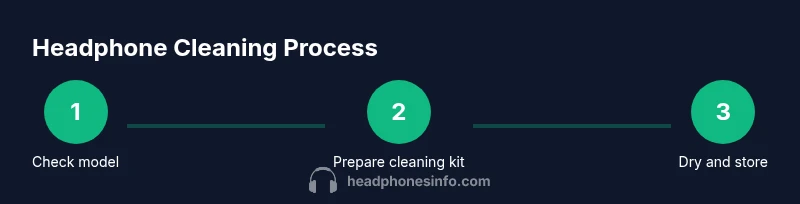
This how-to guide shows you how to clean your headphones after the gym safely and effectively. You’ll learn how to remove sweat and moisture, clean key components (ear cushions, headband, housings, and mesh grills), and dry them properly to protect seals and drivers. The instructions apply to both over-ear headphones and earbuds, with careful steps to preserve longevity.
Why Cleaning After Gym Matters
Sweat, salt, skin oils, and mineralized residues can cling to every surface of your headphones after a workout. Left unattended, moisture can degrade cushions, corrode metal parts, creep into seams, and promote odor or bacterial growth. Regular, proper cleaning helps extend the life of cushions and seals, maintains comfort, preserves sound quality, and prevents pests or allergies from building up on the gear. According to Headphones Info, a disciplined cleaning routine after gym sessions reduces the risk of long-term damage and keeps your listening experience consistent. A quick wipe and a light, thorough clean every week can be enough for many users, but the exact cadence depends on usage, humidity, and how sweaty your workouts are.
For most listeners, the goal is to remove surface moisture and contaminants without saturating any fragile components. If you wear headphones continuously during training, you may need to clean more often. Sweat contains minerals that can leave deposits on earpads and mesh, so paying attention to detail is worth the extra few minutes.
Know Your Headphones: Materials and Construction
Headphones come in many varieties, and the exact cleaning method depends on cushions, housings, and drivers. Leatherette or memory-foam cushions require gentler cleansing than hard-plastic shells. Detachable cushions can often be removed for better access and more thorough cleaning, while non-removable cushions demand careful surface cleaning to avoid soaking the internal circuitry. Wetting fabrics or foams too aggressively can cause deformation or accelerated wear. The headband, ear cushions, and housing often require different approaches; fabric cushions may tolerate mild soap, while leatherette may only need a damp cloth. For in-ear models, the tips and mesh grills are more exposed and can trap sweat more quickly, demanding precise brushing and swabbing. The Headphones Info team emphasizes tailoring the approach to your model to maintain longevity and sound quality.
Essential Tools and Materials
Before you start, gather the tools you’ll need so you don’t interrupt the process. A clean microfiber cloth is essential for wiping without scratching. A soft-bristled brush or cotton swabs help reach seams and mesh grills. A small bowl for a mild cleaning solution (soap + distilled water) is handy. Isopropyl alcohol (70% or lower) can be used on hard surfaces but never directly on open or porous parts like cushions or speaker openings. If cushions are detachable, having replacement pads on hand is useful. A hair dryer on a cool setting (or an air-drying rack) helps speed drying but never uses heat to avoid warping.
Optional but helpful: a gentle detergent (unscented) for fabric cushions, and a secondary microfiber cloth for drying. Always check the manufacturer’s care guide if you have a premium pair, as some plastics and foams have specific instructions.
General Cleaning Best Practices for Any Model
Start with a dry wipe to remove loose dust and sweat. Then dampen your cloth slightly so you don’t saturate any part with liquid. Never submerge headphones in water or cleaning solutions. Avoid spraying liquids directly into cushions, ports, or drivers. Work in a well-lit area so you can inspect micro-dust and residue. For fabric cushions, consider a mild detergent and test a small area first. Always finish with a thorough air-dry, ensuring every component is completely dry before reuse. Finally, after cleaning, reassemble only when everything is dry and re-test the device to confirm it still functions correctly. Protecting the seals and drivers will help maintain bass response and clarity over time.
Cleaning Over-Ear Headphones: Step-by-Step
- Power down and unplug any cables to prevent short circuits. 2) Detach cushions if possible. 3) Remove loose debris with a dry brush or microfiber. 4) Wipe the housing and headband with a cloth lightly dampened with water or a mild soap solution. 5) Clean ear cushions according to material: leatherette—wipe with damp cloth; fabric—use mild soap solution sparingly; memory foam — avoid soaking. 6) Clean mesh grills and ports with a cotton swab; avoid pressing foam fragments deeper. 7) Disinfect hard surfaces sparingly with a microfiber cloth damp with alcohol if needed, avoiding cushions. 8) Dry all parts completely using air-drying or a gentle cool blast from a hair dryer. 9) Reassemble and test. Tip: Do not rush the dry-down; surface moisture can reintroduce odors.
If your cushions are removable, washing by hand according to the manufacturer’s guidance is often safer than machine washing. Remember to keep liquids away from speaker drivers and charging interfaces.
Cleaning In-Ear Earbuds and Small Consoles: Step-by-Step
In-ear models demand careful handling due to small articulations and mesh openings. Start by removing tips and wings if present. Rinse tips with mild soap and warm water if the manufacturer allows it; otherwise, wipe with a damp cloth. Clean the nozzle area and mesh with a dry brush or cotton swab to remove wax residue. Do not soak the earbud shells. Use a slightly damp microfiber to wipe the exterior; avoid the charging contacts and microphone openings. Allow all parts to dry fully in a ventilated space before reattaching tips and storing. Regular maintenance includes inspecting and replacing worn tips to preserve seal and hygiene.
Drying, Reassembly and Routine Maintenance
After cleaning, set all parts on a clean, dry surface or rack to air-dry completely. Do not use direct heat; heat can warp cushions or deform plastic housings. Reassemble once fully dry and test connectivity and sound. Maintain a simple weekly cleaning cadence if you gym frequently, and consider a more thorough monthly cleanse for heavier sweat days. Keep your storage area dry and dust-free to minimize future buildup. Routine maintenance also includes replacing worn cushions and checking for cracks in housings, which can accumulate moisture and odors over time.
Common Problems and Troubleshooting
If you notice persistent odor, repeat a gentle cleaning cycle, ensuring cushions and mesh are thoroughly dried. Sticky residues from sweat may require a mild detergent in a controlled wash for fabric parts. If sound quality fades or drivers feel loose, discontinue use and inspect the housing for moisture or debris. For in-ear models, if tips are degraded, replace them to maintain a secure seal. If you’re unsure about a material’s compatibility with liquids, consult the manufacturer’s care guide or Headphones Info for model-specific advice.
Safety Considerations and Long-Term Care
Always power off and unplug devices before cleaning. Avoid spraying liquids directly onto electronics, especially near ports, microphones, and charging contacts. Use only recommended cleaning solutions and test on a hidden area first. After washing, ensure complete dryness before powering on to prevent short circuits or corrosion. Store headphones in a dry, ventilated place away from direct sunlight or high humidity. A simple weekly wipe plus monthly deeper clean can dramatically extend the life of cushions, seals, and drivers.
Tools & Materials
- Microfiber cloth (lint-free)(For wipe-downs and drying)
- Soft-bristled brush or cotton swabs(Reach seams and mesh grills)
- Isopropyl alcohol 70%(Dampen cloth only; avoid cushions)
- Distilled water(Dilute with mild soap if needed)
- Mild, unscented soap (optional)(For fabric cushions or heavy residue)
- Detachable cushion replacements (optional)(Useful if cushions are worn)
- Small bowl or cup(Mix cleaning solution if needed)
- Hair dryer on cool setting or air-drying rack(Speeds up drying; keep on cool)
Steps
Estimated time: 45-60 minutes
- 1
Power down and disconnect
Turn off the device, unplug cables, and remove detachable accessories to prevent electrical issues and accidental moisture exposure.
Tip: Keep the power off until everything is fully dry. - 2
Detach cushions and removable parts
If cushions or tips are detachable, remove them to access all surfaces and prevent soaking sensitive components.
Tip: Check the manual before removing to avoid tearing. - 3
Dry wipe surfaces
Use a dry microfiber cloth to remove surface sweat, oils, and loose particles before applying any liquid.
Tip: Dry removal minimizes liquid penetration. - 4
Clean cushions by material
Leatherette and silicone cushions get a light wipe with damp cloth; fabric cushions may need a mild soap solution. Avoid soaking foam cushions.
Tip: Test a small area first to ensure colorfastness. - 5
Clean housing and headband
Wipe exterior housings and headband with a damp cloth; pay attention to seams and any crevices where grime collects.
Tip: Do not saturate the foam or electronic vents. - 6
Clean mesh grills and ports
Gently brush mesh grills and ports with a cotton swab or soft brush to remove debris, being careful not to press mesh into the cavity.
Tip: Avoid aggressive scrubbing that could damage the mesh. - 7
Disinfect lightly where appropriate
If desired, wipe hard surfaces with a cloth lightly dampened with isopropyl alcohol; avoid cushions and any exposed drivers.
Tip: Don’t apply directly to any openings. - 8
Dry thoroughly and reassemble
Air-dry all components completely in a ventilated area before reassembly and testing.
Tip: Use cool airflow to speed drying; never heat-dry.
People Also Ask
Can I use isopropyl alcohol on all headphone parts?
No. Use alcohol only on hard surfaces and exterior plastics. Do not apply to cushions, foam, or mesh near the drivers, and avoid soaking any fabric parts. Always test a small area first and follow the manufacturer’s guidance.
Alcohol should only touch hard surfaces; avoid cushions or mesh. Test first and follow your model’s care guide.
Should I wash detachable ear cushions in soap and water?
Detachable cushions can be washed if the material is water-safe, typically with mild soap and warm water. Rinse thoroughly and air-dry completely before reattaching. If in doubt, hand-clean with a damp cloth and replace worn cushions.
Detachable cushions may be washed if allowed by the user manual; otherwise, wipe them gently with a damp cloth and let them dry fully.
How often should I clean headphones after gym?
Clean after heavy sweating sessions or at least once a week for frequent gym users. For light use, a quick wipe after workouts is usually sufficient. Adjust frequency based on odor, residue, and cushion wear.
Clean once a week if you gym often, or after sweaty workouts. Adjust as needed for odor and residue.
Can I speed up drying with a hair dryer?
Use a hair dryer on a cool setting or rely on air-drying racks. Direct heat can warp cushions or distort plastics, so avoid high heat and proximity to electronics.
Cool air only. Avoid hot air that can warp cushions or damage parts.
What if the headphones still smell after cleaning?
Re-clean the cushions and mesh, ensuring complete drying. If odor persists, consider replacing cushions or using odor-neutralizing storage between uses. Persistent odors may indicate deeper residue requiring professional service.
If odor sticks around, re-clean and dry completely. If needed, replace cushions or consult a professional if the smell persists.
Watch Video
What to Remember
- Identify materials before cleaning to choose the right method.
- Never saturate cushions or internal electronics.
- Dry thoroughly before reuse to prevent damage and odors.
- Regular, light wipes extend cushion life and sound quality.
- Follow manufacturer care guidelines for your model.