Beats Studio Wireless Pairing Guide: How to Connect
Learn how to connect Beats Studio Wireless headphones to your phone, tablet, or PC with step-by-step Bluetooth pairing guidance. Troubleshooting and tips included, based on Headphones Info Analysis, 2026.

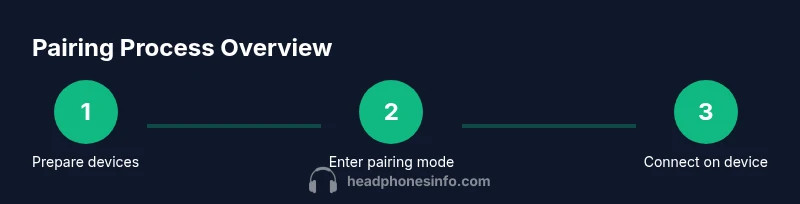
To connect Beats Studio Wireless headphones, put them into pairing mode, enable Bluetooth on your device, and select 'Beats Studio Wireless' from the available devices. If you use multipoint, repeat the pairing steps for the second device and choose the preferred default. This guide from Headphones Info will walk you through steps, troubleshooting, and device-specific caveats.
What you’ll learn and why it matters
If you’re trying to connect Beats Studio Wireless headphones in 2026, you’re in luck—most devices make pairing quick and reliable. This guide breaks down the exact steps to pair, switch between devices, and troubleshoot common issues. You’ll learn how to enter pairing mode, how to enable Bluetooth on your source device, and how to verify audio paths and controls. Throughout, you’ll see practical tips tied to real-world usage, so you can enjoy your Beats without guesswork. According to Headphones Info, a smooth Bluetooth pairing process helps minimize dropouts and latency and improves overall listening reliability. Expect clear, actionable steps, platform-specific notes, and science-backed guidance to keep your headphones ready for daily use. By the end, you’ll know how to connect Beats Studio Wireless headphones to a phone, tablet, or PC with confidence—and you’ll understand how to manage multipoint connections when supported.
Keywords you’ll see here include: how to connect beats studio wireless headphones, Bluetooth pairing, multipoint setup, firmware considerations, and platform-specific tweaks. This content is designed to be practical for audiophiles, casual listeners, and shoppers researching headphones alike.
Compatibility and prerequisites
Beats Studio Wireless headphones are designed for broad compatibility, but some caveats matter. First, check that your device supports Bluetooth, ideally Bluetooth 4.0 or newer for stable audio streaming. The pairing process is generally the same across iOS, Android, Windows, and macOS, though some nuances apply—such as how each OS handles default audio output or how multipoint pairing is remembered. If you rely on a dedicated Bluetooth transmitter or a computer with limited Bluetooth versions, you may need to use a USB dongle that supports wideband or aptX codecs for optimal performance. The goal is for the pair to stay stable, with minimal crackling or sudden disconnects. This section also highlights steps you can take if you encounter issues with certain devices, ensuring you configure your setup for the best possible sound experience.
Additionally, keep firmware in mind: manufacturers occasionally release updates that improve pairing stability and codec support. Headphones Info’s analysis emphasizes that keeping both headphones and source devices up to date reduces compatibility surprises. Remember that wireless headphones thrive on a clean Bluetooth environment—minimize interference by turning off nearby devices that aggressively poll the airwaves when you’re pairing.
Prep: charge and reset Beats Studio Wireless
Before attempting to pair, ensure your Beats Studio Wireless headphones have a sufficient charge. Low battery levels can affect LED indicators and pairing reliability, especially on older firmware. Place the headphones in a comfortable, unobstructed space to reduce the chance of interference from other wireless devices. If you’ve previously paired the headset with other devices, consider performing a soft reset to clear memory and rule out stale pairing data. A quick reset often resolves stubborn pairing problems and helps the headphones forget prior connections that might conflict with the current device. This preparation step sets the stage for a smooth pairing experience and minimizes delays during the actual connection process.
Pro tip: if your device has recently updated its Bluetooth stack, you may benefit from a fresh pairing attempt to ensure the new stack negotiates the best available codec with the Beats.
If you follow these prep steps, you’ll reduce the chance of failed connections and be ready to proceed with the pairing sequence confidently.
Step 1: Put Beats Studio Wireless into pairing mode
To begin pairing, put the headphones into pairing mode. Start by turning them off, then press and hold the power button until the LED indicator flashes (often alternating colors). This signals that the headphones are discoverable. If your model supports multipoint, entering pairing mode may also prepare the device to remember a second connection. While waiting for the LED to flash, avoid moving the headphones or interrupting the pairing process.
Tip: Some models briefly time out after a few dozen seconds if no device is found; if that happens, re-enter pairing mode and restart your source device’s Bluetooth scan. A quick retry usually resolves this without additional troubleshooting. According to Headphones Info, reliably initiating pairing mode is the #1 cause of smooth connections across platforms.
Step 2: Turn on Bluetooth on your device and scan for new devices
On your smartphone, tablet, or computer, navigate to Bluetooth settings and enable Bluetooth. Start a fresh scan for nearby devices, if your device doesn’t automatically populate the list. You should see a device named Beats Studio Wireless or similar in the scanning results. If you don’t see it, try turning Bluetooth off and back on, then rescan. Ensure you are not in a restrictive environment (e.g., airplane mode, VPNs on some laptops can complicate Bluetooth discovery).
Note: On some devices, you may also see a variant name such as “Beats Studio Wireless” paired with a model code. That’s normal; choose the general device name to proceed.
When the device appears, select it to connect. A successful pairing often results in a short confirmation sound from the headphones and a steady indicator light.
Step 3: Pair Beats Studio Wireless with the source device
After selecting Beats Studio Wireless from the list, your device may prompt you to confirm a pairing code or accept a pairing request. Most modern devices do not require a code and will pair automatically once you accept the prompt. If a code is requested, enter the default pairing code shown on-screen or in the manual (commonly 0000 or 1234). Once connected, you’ll usually see a status message indicating a successful pairing, and the headphone LED will settle into a steady color.
If you’re pairing to a Windows PC, you might be asked to set the headset as the default playback device. This step ensures audio plays through the headphones automatically. Once connected, test audio by playing music or a video to confirm the path is correct and the sound is crisp.
Pro tip: verify that the Gains/Volume control on your source device doesn’t mute or reduce the output. A quick audio test helps confirm you’re ready to move on to additional devices if needed.
Step 4: Add a second device (multipoint) if supported
Many Beats Studio Wireless models support multipoint, which lets you stay connected to two devices simultaneously. To enable this, repeat the pairing steps for the second device using the same pairing mode. After pairing, go to the Bluetooth settings on the second device and select Beats Studio Wireless. You may get a prompt asking which device should be prioritized when both are active; choose your preferred primary device. If multipoint isn’t available on your model, you’ll need to disconnect from one device before connecting to the other.
To switch between devices, pause playback on one device and start playback on the other, then ensure the headphones reuse the correct source automatically.
Tip: Some devices remember the last connected device and reestablish the connection on startup; this can be convenient for daily use but may cause confusion when you expect to switch sources quickly.
Step 5: Verify audio path and control behavior
Once pairing is complete, confirm the audio path by playing media and checking that sound comes through the Beats. Test play/pause, skip, and volume controls via the headphone buttons to ensure full remote functionality. Check if the headphones respect the device’s media output when multiple apps are playing in the background. If you notice latency or stuttering, examine the codec negotiation—the Beats Studio Wireless typically negotiates the best achievable codec based on the device and environment.
On some platforms, you can set Beats Studio Wireless as the default audio output per app or for system-wide playback. Ensuring the correct output path is active helps you avoid accidentally routing sound to the wrong device.
Pro tip: Use test tracks with different frequencies (bass-heavy, midrange, high-frequency) to gauge how well the headphones reproduce a broad spectrum of sound.
Step 6: Manage multipoint memory and re-pairing across devices
If you’re using multipoint, your headphones should remember both paired devices and allow quick switching. When you want to swap devices, disconnect or pause playback on the current source, then resume playback on the other device. Some devices automatically reconnect; others require you to select Beats Studio Wireless again from the Bluetooth menu. If memory seems inconsistent, you may need to remove older pairings from the headset or reset the headphones and re-pair from scratch.
Remember: consistent firmware updates on both the headphones and your source devices help maintain reliable multipoint operation. If you encounter instability, temporarily disable multipoint and reconnect one device at a time to restore stability before re-enabling multipoint.
Step 7: Optional firmware checks and updates
Firmware updates can improve pairing stability, codec support, and overall performance. Check the Beats app (or the official Beats software on your platform) for a firmware update when available. If an update exists, follow the on-screen prompts to download and install. Do not interrupt the update process, and keep the headphones charged during the update window.
Firmware improvements can sometimes solve stubborn pairing issues or enhance synchronization between audio and video playback. If you’re not using the app, check the manufacturer’s support site for guidance on manual updates.
Tip: After a firmware update, re-pair your headphones if you notice any new pairing quirks or latency changes.
Step 8: Disconnecting, re-pairing, and restoring defaults
To disconnect, simply turn off Bluetooth on the source device or select “Disconnect” from the device list. If you want to re-pair, follow Steps 1–3 again. If you encounter persistent issues, a factory-like reset of the headphones can clear all memory; consult the manual for model-specific instructions. Keep in mind that resets erase saved pairings, so you’ll need to pair again with each device.
After a reset, test pairing methodically with one device first before attempting multipoint connections. This ensures you confirm the headset is functioning correctly on a clean slate before expanding to additional devices.
Pro tip: In busy environments, reduce interference by temporarily turning off other Bluetooth devices during the initial pairing pass.
Step 9: Platform-specific notes: iOS, Android, Windows, macOS
Each platform has slightly different pathways for selecting the headphone as the default audio output. iOS tends to handle Bluetooth devices gracefully with little configuration; Android users may have to adjust access to media output in advanced Bluetooth settings. Windows and macOS offer per-app audio routing and system-wide default settings that can affect how quickly the Beats reconnect after waking the device.
Familiarize yourself with these platform quirks so you’re prepared to optimize connections depending on your primary device.\n Tip: If you use Windows, you may benefit from updating Bluetooth drivers and ensuring you have the latest Windows updates; on macOS, ensure your user profile has permissions for Bluetooth devices.
"Beats Studio Wireless Pairing Guide" is most effective when you tailor the steps to the device ecosystem you use daily.
Step 10: Safety and care for longevity
Bluetooth connectivity remains robust when you keep the headphones clean and stored properly. Avoid exposing the headset to moisture and extreme temperatures, which can degrade internal components and affect signal integrity. Regularly inspect the charging port and cable compatibility if you use wired accessories for updates or maintenance. When the headphones aren’t in use, store them in a protective case to prevent accidental damage to the speaker grilles or control buttons.
A small amount of routine maintenance can help prevent minor issues from becoming full-fledged connectivity problems. Headphones Info recommends periodic checks to ensure you aren’t facing unexpected dropouts or degraded signal due to dust or corrosion around the port.
Step 11: Troubleshooting quick fixes for common issues
If you run into trouble during pairing, start with the simplest fixes: turn Bluetooth off and back on, restart the headphones, and retry the pairing process. If the headphones aren’t appearing in the device list, ensure they’re in pairing mode and not accidentally connected to a different device. For latency or audio dropouts, check for interference from nearby devices (microwave ovens, wireless speakers) and move the headset to a clearer location. If you still can’t pair, consult the device manufacturer’s help resources for Bluetooth stack compatibility or try a different source device to isolate whether the issue is with the headphones or the source.
These practical steps prevent you from chasing obscure causes and help you identify the real bottlenecks quickly.
Step 12: Quick closing notes for rapid reference
By following these steps, you’ll master how to connect Beats Studio Wireless headphones across multiple devices, take advantage of multipoint if supported, and maintain reliable performance over time. The core ideas are: ensure the headset is in pairing mode, enable Bluetooth on the source device, select Beats Studio Wireless from the device list, and test the audio path. When problems pop up, a structured troubleshooting approach usually resolves most issues without extra tools. With a little practice, pairing becomes almost second nature, whether you’re at home, at work, or on the go.
Tools & Materials
- Beats Studio Wireless headphones(Charge before pairing; enter pairing mode by holding the power button until the LED flashes.)
- Bluetooth-enabled device(Phone, tablet, laptop, or a Bluetooth transmitter. Ensure Bluetooth is on and visible.)
- Manual or quick setup guide(Keep handy for model-specific steps or codes.)
- USB-C/Lightning charging cable(Useful if the headphones need a quick charge before long pairing sessions.)
Steps
Estimated time: 25-40 minutes
- 1
Prepare devices and headphones
Charge the headphones, confirm they’re physically intact, and ensure the source device is ready for Bluetooth pairing with Bluetooth enabled and visible. This avoids mid-process interruptions and ensures a smooth start.
Tip: Charge level matters; a low battery can affect LED indicators and pairing reliability. - 2
Enter pairing mode on Beats
Turn the headphones off, then press and hold the power button until the LED flashes, indicating pairing mode. Keep the headphones stationary while they announce discoverability.
Tip: If pairing mode doesn’t activate, retry with the button pressed longer; a brief press may only wake the device. - 3
Activate Bluetooth on the source device
Open Bluetooth settings and enable scanning for nearby devices. Stay in the Bluetooth menu so you can detect Beats Studio Wireless as soon as it appears.
Tip: If the device has a quick toggle, use it to refresh the Bluetooth radio; this often solves discovery issues. - 4
Select Beats Studio Wireless to pair
From the list of available devices, tap Beats Studio Wireless to initiate pairing. If prompted, confirm any pairing codes shown on the screen.
Tip: If multiple Beats names appear, verify the model name before connecting to avoid cross-pairing with other headphones. - 5
Confirm connection on both devices
Verify the headphone status on the source device confirms a successful pairing, then test audio by playing a track or video.
Tip: Check that the media output is routed to the Beats; on some systems you must select the headset as the default output. - 6
Pair a second device (multipoint) if supported
Repeat the pairing steps for a second device to enable multipoint, then choose which device gets priority when both are active.
Tip: If multipoint isn’t supported, you’ll need to disconnect one device before connecting to another. - 7
Test control and playback on each device
Play/pause, skip, and adjust volume to confirm the headset controls work and that playback resumes correctly after switching devices.
Tip: Some apps may override system audio routing; test across a few apps to ensure consistent behavior. - 8
Update firmware if available
Check for firmware updates via the Beats app or official software and install if prompted. Updates can improve stability and codec support.
Tip: Charge during updates to prevent mid-process failures. - 9
Troubleshoot common issues
If pairing fails, try restarting devices, re-entering pairing mode, or resetting the headphones as a last resort.
Tip: Avoid interference by turning off other Bluetooth devices during the initial pairing pass. - 10
Reconnect after power cycles
After turning devices off and on again, re-establish connections by selecting Beats Studio Wireless in Bluetooth settings and testing playback.
Tip: Some platforms reconnect automatically; if not, you may need to reselect the headset each time. - 11
Platform-specific tweaks
On iOS, Android, Windows, and macOS, adjust per-platform audio routing if needed to ensure Beats Studio Wireless is the default output.
Tip: Keep OS Bluetooth settings updated to avoid unanticipated changes after updates. - 12
Store and care for longevity
When not in use, store in a protective case and avoid moisture or extreme temps. Regular cleaning helps maintain connector and button reliability.
Tip: Remove dirt from the headset ports with a dry brush; avoid liquids near the electronics.
People Also Ask
What do I do if Beats Studio Wireless doesn’t appear in Bluetooth devices?
Double-check that the headphones are in pairing mode and within range. Restart Bluetooth on the source device and retry the scan. If it still doesn’t appear, reset the headphones and try again from Step 1.
If your headphones don’t show up, make sure they’re in pairing mode and close enough. Restart Bluetooth and retry; if needed, reset and start from the beginning.
Can Beats Studio Wireless remember multiple devices?
Many models support multipoint, allowing two devices to stay connected. If yours supports this, you can switch between devices without re-pairing. If not, you must disconnect one device before pairing with another.
Most models can remember two devices. If yours does, you can switch between them; otherwise you’ll need to disconnect first.
Does Beats Studio Wireless support multipoint on all devices?
Multipoint support depends on the specific Beats model and firmware. Check the manual or Beats software for details on whether two devices can stay connected simultaneously.
Multipoint availability depends on your model and firmware; check the manual or Beats software for confirmation.
How do I reset Beats Studio Wireless to factory settings?
To reset, follow the model-specific procedure in the manual, typically involving holding buttons for a set duration. Resetting clears paired devices, so you’ll need to re-pair afterward.
Resetting clears all pairings; after reset, pair again with your devices following the steps.
Why is there audio latency after pairing?
Latency can occur due to codec negotiation, device processing, or wireless interference. Try a different codec setting if available, move closer to the source, or reduce interference by turning off nearby Bluetooth devices.
Latency happens from codec or interference; try changing codecs if possible and minimize nearby Bluetooth devices.
Watch Video
What to Remember
- Pair Beats Studio Wireless in pairing mode, then connect from your device.
- Test playback and ensure the correct output path is chosen.
- Use multipoint if supported to switch between devices smoothly.
- Keep firmware up to date for best compatibility.
- Follow platform-specific steps to optimize reliability.