How to Remove Wired Headphones from Phone: Safe Steps
A comprehensive, expert guide on safely removing wired headphones from phones, troubleshooting common sticking points, and preventing future port issues. Learn practical steps for Android and iPhone devices with tips from Headphones Info.

To remove wired headphones from your phone safely, identify your port (3.5mm, USB-C, or Lightning) and disconnect gently. If the plug feels stuck or there’s debris, follow these steps and test audio afterward. This guide covers safe removal, troubleshooting, and prevention for lasting port health.
Understanding the headphone jack and port on phones
If you’re asking how to remove wired headphones from phone, start by understanding that there are several port configurations. Some devices still include a native 3.5mm jack, while others route audio through USB-C or the Lightning port with adapters. The port type determines the disconnection method and what counts as safe movement. According to Headphones Info, most removal issues stem from debris, misalignment, or a plug that’s seated at an odd angle, not from the software. A careful, straight pull or a gentle wiggle is often enough, but applying force can bend pins or damage the internal socket. This section explains how port design affects removal and what safe handling looks like in practice. You’ll learn to recognize when the port is simply snug versus when something is truly stuck, and how to plan your next steps with minimal risk to your device.
Common scenarios that trigger removal challenges
Several everyday situations can make removing wired headphones feel tricky. A loose adapter, a phone case hugging the jack, or debris lodged in the port can grip the connector. If you recently plugged in while the phone was off or while the screen is locked, you might also experience misalignment, causing the connector to bind. Headphones Info analysis shows that most removal issues are mechanical rather than software-based, and they resolve with careful inspection and a controlled removal motion. In practice, you’ll often encounter one of these patterns: a snug fit due to a thick case, a bent plug, or a small fragment of lint that acts like a wedge. Recognizing which pattern you see helps you choose the right approach—don’t yank, don’t twist, and don’t force the connector to exit.
Safety and preparation before you attempt removal
Before you start any removal effort, set up a safe, well-lit workspace and dry hands. Wake the phone and unlock it so you can observe the screen and access the port without obstacles. If the jack sits behind a protective case or a thick adapter, remove the case or adapter temporarily to clear space and avoid additional binding. This precaution reduces the chance you’ll press the connector at an awkward angle or apply torque that could bend the port's pins. Note that you’re focusing on physical removal rather than digital settings; software updates won’t affect the hurt of a stubborn plug, though a reboot can help after you finish. By preparing properly, you set a calm baseline for the rest of the process. The Headphones Info team recommends performing this in a well-lit area and taking your time.
Practical considerations: adapters, cases, and compatibility
Many phones accommodate wired audio via three main approaches: a native 3.5mm jack, a USB-C port with an inline adapter, or a Lightning port with a proprietary adapter. If you’re troubleshooting a removal, check whether the jack is the same as the one you used previously; some cases and adapters are subtly recessed and can grip the plug. When you plan to remove, keep the phone oriented for a straight pull—pull the connector along its axis rather than at an angle, which can bend the plug or port. If an adapter is involved, test removal with and without the adapter to see which configuration frees the plug. In practice, avoiding adapters that add extra depth is a good idea if you frequently switch between devices.
Debris removal: cleaning without damage
Lint and dust in the jack are common culprits and can make extraction harder. Start by turning off the device or setting it to sleep so you don’t mis-tap during the inspection. Use a clean, dry microfiber cloth to wipe the surface of the jack and plug; avoid liquids or sprays that could seep into the socket. If you need a closer look, use a soft plastic tool or a dedicated earbud cleaning brush, gently sweeping away lint without touching delicate metal contacts. Do not insert metal objects, which can scratch or bend the connector. After cleaning, reattempt removal with a steady, straight motion.
Differences across platforms (Android vs iPhone)
Some platforms handle audio routing in hardware sense via the jack differently, but the physical act of removing should be the same. The port and accessory ecosystem differ, with Android devices more often using USB-C and iPhones using Lightning. If a case is involved, make sure it isn’t obstructing the port or pressing the connector at an angle. In all cases, avoid twisting the connector and maintain a gentle grip. If you’re using a micro-USB adapter or a dedicated dongle, verify its orientation and ensure it is fully seated before attempting removal again. Headphones Info notes that device design can influence how firm the fit feels.
What to do if the plug is stuck despite your best efforts
Stop pulling if you feel resistance that doesn’t lessen within a few seconds. The next step is to inspect for hidden obstruction—switch off the device and re-examine the port with a bright light. Use a soft brush or compressed air to dislodge debris, keeping the nozzle at a distance and at a gentle angle. If nothing shifts, you may need to remove the phone case entirely to visualize the interior more clearly. In some cases, the port can be slightly misaligned; if you see bent or damaged pins, stop and seek professional service.
Testing after removal: confirm audio path is clear
With the plug out, reinsert the headphone or connect a replacement adapter and play a short track to confirm sound is routed correctly. Switch between built-in speakers and the headphone jack to verify both channels work. If you still hear feedback or nothing at all, try rebooting the device to reinitialize the audio stack. If issues persist, test with another pair of headphones to determine whether the problem lies with the original cable, the adapter, or the port itself. Headphones Info notes that cross-checking across accessories can prevent misdiagnosis.
Maintenance and prevention after removal
Keep the jack clean by wiping after heavy use and addressing stray fibers as soon as you notice them. Consider a small cap or dust plug when the device is stored to reduce debris intrusion. Regular lighting checks help catch issues early, and using a microfibre cloth after each daily use keeps the contacts clear. By keeping a simple routine, you minimize the risk of future jamming and ensure smoother removal next time.
Safety and warranty considerations
Do not force components; forcing can void warranty and cause damage. If you suspect port damage, consult the manufacturer’s support page for device-specific guidance. Many devices allow safe self-inspection, but if you see bent pins or visible damage, stop and seek professional repair. Using non-original adapters or clearing solutions can also void warranties, so prefer manufacturer-approved parts when replacements are needed.
Alternatives to wired headphones in daily life
If you frequently switch devices or want to reduce future removal friction, consider wireless headphones or USB-C/Lightning audio solutions. Bluetooth headphones eliminate the need for a jack entirely, while multi-device wireless models can share compatibility across phones, tablets, and laptops. If you do choose wired options, select high-quality, slim adapters and keep your ports clean to maintain reliable removal.
Best practices and next steps
The practical takeaway is to stay patient, identify the port type, inspect for debris, and use a straight, steady pull rather than twisting. Compatibility guides and careful maintenance reduce the chance of a stuck plug. The Headphones Info team recommends documenting any recurring port issues and keeping a small cleaning kit handy so you’re prepared for the next time you need to remove wired headphones from your phone.
Tools & Materials
- Smartphone(Make sure it’s on or awake to view the port clearly.)
- Wired headphones with 3.5mm jack or USB-C/Lightning connector(Have the exact end you typically use handy.)
- 3.5mm to USB-C/Lightning adapter (if applicable)(Useful if your device requires an adapter for audio output.)
- Soft microfiber cloth(For dry cleaning of the jack and plug surfaces.)
- Soft plastic cleaning tool or earbud brush(Gently removes lint without touching metal contacts.)
- Bright light or flashlight(Helps inspect inside the jack for debris.)
Steps
Estimated time: 12-15 minutes
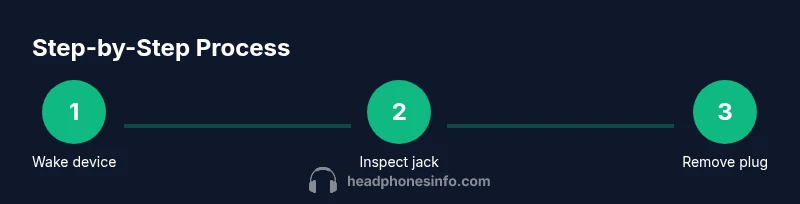
- 1
Wake the device
Power on and unlock the phone so you can clearly view the port and plan your approach.
Tip: Have a well-lit area to improve visibility and reduce accidental slips. - 2
Inspect the plug and port
Look for debris, case interference, or adapter misalignment that could bind the connector.
Tip: Use a bright light to spot lint or small particles inside the jack. - 3
Loosen the connector gently
Slowly wiggle the plug back and forth within a small range to release any grip.
Tip: Avoid aggressive movements that bend pins or the socket. - 4
Pull the plug straight out
With a steady, straight force along the connector’s axis, remove it from the jack.
Tip: Never twist while pulling; that increases risk of damage. - 5
Check for obstructions again
If resistance returns, re-inspect the jack for any new debris or misalignment.
Tip: A second pass often finds hidden lint you missed first. - 6
Clean the jack and plug
Wipe surfaces with a dry microfiber cloth; avoid liquids near the port.
Tip: Be patient and use light strokes rather than scrubbing. - 7
Test with audio
Reconnect or test with an adapter, then play audio to confirm output.
Tip: Test both speaker and headphone modes to verify routing. - 8
Restart if needed
If audio seems inconsistent, reboot the device to reinitialize audio drivers.
Tip: A simple reboot can fix many transient issues. - 9
Inspect for damage
Check ports and connectors for bent pins or signs of wear.
Tip: If you see damage, stop and seek professional service. - 10
Store or re-seat accessories
Keep headphones untangled and store adapters in a safe place.
Tip: Use a dedicated pouch or case to prevent debris exposure. - 11
Consider alternatives
If removal remains challenging, explore wireless options or higher-quality adapters.
Tip: Choose compact adapters to minimize port obstruction. - 12
Document any recurring issues
Note when and where sticking occurs so you can share with support if needed.
Tip: Consistency helps diagnose port wear or adapter incompatibility.
People Also Ask
What should I do first when my wired headphones won't unplug?
Stop pulling and inspect the port for debris or misalignment. Gently clean if needed, then reattempt removal.
Stop pulling and check the port for debris; clean gently and try again.
Is it safe to pry the plug loose with tools?
No. Do not use metal tools or forceful prying, which can bend pins or damage the connector.
No, avoid tools; you can damage the port.
Why does the plug feel stuck only on some devices?
Port geometry, case fit, and adapter depth can vary by device, causing different removal experiences.
Different devices have different jack and adapter fits that can cause sticking.
Will removing wired headphones damage my phone?
If done gently and without force, the risk is minimal. Avoid forcing the connector and inspect for damage.
Gently remove; avoid forcing and check for damage.
What if the port shows bent pins?
Stop immediately and seek professional repair; continuing could worsen damage.
If you see bent pins, get expert help.
Should I replace adapters regularly?
Only replace adapters if they show wear, looseness, or poor fit. Use OEM or reputable brands.
Only replace if there's wear; use reputable adapters.
Watch Video
What to Remember
- Identify port type before removal.
- Never twist or force the plug out.
- Check for debris and clean gently.
- Test audio after removal to confirm path.
- Maintain port cleanliness to prevent future jams.