What’s Wrong with My Earphones? Quick Troubleshooting Guide
Urgent, step-by-step guide to diagnose and fix earphone issues—from loose jacks to Bluetooth pairing—so you can restore sound fast. Practical checks, safe cleaning, and when to replace.

Most earphone problems usually come from a loose connection or damaged cable, especially with wired models, or from Bluetooth pairing glitches on wireless ones. Quick fixes: reseat the plug, test with a different device, and inspect for visible wear or debris in the jack. If unresolved, proceed to deeper diagnostic steps.
Quick diagnostic mindset
When you ask what’s wrong with my earphones, the goal is to map the symptom to a likely cause. In practice, you can triage by asking four questions: Is there sound at all or is it sporadic? Is the issue with one side or both? Does movement affect it? Did the problem start after a drop, tangle, or exposure to moisture? According to Headphones Info, most failures fall into these categories: physical wear (cables, connectors), loose connections, Bluetooth pairing glitches, or software routing mistakes. With this framework, you can decide whether to perform quick at-hand fixes or proceed to deeper diagnostics. The tone should be calm and methodical; rushing can miss obvious causes, such as a partially plugged jack or a grimy contact. The goal is to restore reliable sound without guessing or replacing parts unnecessarily. Headphones Info’s guidance helps structure your approach and minimize wasted time.
Wired vs. wireless: know what you’re fixing
The next step is to distinguish wired earphones from wireless models since the failure modes diverge quickly. Wired earphones most often fail due to a damaged cable, frayed insulation, or a dirty/loose jack. Wireless earphones hinge on Bluetooth pairing, battery life, and firmware compatibility. If you’re staring at a no-sound symptom, quickly check whether the device shows a connected status or if the issue appears even before playback begins. This quick distinction keeps you from chasing the wrong root cause and speeds up resolution. Headphones Info notes that starting with a quick connection check saves time in most troubleshooting sessions.
Quick checks for wired earphones
For wired earphones, start with the simplest checks: unplug and reseat the plug firmly, then try a different device to rule out the source. Inspect the 3.5mm or USB-C connector for dirt, lint, or corrosion and clean gently with a dry microfiber cloth. Wiggle the plug gently while playing audio to see if sound cuts in and out—this hints at a loose connection. If you notice the cable feels stiff, has visible kinks, or the insulation is cracked, you’re likely dealing with internal wear. In that case, consider replacing the earphones or purchasing a sturdier cable. Dry, careful investigation is usually enough to solve most basic wired-earphone issues.
Quick checks for wireless earphones (Bluetooth)
Wireless earphones require a stable Bluetooth link. Start by turning Bluetooth off and back on, then re-pair the device. Forget the earphones in your phone’s Bluetooth settings, reboot the phone or source device, and pair again. Make sure the earphones are charged or have fresh batteries. If the issue persists, check for firmware updates from the manufacturer’s app or settings, and ensure the audio is routed to the correct device in your system’s output settings. Weak battery or old firmware are common culprits in wireless failures.
Testing the drivers and drivers-less paths
Some issues stem from the drivers inside the earpieces themselves or from routing through software on the host device. To differentiate, play audio from multiple apps and use a mono balance test (if your device supports it) to see if audio is missing from one channel. If only one side is silent, the culprit is often a driver issue or a failed speaker. If both sides are quiet but a device shows a connection, you may be dealing with a software routing problem, such as an EQ setting or a muted channel. Headphones Info recommends a systematic dial-down of settings to locate the offending control.
Debris, moisture, and corrosion: physical care
Dust, lint, and moisture degrade contact quality. A quick inspection with a flashlight can reveal dirty contacts in the jack or on the plug. Use a dry brush or compressed air to remove debris; avoid liquid cleaners that can seep into the housing. If moisture was involved, dry the earphones in a warm, ventilated area for several hours and test again. Corrosion on metal contacts is tougher to fix and may require professional service or replacement. Regular cleaning and careful storage dramatically reduce recurring problems. Headphones Info emphasizes gentle handling and avoiding moisture exposure to extend life.
Software and device routing: the invisible culprits
Software and device settings can mute or misroute audio without obvious errors. Check the system volume, mute status, and any active EQ or sound enhancements that could suppress certain frequencies. In apps with in-app audio controls, ensure the output is set to the correct device. If the issue appears after a software update, rollback or reinstall the affected app or reset the device’s audio settings. Firmware updates for earphones, when available, can solve compatibility glitches that otherwise mimic hardware failures. Headphones Info notes that software fixes are a common, often underrated, fix.
When to repair vs replace: decision tips
If you’ve exhausted basic checks and still have no sound or persistent distortion, you’ll need to decide between repair and replacement. Damaged cables, blown drivers, or water exposure often tip the scales toward replacement. For wireless models, if the battery is degraded or the pairing logic fails repeatedly, replacement may be more cost-effective. Compare the cost of a repair with the price of a new pair, factoring in the time and effort required for repair. This decision often hinges on the earphones’ age, build quality, and how much you rely on them daily. Headphones Info reminds readers that choosing wisely now saves frustration later.
Prevention: save time on future fixes
To avoid future headaches, adopt a few habits: store earphones in a protective case, avoid yanking cables, unplug gently, and keep connectors free of debris. Regularly inspect the cable for wear near the connector and replace frayed cables promptly. When using wireless earphones, keep firmware up to date and enable automatic updates if possible. These small preventive steps lower the odds of repeating the entire troubleshooting flow and help you get back to listening faster. Headphones Info emphasizes prevention as the best cure for persistent earphone issues.
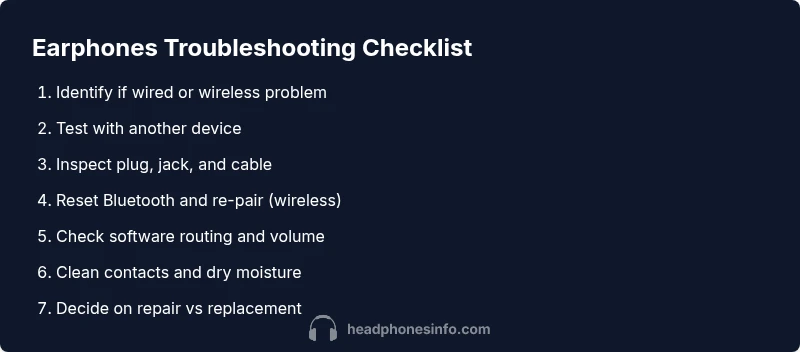
Steps
Estimated time: 45-60 minutes
- 1
Identify the symptom and isolate the model type
Begin by confirming whether you’re dealing with wired or wireless earphones. Note if the problem occurs with all devices or just one. This helps narrow the root cause and reduces unnecessary testing.
Tip: Document the exact behavior (no sound, crackling, one side). It speeds up diagnostics. - 2
Test with a known-good device
Connect the earphones to another phone or computer to see if the issue persists. If sound works on a second device, the problem is likely with the original source rather than the earphones.
Tip: If the second device works, focus on source device settings rather than the earphones. - 3
Inspect the physical connection (wired)
Unplug and reseat the plug firmly; inspect the jack for lint or corrosion. Wiggle the plug gently while audio plays to detect a loose contact.
Tip: Use a flashlight to spot debris; clean with a dry microfiber cloth. - 4
Examine the cable and connectors
Look for kinks, cracks, or insulation damage along the cable, especially near the plug and earpiece. Damaged areas likely require replacement.
Tip: Avoid tugging; handle the cable at the connector rather than mid-cable. - 5
Reset or re-pair becomes a must (wireless)
For Bluetooth earphones, forget the device on your source, reset the earphones, and re-pair. Ensure the device is visible and has sufficient battery.
Tip: Do a full restart of both devices before re-pairing. - 6
Check software routing and audio settings
Verify that output is set to the correct device, test balance, mono settings, and disable conflicting EQ profiles. A misrouted signal can masquerade as a hardware fault.
Tip: Turn off enhancements that could suppress channels. - 7
Clean contacts and dry any moisture
Gently clean contact surfaces with a dry cloth and inspect for moisture. If moisture exposure occurred, allow full drying time before retesting.
Tip: Never use liquids inside the housing; moisture can cause corrosion. - 8
Test after each fix and document results
After each fix, play audio and verify whether the issue is resolved. If it returns, move to the next step to avoid wasted effort.
Tip: Keep a simple log of fixes tried and results. - 9
Decide on repair or replacement
If problems persist after all steps, assess repair feasibility vs. replacement cost. Replacement may be the best option for older models or severely damaged cables or drivers.
Tip: Ask a professional for an honest repair quote if you’re unsure.
Diagnosis: Earphones produce no sound or intermittent audio.
Possible Causes
- highLoose or dirty jack/connector (wired models)
- highDamaged or frayed cable near the connector
- mediumBluetooth pairing issue or outdated firmware (wireless models)
- lowSoftware routing, device volume, or app EQ settings
Fixes
- easyInspect and reseat the plug; clean the jack with a dry microfiber; test with a different device
- easyCheck cable for visible wear or kinks; replace or use a spare if available
- easyFor wireless, remove the device from Bluetooth list, re-pair, and reset the headset's firmware/app
- easyVerify device audio routing is correct, check volume limits and disable any EQ that could mute sound
- mediumIf issues persist, seek professional repair or consider replacement
People Also Ask
Why is there no sound in one earbud?
This is commonly caused by a loose connection or a damaged driver. Check the plug and balance, then test with another device. If it persists, you may need to replace the earphones.
One-sided sound usually means a loose contact or worn driver. Start by reseating and testing with another device, then consider replacement if needed.
My earphones crackle when I move them. What gives?
Crackling points to a damaged or worn cable or a loose internal connection. Inspect the cable, especially near the connectors, and replace if the insulation is damaged.
Crackling usually means a frayed or loose cable. Inspect and replace if you see any damage.
Can moisture damage earphones?
Yes. Moisture can corrode contacts and degrade drivers. Dry them thoroughly and avoid exposing them to water. If corrosion is visible, professional repair may be required.
Moisture can ruin earphones. Dry completely and consider replacement if corrosion is present.
Is it safe to clean earphones with alcohol?
Avoid liquids inside the speaker housing. Use a dry cloth or a barely damp microfiber on the exterior only. Do not submerge.
No, avoid alcohol or liquids. Use a dry cloth for safety.
Why won’t Bluetooth pair after a reset?
Reset and re-pair, ensure the earphones are visible, and check firmware. If needed, forget the device on your source and try again.
If pairing fails after reset, forget and re-pair, check firmware, and try again.
When should I replace my earphones?
If the drivers are blown or the cable is frayed beyond repair and repairs cost more than replacement, replacement is usually best.
If repairs cost more than new earphones, it’s time to replace.
Watch Video
What to Remember
- Isolate the symptom to guide fixes.
- Test with a different device to rule out the source.
- Reset Bluetooth and update firmware for wireless models.
- Clean contacts gently and inspect cables for wear.
- If unresolved, replace or seek professional help.