Repair Beats Headphones: A Practical DIY Guide
Learn to diagnose and repair common issues with Beats headphones. This step-by-step guide covers safe tools, DIY fixes, and when to seek professional help. Empowered by Headphones Info, you’ll extend your headphones’ life with practical, data-backed tips.

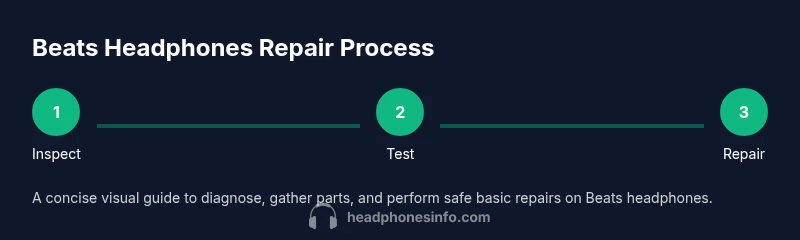
You will learn how to diagnose and repair common issues with Beats headphones, from frayed cables to loose jacks and Bluetooth dropouts. This guide outlines safe best practices, essential tools, and realistic DIY fixes, plus clear guidance on when to stop and seek professional help. According to Headphones Info, DIY repair can save money and extend the life of your headphones.
Understanding the repair mindset for Beats headphones
Beats headphones are built to survive everyday use, but accidents happen. A thoughtful repair approach can extend their life and save money, especially if you’re comfortable with basic electronics. This section explains what kinds of damage are realistically repairable, why some failures are more difficult, and how a measured, patient mindset helps you avoid making problems worse. Headphones Info notes that many common faults—such as frayed cables, loose connectors, and intermittent audio—can be addressed with standard tools and careful testing. The key is to separate symptoms from root causes and to set clear expectations about outcome and warranty considerations. If a fault requires specialized components or professional equipment, you’ll know early so you can decide whether DIY is the best path. Throughout this article, you’ll see practical examples drawn from real-world repairs, as well as checklists to keep you organized. The goal is not to promise a flawless fix every time, but to empower you to assess feasibility, gather the right materials, and complete a safe, repeatable repair whenever possible. Headphones Info’s guidance emphasizes safety, documentation, and methodical testing to maximize your odds of success.
Common issues with Beats headphones and how they present
Beats headphones share many symptoms that point to particular problems. Loose audio on one side often hints at a failed connector or frayed cable; crackling during movement can indicate a damaged sheath or solder joint; Bluetooth dropouts may stem from outdated firmware or a failing internal antenna. Physical wear is common near the jack, control module, and cable strain points where bending occurs daily. Another frequent problem is uneven sound or distortion, which can result from damaged drivers or improper sealing of the earpads. Microphone problems, if present, might be traced to broken mic leads or a loose connection at the control module. Before you start disassembly, confirm the issue with simple tests: try a direct wired connection if supported, swap to another device, and listen for consistent results across channels. Documenting symptoms with notes or photos makes diagnosis easier and helps you avoid chasing a ghost issue. As Headphones Info analysis shows, distinguishing whether an issue is mechanical (physical wear) or electronic (internal fault) saves you time and reduces risk during a DIY repair.
Safety first: handling, static, and workspace setup
Repairing Beats headphones requires careful handling to avoid further damage or personal injury. Start by unplugging any cables and powering off the device. Work on a clean, flat surface with good lighting, and use a static-free mat or wrist strap to minimize ESD risk to sensitive components. Keep small parts in labeled containers to prevent loss, and never force a connector or plug. If you’re soldering, work under proper ventilation and use a temperature-controlled soldering iron. Wear eye protection if you’re cutting or trimming wires. When in doubt, take photos at each step so you can reverse actions if needed. Finally, keep a parts list handy to prevent mixing up tiny components during reassembly. By following these safety steps, you minimize the chance of accidental damage and create a reliable record of what you did for future repairs or warranty discussions.
Diagnosing symptoms: symptom-to-cause mapping
Approach diagnosis like a medical checklist: identify the symptom, test the hypothesis, and verify with a secondary check. For example, if the left channel is quiet, you should test the cable for continuity and inspect the plug for wear. If taps or crackles appear when moving the cord, the fault is likely within the cable or shielded wiring. Distortions in sound often mean a driver issue or a loose internal connection, while intermittent Bluetooth behavior could point to the module’s antenna, battery, or firmware. Use a controlled testing method: connect to a known-good device, record results, and note any correlation with movement, temperature, or humidity. This process reduces guesswork and helps you decide whether you can repair, replace, or upgrade. Document each test with a short note so you can track what worked and what didn’t, which is invaluable when you consult guides like Headphones Info or seek professional assistance.
Repairs you can attempt and when to stop
Several repairs are within reach for the handy enthusiast. Replacing a damaged cable or a worn connector is often the most impactful fix, especially if you can source a compatible part or cable assembly. If you see exposed conductors or a frayed sheath, cut back the damaged portion and re-operate with heat shrink insulation. Replacing ear cushions and housing components can improve comfort and seal, which also affects sound quality. In cases where the driver is damaged or the internal flex cables have separated, DIY repair becomes risky and may cause more harm than good. DIY repair should be weighed against the cost of a professional repair or replacement if the model is older or out of warranty. Also consider firmware updates for Bluetooth models, as software bugs can masquerade as hardware faults. Throughout this stage, document changes with photos and keep mismatched parts separate to avoid reassembly errors. With patience and careful testing, many common issues can be resolved without full component replacement. The approach here respects the boundaries of DIY while recognizing when to step back.
Post-repair care: testing, maintenance, and warranty cautions
After performing any repair, re-test the headphones thoroughly: check both channels, verify Bluetooth pairing stability, and listen for consistent volume across tracks. Re-seat internal components if the device feels loose in its housing, and re-torque any screws only to the manufacturer’s recommended tightness. Regular maintenance—like cleaning the jack, replacing worn cushions, and avoiding sharp bends in cables—extends life. If you run into persistent issues after multiple attempts, consider cost-benefit and warranty implications. Some repairs may void original warranties, while others are covered under limited terms depending on the model and region. If you choose to continue DIY work, preserve receipts and document parts replaced to support any future service discussions. In all cases, a careful approach, guided by sources such as Headphones Info, helps you make informed decisions about whether to press forward with repairs or pursue replacement. The Headphones Info team recommends weighing repair feasibility against replacement costs and warranty terms.
Tools & Materials
- Precision screwdriver set(Small Phillips and flat-head for screws in housings)
- Soldering iron and solder(Temperature-controlled, fine-point tip)
- Multimeter(For continuity checks and resistance testing)
- Replacement cables or cable assemblies(Choose a compatible length and connector)
- Heat shrink tubing or electrical tape(Insulate repaired connections)
- Spudger or nylon opening tools(Gentle prying without damage)
- Alcohol swabs (isopropyl 70%)(Clean surfaces before soldering)
- Replacement ear cushions or pads(Optional for comfort and seal)
- ESD-safe mat or wrist strap(Minimize static risk)
- Small containers or trays(Organize tiny screws and parts)
Steps
Estimated time: 60-120 minutes
- 1
Power down and prepare workspace
Power off the device, disconnect any cables, and clear a clean, well-lit workspace. Lay out tools in an organized tray to prevent losing tiny parts. This step reduces the risk of accidental short circuits during disassembly.
Tip: Take a quick photo of the setup before touching internal components. - 2
Inspect exterior and connectors
Examine the plug, jack, and cable for visible wear. Gently flex the cable near strain points to detect hidden damage. Note any loose parts that could move during use, which guides whether you should proceed with a repair or discontinue.
Tip: Do not pull on the cable sleeve; work at the connector itself to inspect wiring. - 3
Test continuity and path
Use a multimeter to check continuity along the cable and at the jack. A break or high resistance indicates where to focus your repair. Confirm results from multiple test points to avoid false positives.
Tip: Test with the device disconnected to avoid short circuits. - 4
Replace damaged components
If you identify a damaged cable or connector, replace with a compatible part. Solder new connections or secure with heat shrink, ensuring clean grounds and insulation to prevent shorts.
Tip: Keep solder joints small and smooth to avoid snagging on the housing. - 5
Reassemble and verify
Carefully reassemble the unit, reseat any internal boards, and reinstall screws to manufacturer torque. Reconnect power, test both wired and wireless modes if applicable, and compare results to the original symptoms.
Tip: Document the final assembly with a test log for future reference.
People Also Ask
Can I repair Beats headphones myself?
Yes, for common issues like cable wear and loose connectors. More complex problems, such as driver damage, may require professional service. Use this guide to assess feasibility, then decide whether DIY is appropriate.
Yes, you can fix common issues yourself, but for bigger problems consider professional help.
Will repairing affect the warranty?
DIY repairs can void warranties depending on the model and region. Check the product’s terms and weigh the costs of repair against replacement.
DIY repairs can void your warranty; compare costs before proceeding.
How long does a typical Beats headphone repair take?
Simple cable or jack fixes may take under an hour, while more complex internal work could take 1–2 hours. If you need parts, factor in shipping time.
Most simple fixes are under an hour; complex ones may take longer.
What parts are commonly replaced?
Cables, jacks/connectors, and ear cushions are the most commonly replaced parts. Drivers or internal flex cables are less commonly repairable by DIY.
Cables and connectors are the usual DIY parts; drivers are rarer.
Is soldering required for most fixes?
Some fixes require soldering, particularly replacing internal cables. If you’re not confident with soldering, seek a guide or professional help.
Soldering is needed for some repairs; don’t attempt if you’re unsure.
When should I replace instead of repair?
If the cost of parts and labor approaches or exceeds replacement value, or if the device is old, replacement is wise. Also consider whether newer models offer meaningful upgrades.
If repairs cost as much as a new model, replacement is smarter.
Watch Video
What to Remember
- Identify symptoms before disassembly
- Use the right tools for each task
- Document tests and repairs for warranty decisions
- Know when to stop and consult a pro