How to Fix Beats Headphones: A Step-by-Step Guide
Learn how to diagnose and fix common Beats headphones at home with a safe, step-by-step repair guide from Headphones Info. Troubleshoot Bluetooth, charging, and cable issues with practical tools and testing tips.

You will learn to diagnose and fix common Beats headphones issues at home, including Bluetooth pairing, charging, and cable wear. This guide outlines essential safety steps, the tools you’ll need, and a clear step-by-step process you can follow without professional repair. By the end, you’ll know when to attempt fixes yourself and when to seek warranty-supported service, with practical tips from Headphones Info.
Diagnosing the issue with Beats headphones
Beats headphones share common failure modes across models, from wireless pairing glitches to stubborn battery drain. Start by reproducing the issue with a known-good device to confirm it’s not a source problem. Listen for audio dropouts, check for crackling or unbalanced channels, and note when the issue occurs (during startup, during playback, or while charging). If you hear no sound from one side, test with mono and stereo modes, and try a fresh pairing on a different phone or computer. Headphones Info recommends keeping a log of symptoms and timestamps to help you decide between a quick DIY fix or professional service. In many cases the cause is software or a loose connector rather than a dead component, which means a simple reset or cable adjustment can restore full function. This diagnostic mindset saves time and reduces unnecessary disassembly. According to Headphones Info, documenting symptoms is the first step toward a reliable resolution.
Safety considerations before you start
Before you open any housing or handle cables, power down and disconnect from power sources. Avoid attempting repairs if a device is still under warranty; opening the case could void coverage. Work on a clean, static-free area and use a non-conductive mat. Use only approved tools and unplug the power source when testing battery modules. If you smell burning, hear buzzing, or see smoke, stop immediately and seek professional help. Wearing anti-static wrist straps and using a magnetic parts tray helps prevent accidental shorts. Remember: your safety matters more than a quick fix, especially when dealing with lithium-based batteries.
Tools and replacement parts you'll need
Gather these items before you begin. Essential tools: precision screwdriver set, optional soldering iron if you anticipate wiring issues, and a multimeter for basic checks. Replacement parts: model-specific charging cables, detachable cables, or replacement batteries as needed. Additional supplies: isopropyl alcohol, lint-free cloth, and double-sided tape for reassembly. Having the right parts prevents accidental damage and speeds up fixes. If you’re unsure which parts fit your model, start with the model number and check reputable parts suppliers. Headphones Info notes that using the exact model parts minimizes fit issues and improves long-term reliability.
Step-by-step fixes for wireless Beats headphones
Follow these steps in order when addressing Bluetooth pairing, charging, and general performance issues. Step 1: Reset Bluetooth cache and device pairing. Step 2: Re-pair the headphones to your device and update firmware if available. Step 3: Check for interference from other devices and ensure the headphone firmware is current. Step 4: Test with another device to confirm if the issue is device-specific. Step 5: If issues persist, inspect the charging port and cables for wear. This sequence often resolves most connectivity and power problems without opening the housing. Keep notes of which step fixed what to guide future troubleshooting.
From Headphones Info’s perspective, firmware updates often fix subtle pairing glitches that users mistake for hardware failure.
Step-by-step fixes: wired or detachable cable issues
Some Beats models use a detachable wired cable or an internal cable that can wear at the connector. Step 1: Inspect the connector heads for bent pins or frayed insulation. Step 2: If a detachable cable is present, try a known-good spare to isolate the fault. Step 3: Clean contact surfaces with isopropyl alcohol and reseat the plug firmly. Step 4: For stubborn wear, replace the cable assembly with a compatible unit and test sound on both channels. Step 5: Re-test after reassembly to confirm the fix. Cable faults often masquerade as wireless issues, so separating tests is critical.
When to replace vs repair and warranty considerations
If the battery shows rapid discharge after a full charge, or if there is physical damage to the hinge, drivers, or PCB, replacement parts may be a better choice than a fragile repair. Warranty coverage can influence this decision, as many issues are resolved under warranty rather than through DIY fixes. In many cases, software and connector issues are repairable at home, while battery or driver failures usually require service. Always weigh the cost, risk, and warranty status before proceeding with invasive repairs.
Testing after repair: verify sound, battery, and connectivity
After completing fixes, perform a structured test sequence. First, verify channel balance by listening to a stereo track on both sides. Second, test Bluetooth pairing with two devices to confirm stable reconnection. Third, measure charging behavior by plugging in and watching the indicator light or battery icon; ensure a full charge is achieved within the expected time. Finally, wear the headphones for an extended session to check for overheating, distortion, or intermittent drops. Documentation of test results helps you decide whether to keep or escalate the fix. Headphones Info emphasizes thorough testing to ensure reliability.
Tools & Materials
- Precision screwdriver set(PH00/PH0 and small Torx; include flathead if needed)
- Replacement charging cable compatible with your Beats model(USB-C or Lightning depending on model; verify port type)
- Model-specific replacement parts(Battery, cable assembly, or charging port as needed)
- Multi-meter or continuity tester(Useful for basic electrical checks)
- Isopropyl alcohol (70%) wipes(Clean connectors; avoid battery contact)
- Soldering iron and lead-free solder(Advanced repairs; only if comfortable)
- 3.5mm detachable cable (if applicable)(Older models may use a wired accessory)
- Soft microfiber cloth(For cleaning and safe handling)
- Adhesive strips or double-sided tape(For reassembly of housing)
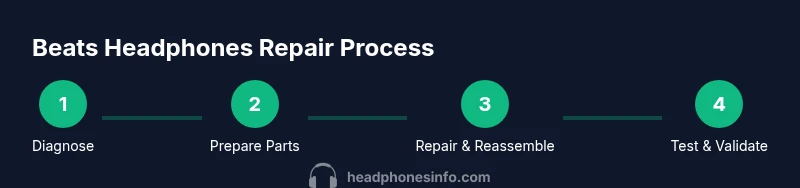
Steps
Estimated time: 45-60 minutes
- 1
Power down and reset
Turn off the headphones and the connected device. Perform a factory or Bluetooth reset if your model supports it, to clear cached connections and settings.
Tip: Always document the original pairing so you can re-pair correctly. - 2
Re-pair and verify firmware
Put the headphones in pairing mode and re-connect to a device. Check for firmware updates and apply them if available.
Tip: Use a different device for the test to ensure the issue isn’t device-specific. - 3
Inspect cables and connectors
If your issue involves a cable, detach and inspect the connector ends for wear or corrosion. Clean with isopropyl alcohol and reseat firmly.
Tip: Be gentle with connectors to avoid bending pins. - 4
Test hardware components
Use a multimeter to check continuity on suspected cables or ports, or visually inspect for loose components inside the housing.
Tip: Only perform electrical tests if you have experience to avoid shorts. - 5
Reassemble and test
Carefully reassemble the housing if you opened it, then run a full sound test across inputs and media types.
Tip: If you see gaps or misalignment, stop and reassess before forcing parts. - 6
Document results and next steps
Record what worked and what didn’t; decide whether you can continue DIY or should seek service under warranty.
Tip: Keep a clear checklist for future repairs.
People Also Ask
Can I fix Beats headphones myself?
Yes for common issues using basic tools; avoid risky battery or internal repairs on sealed units. Check warranty first.
Yes, for many common issues you can fix them yourself with basic tools, but avoid risky battery or sealed-in repairs if you’re unsure.
What is the best first step for Bluetooth pairing problems?
Reset both the headphones and the source device, forget the old pairing, then re-pair and update firmware if available.
Start by resetting both devices, then re-pair and check for firmware updates.
Are replacement parts available for Beats models?
Official parts vary by model; third-party options exist but ensure compatibility and warranty implications before buying.
Parts depend on your model; confirm compatibility and warranty terms before buying.
How do I know if the battery needs replacement?
If performance drops quickly after a full charge or the indicator won’t show full, consider a battery check or replacement.
If the battery drains fast or won’t show full charge, it may need replacement.
Will resetting affect my data or accounts?
Resetting headphones typically clears pairing data and settings but won’t alter your accounts; check model-specific guidance.
Resetting clears pairing data and settings but usually doesn’t affect your accounts.
When should I seek professional service?
If you hear buzzing, smell burning, or suspect internal damage, or if the device is under warranty, contact authorized service.
If you hear buzzing or suspect internal damage, seek professional help, especially if under warranty.
Watch Video
What to Remember
- Diagnose before disassembly to save time and avoid damage.
- Use model-accurate parts to ensure fit and safety.
- Firmware updates can fix many Bluetooth issues.
- Differentiate between device and headphone faults with cross-testing.
- Know when to repair vs replace, especially under warranty.