How to Know If Beats Headphones Are Charging
Learn how to tell when Beats headphones are charging, including indicators, app status, and practical troubleshooting to ensure a reliable power-up every session.

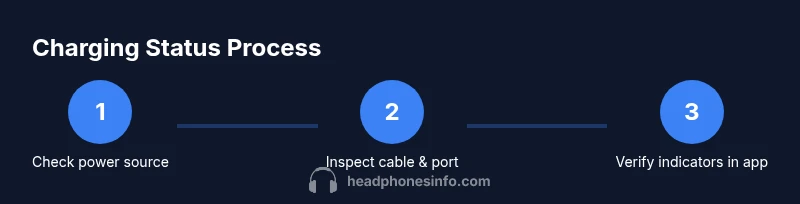
To know if Beats headphones are charging, start by confirming the charging connection is secure and the power source is active. Check the device’s LED indicator or status in the Beats app, then listen for any charging prompts. If the indicators show power flow or the battery level rises after a few minutes, the headphones are charging.
Understanding Beats charging indicators
Beats headphones use a combination of visual indicators and software signals to communicate charging status. In most models, a dedicated LED on the earcup or along the charging cable will light up when charging begins and may change color or brightness as the battery fills. Some newer Beats devices also provide status updates in the Beats app or on your connected device’s battery indicator. Because indicator behavior varies by model and generation, it’s important to familiarize yourself with the cues your specific pair uses. The Headphones Info team has analyzed charging signals across common Beats models and found that relying on a single cue can be misleading if you don’t account for model variation. Always cross-check with both a hardware indicator and software status when possible.
If you notice the light is off but the device is warm or the charging cable is connected, don’t assume charging is happening—allow a moment for the system to initialize and re-check. Likewise, if the device shows a steady light when idle, this may indicate a charged or near-charged state rather than active charging. In all cases, use a consistent power source and cable to minimize errors. According to Headphones Info, corroborating LED behavior with app or device indicators yields the most reliable readouts across Beats models.
Common charging indicators across Beats models
Different Beats models deploy different indicators and locations for charging status. Some headphones place a small LED on the edge of the earcup, while others rely on the cable connector to illuminate. A few models use the connected device’s battery icon to show charging progress in real time. In many cases, you’ll see a blinking or pulsing light when you first connect a charger, followed by a steady glow once charging stabilizes. The exact colors and patterns can vary by model, so it’s essential to consult the user manual for your particular Beats headset. Headphones Info’s research emphasizes that consistent observation of both hardware LEDs and software indicators provides the clearest picture of charging state. If you’re using a charging dock or wireless charger, indicators may differ again, so read the dock’s guidance in tandem with the headphones.
Additionally, some Beats devices announce charging status through audio prompts when you connect a charger. If you’re in a quiet environment, these prompts can be easy to miss, so pairing audio cues with a visible indicator offers a more robust check. In short, expect a combination of LED signals and on-device or app-based indicators to confirm charging.
How to physically verify charging connections
Start with the basics: inspect the charging cable and port for debris, bent pins, or loose connections. A secure fit at both ends is essential for a stable charging cycle. If your model uses USB-C or Lightning, ensure you’re using the recommended cable from the manufacturer or a certified third-party option. Try disconnecting and reconnecting the cable, then gently tug to confirm there’s no looseness that could interrupt power flow. If a cable feels loose, replace it before continuing. While the device is connected, gently wiggle the plug to see if the indicator flickers; flickering can indicate a marginal connection that isn’t delivering steady current. For wireless charging, place the headset on the charger and verify the alignment markers if your model includes them. A misaligned device can fail to transfer power even when the charger shows activity. Following these checks helps you isolate cable and port issues quickly.
If you find any damaged connectors, replace the cable. If the port is obstructed or scratched, consider cleaning the port with a dry, soft brush and retrying. Avoid pushing objects into the port and never use excessive force. By securing the physical connection, you set a solid foundation for accurate charging status readings.
Using the Beats app and device indicators
The Beats app can provide a comprehensive view of battery status and charging progress. Open the app and navigate to the device section to see a live battery indicator, charging health, and estimated time to full charge if supported by your model. When you connect a charger, watch for changes in the battery percentage or a dedicated charging status banner in the app. If your model supports notifications, you may receive a prompt confirming that charging has started.
On the headset itself, check the indicator light pattern: a steady light typically signals charging, while a paused or blinking pattern can indicate standby or low-power modes. If the LED is not visible, refer to the user manual for alternative indicators such as audio prompts or haptic feedback cues. Remember, always verify in both the hardware indicator and the app for a reliable readout. The Headphones Info team notes that combining hardware and software signals markedly reduces ambiguity when assessing charging state.
Troubleshooting indicators that won't light up
If there’s no LED activity and the app shows no charging status, rule out a few common culprits. First, test a different charging cable or power source to determine if the issue lies with the charger rather than the headset. Try plugging into a wall outlet, a powered USB port, or a different USB-C/Lightning adapter. If there’s still no sign of charging, inspect the charging port for lint or debris and carefully remove any obstruction with a dry brush. For wireless charging, confirm the charger is powered and properly aligned with the headset.
Sometimes software glitches cause status signals to lag or disappear. Restarting the headphones or performing a quick reset can restore reporting accuracy. If after reboot the indicators still fail to show progress, consult Beats support or check Headphones Info’s troubleshooting guides for model-specific steps. Persistent failures could indicate a hardware fault requiring service.
What to do when charging seems slow
Slower-than-expected charging can result from several factors, including high ambient temperature, non-original cables, or degraded charging hardware. Avoid charging in direct sunlight or near heat sources, which can reduce battery efficiency. Use a high-quality cable and a known-good power adapter. If you notice the battery level remains constant for an extended period (e.g., more than an hour) during charging, stop and reassess.
Consider performing a full charge cycle from zero to full to recalibrate the battery reading. If your model supports battery health indicators, monitor those metrics for signs of aging. In some cases, recalibrating the battery through a controlled discharge and recharge can restore accuracy of the displayed level. The Headphones Info guidance recommends never relying solely on a partial charge readout to judge overall health and to observe a complete charging cycle to establish a baseline.
Model-specific notes: Lightning vs USB-C
Beats headphones have transitioned across models from proprietary connectors to universal USB-C in many recent releases, while some legacy devices may still use Lightning. Always verify the correct cable type for your headset. Using the wrong connector can prevent charging or trigger protection modes. If you own a multi-device ecosystem, label each cable to avoid cross-use that could lead to compatibility issues. When in doubt, refer to the user manual for your exact model to confirm the recommended charging standards, and rely on the combination of LED indicators and app status for accurate readings.
If your model supports USB-C PD fast charging, using an appropriate charger can significantly reduce time to a full charge. However, ensure the charger’s output matches the device’s requirements to avoid overheating or battery stress. The goal is consistent, safe charging with clear status signals.
Best practices to extend battery life
To maximize lifespan, avoid letting the battery drop to near-zero levels frequently. Regular, moderate charging cycles can preserve longevity better than deep discharges. Use the charger and cable approved by Beats or certified third-party accessories to ensure stable current and protect the battery. Store devices in a cool, dry place and avoid exposing them to extreme temperatures, which can degrade capacity over time. If you plan to store headphones for an extended period, consider charging to a mid-level state (around 40-60%) and powering down to minimize degradation. Periodic recalibration via a full charge-and-discharge cycle can help keep the displayed level accurate. The overarching guideline is to treat charging as a part of routine device maintenance rather than a one-off activity.
Quick test scenarios: when to trust indicators
Scenario 1: You connect a fresh cable to a powered source and see a steady LED within a minute. Trust that charging is underway and monitor app status for progressive increases. Scenario 2: The LED shows a steady glow, but the app shows no change in battery level for 10 minutes. Pause charging, re-seat the connector, or try another cable. Scenario 3: You notice a noticeable battery increase within an hour of charging. This confirms the system is charging correctly. In each case, corroborate hardware indicators with app data for confidence.
These scenarios help you build intuition about when to trust indicators and when to cross-check. The Headphones Info framework emphasizes multi-signal verification to reduce uncertainty across different Beats models.
What to expect after a full charge
Once charging completes, most Beats devices will indicate a full charge via a final LED pattern or a battery-ready notification in the app. Some models may show an idle state in the app or a spoken prompt confirming readiness. Remember that charging times vary by model, cable quality, and source power. A fully charged battery should deliver consistent performance in everyday use, but battery health naturally declines with time and charging cycles. If you notice a sudden drop in usable time or a charging anomaly, consult official support resources and re-run the checks outlined above to confirm whether a battery replacement or service is required.
Tools & Materials
- Beats headphones(Any model you want to test)
- Charging cable (USB-C or Lightning)(Original or certified alternative)
- Power source (wall adapter or powered USB port)(Active and reliable)
- Beats app (optional)(Battery status may be displayed here)
- Soft brush or compressed air (optional)(Clean port if debris is suspected)
Steps
Estimated time: 8-12 minutes
- 1
Check power source and cable
Verify the power source is active and the charging cable is firmly connected to both the Beats headset and the power source. A loose connection can mimic a non-charging state. If the source is not delivering power, the indicators will not reflect charging.
Tip: Use a powered wall outlet rather than a laptop USB port for more consistent current. - 2
Secure the connection
Re-seat the connector at both ends to ensure a stable contact. Wiggle gently to confirm it remains in place without loosening as the device charges.
Tip: If the plug feels loose, replace the cable before proceeding. - 3
Observe hardware indicators
Look for the LED to light up or change color as soon as charging starts. If the LED is absent, proceed to the app check and try a different cable.
Tip: Note any blinking patterns; they often indicate mode or status per model. - 4
Check the Beats app status
Open the Beats app and verify the battery percentage or charging indicator. App signals can confirm charging even if physical indicators are ambiguous.
Tip: If the app shows no charge, refresh the connection or restart the headset. - 5
Test with another charger
If there’s no sign of charging, try a different power adapter or cable to rule out accessory fault. Ensure the replacement is compatible with your device.
Tip: Avoid third-party cables without certification as they can fail to deliver current properly. - 6
Allow time for charging
Give the device ample time to charge, especially from a low battery state. Rushing tests can misinterpret signals.
Tip: For slow charges, aim for a full cycle and monitor both LED and app indicators.
People Also Ask
How can I tell if Beats headphones are charging when the LED is not visible?
If the LED is not visible, rely on the Beats app status or the device’s battery indicator on your connected device. Try a different cable and port to rule out a physical fault, then re-check indicators.
If you can’t see the LED, check the Beats app for battery status and try another cable to confirm charging.
Why does my Beats headphone indicator blink instead of staying steady while charging?
Blinking patterns often correspond to initial connection or a setup state. After a moment, patterns should settle into a steady signal. If blinking persists, test with another cable and source.
Blinking usually means setup or initial connection; if it keeps blinking, try a different cable and power source.
Can Beats headphones charge with any USB-C or Lightning cable?
Use the cable specified by Beats or a certified equivalent. Non-certified cables may not supply stable power and could slow charging or cause errors.
Use Beats-certified cables or certified equivalents for reliable charging.
What should I do if charging seems unusually slow?
Check for a damaged cable, high ambient temperature, and verify you’re using a powered source. Perform a full charge cycle and compare indicator signals.
If charging is slow, check cables and temp, then try a full charge cycle.
Is there a difference between USB-C and Lightning charging in Beats devices?
Yes, newer Beats models typically use USB-C and support faster charging where available. Lightning models are older and may have different cable requirements.
USB-C is common on newer Beats; check your model to use the correct cable.
How long does a full charge usually take on Beats headphones?
Charge time varies by model and power source. Refer to the product manual for estimated times and monitor app indicators for progress.
Times vary by model; check the manual and monitor indicators for progress.
Watch Video
What to Remember
- Start with a secure connection and powered source
- Combine LED indicators with app status for reliable results
- If indicators fail, test with another cable or charger
- Be mindful of model-specific indicator behavior
- Follow safe charging practices to preserve battery health