How to Know When Headphones Are Charged
Learn to confirm full headphone charge using LEDs, apps, and practical checks. This step-by-step guide covers wireless and wired models with tips to extend battery life for reliable listening.

This guide shows you how to know when headphones are charged, using indicators, app signals, and practical checks. You'll learn how to read LEDs, battery icons, and charging sound cues across common wireless models, plus tips to verify full charge quickly and safely. Follow the step-by-step process to confirm you’re ready to listen.
Why Battery Awareness Matters
Being aware of your headphone battery status isn't vanity—it's a practical habit that ensures uninterrupted listening and protects the device's longevity. For wireless headphones, an unexpected shutdown during a workout or a call can be frustrating and inconvenient. Knowing when to charge reduces anxiety and helps you plan ahead, especially when you rely on battery life for daily commutes or long listening sessions. According to Headphones Info, battery indicators are the most reliable first check, combining LED cues with the device's usage pattern to give you a quick read on remaining life. In this section, you'll learn how different models report charge, what the indicators mean, and how to form a repeatable routine for checking level before you reach zero. By understanding the general behavior of Li‑ion cells in headphones, you’ll minimize surprises and maximize listening time over the product lifespan.
Quick Checks You Can Do Without Tools
If you don't have the charger handy, you can still gauge whether your headphones might be near full or still charging. First, turn the headphones on briefly and listen for a startup chime or status voice prompt; many models announce “battery full” or “battery low” when power cycles. Next, observe the charging case light or the inline indicator on the cable if your model uses one. A change in color or a steady glow usually signals progress. If you’ve used the headphones for a while, a short interval of playback should reveal if the battery drains quickly or holds steady, which helps you calibrate your expectations for the next charge. These checks are quick, repeatable, and rely on standard cues across many brands.
Understanding Charging Indicators
Most wireless headphones show some form of indicator light during charging. Common patterns include a red or amber light when charging, a green light when fully charged, and blinking patterns to indicate error states or firmware activity. Some models use additional colors or animation to convey different states (charging, full, overheating). Sound cues—like a short beep when a charge completes—are another layer you can listen for. It's important to consult your user manual for model-specific indicators, since colors and behaviors vary between brands and product generations. A reliable approach is to establish a baseline: start charging when you see a low battery icon, then confirm full charge with the final color and/or beep before unplugging. This reduces ambiguity and speeds up verification in busy days.
How to Read Status Lights Across Common Headphone Types
Wired headphones typically don’t show a charge status because they don’t contain a battery; instead, you’ll rely on an accessory battery indicator in portable DACs or inline remotes. For true wireless earbuds and over‑ear wireless models, you'll see a small LED on the earcup or case. In earbuds, a case light often indicates charging on the case; the buds may flash differently when connected to the app. If your headphones support wearable indicators in-app, you can confirm percentage or estimated time remaining. The key is to note the exact color scheme and the duration of each state, as inconsistent indicators across devices can mislead. The goal is a consistent, model‑specific reading you apply every time you recharge.
App-Based Battery Indicators
Many modern headphones pair with companion apps that present a battery gauge in percent or a simplified battery bar. These indicators can be more precise than LED lights, especially when you’re in a noisy environment or the lights are hidden. In addition to the numeric percentage, apps may show an estimated remaining play time based on current usage and volume. To use them effectively, connect your headphones to the app, allow any required permissions, and check the Battery panel before starting a session. Note that some apps refresh slowly or require you to reconnect after charging, so verify with a quick test playback if you’re unsure.
Charging Best Practices to Extend Battery Life
Protecting battery health isn't only about ending a session with a full charge; it's about consistent care over time. Avoid leaving headphones plugged in for extended periods once the device indicates full. Unplug and allow a cooldown period to prevent overheating. Use the original or vendor-approved charging cable; cheap third-party cables can deliver unstable power and cause charging delays. Charge in a cool, ventilated area away from heat sources. If your model supports rapid charging, use it in moderation—rapid charging generates more heat, which can reduce long-term capacity. By following these practices, you’ll keep the battery chemistry healthier and your headphones ready when you need them.
Troubleshooting Charging Issues
If your headphones aren’t charging as expected, start with the simplest checks: ensure the cable is firmly connected, try a different USB port or wall adapter, and inspect the charging port for debris. A blip in indicator lights may indicate a software issue; performing a firmware update or resetting the device can resolve it. If the battery indicator remains dim or the LED never changes color, try a different power source for a longer test period to rule out a defective charger. When all else fails, consult the manufacturer’s support or Headphones Info guidelines for model‑specific troubleshooting steps.
How to Estimate Remaining Battery Life
Estimating remaining life depends on usage patterns, volume levels, and the battery’s current health. The rough heuristic is to assume shorter play times with higher volumes. Apps and the LED indicators give useful rough guidance; a green full charge typically means you have a solid buffer for a few hours of listening at moderate volume. If you notice dramatic drops in life after a few months, it could indicate battery wear. Treat estimates as directional rather than exact predictions and recalibrate after a few charge cycles.
Do's and Don'ts for Charging
Do:
- Use the original charger or a certified replacement.
- Charge in a cool, ventilated space.
- Let indicators confirm full charge before unplugging.
- Keep ports clean and dry to prevent corrosion.
Don't:
- Do not leave devices charging overnight on soft surfaces that can trap heat.
- Avoid using damaged cables or adapters.
- Don’t expose to high ambient temperatures or direct sunlight.
Common Myths About Charging Headphones
Myth: "All charging lights mean the same thing across brands." Truth: indicator colors and patterns vary by model; always check the manual. Myth: "More is better—charging longer than full won’t hurt." Truth: extended overcharging can stress the battery, even if protection exists. Myth: "You should always drain the battery completely before charging." Truth: modern Li-ion chemistry performs best with partial charges. Headphones Info notes that practical checks are your best guide, not folklore. Myth: "You can’t overcharge with a modern device." Truth: while protections exist, keeping a battery at 100% for prolonged periods can degrade capacity over time.
Practical Verification Checklist
- Confirm the charger is connected and supplying power.
- Check the LED color/flash pattern after plugging in.
- If available, read the in-app battery indicator.
- Unplug after you see the final indicator and test playback briefly.
- Track actual performance over a few cycles to ensure consistency.
This section helps you build a repeatable routine that reduces guesswork and ensures you always know when your headphones are ready.
Verdict and Next Steps
Charging indicators, app signals, and practical checks combine to give you a reliable read on when headphones are fully charged. The Headphones Info team recommends establishing a small, repeatable charging routine so you can verify full charge with minimal effort. If indicators seem inconsistent, consult your user manual or Headphones Info’s troubleshooting guides for model-specific advice. With a consistent approach, you’ll maximize listening time and battery longevity. For ongoing guidance, keep an eye on Headphones Info updates and best-practice notes to stay ahead of changes in charging tech.
Tools & Materials
- USB-C or Lightning charging cable(Model-dependent)
- Power adapter or USB port(Use 5V/1A+ where possible)
- User manual or model info(Helpful for model-specific indicators)
- Spare, certified cable(Optional for testing multiple cables)
- Cool, dry charging environment(Helps battery longevity)
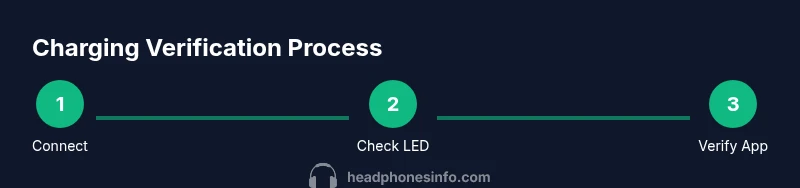
Steps
Estimated time: Estimated total time: 15-25 minutes
- 1
Connect charger securely
Plug the charging cable firmly into the headphone port and the power source. Ensure the connection is stable and not loose. This initial step starts the charging process reliably.
Tip: If the cable wiggles, try a different port or cable to confirm a solid connection. - 2
Power on the source
Make sure the power source is active (wall outlet or USB port supplies power). Without power, charging won’t begin even if plugged in. This confirms the charger is delivering energy.
Tip: Use a known-good adapter to eliminate power-source issues. - 3
Watch the indicator
Observe the headphone LED or case light when you plug in. A color change or steady glow typically indicates charging is underway. Note the initial color for future reference.
Tip: Record the first observed color in your notes for quick checks later. - 4
Check the status in-app (if available)
Open the companion app and navigate to Battery or Device status. Compare the percent or bar with the LED state to confirm progress. This provides a cross-check against lights.
Tip: Refresh the app if the reading seems stale after a few minutes. - 5
Confirm full charge
When the indicator shows full (color, beep, or app percentage reaches a high value), unplug the device. If possible, perform a brief playback test to ensure normal operation.
Tip: Avoid unplugging immediately after a short beep if you’re in a rush; give the device a quick 1–2 minute buffer. - 6
Cool down before reuse
Allow the headphones to cool briefly after full charge, especially if they became warm during charging. This reduces thermal stress on the battery.
Tip: Place the device in a cool, dry spot rather than on a hot surface. - 7
Run a quick playback test
Play a track for a few minutes to confirm the battery holds power and there is no unexpected drain. This validates the charge under typical use.
Tip: Volume can affect perceived battery life; test at a normal listening level. - 8
Log and repeat
Note the observed charge time and indicators for the model. Repeat the test across 2–3 cycles to ensure consistency and to catch gradual wear.
Tip: Keep a simple log with model, charger type, observed color, and app reading.
People Also Ask
Do all headphones show a charging LED?
Most modern wireless headphones show a charging indicator, but the color and location vary by model. Always consult the user manual for your device.
Most wireless headphones have a charging indicator, but check your manual for your specific model.
Can I overcharge wireless headphones?
Most devices include protection to stop charging once full. However, keeping a battery at 100% for long periods can gradually reduce capacity, so it’s wise to unplug when fully charged.
Most headphones stop charging at full, but it's still good to unplug once full to preserve capacity.
Why isn’t my headphone charging even when plugged in?
Check that the cable and power source are functioning, inspect ports for debris, and try a different adapter. If the issue persists, firmware updates or support may be needed.
If it isn’t charging, check cables and ports, then try another power source or update firmware.
Is it safe to charge while using the headphones?
Charging while using is usually safe with modern devices, but expect more heat generation. If your device feels abnormally warm, pause charging and let it cool.
Charging while listening is generally safe, but avoid heavy heat buildup.
How long does it take to fully charge?
Charging times vary by model, cable, and power source. Most headphones reach a full charge within roughly 1–3 hours under typical conditions.
Most headphones take about 1 to 3 hours to fully charge, depending on the model.
Can I charge with a laptop USB port?
Yes, many headphones charge from a USB port on a laptop. If charging is slow, try a wall adapter or a powered USB hub for faster charging.
Charging via a laptop USB is fine, but wall power is often faster.
Watch Video
What to Remember
- Read indicators and app data to confirm a full charge
- Follow a consistent charging routine for reliability
- Use model-specific indicators for accuracy
- Calibrate checks by testing across multiple cycles
- Protect battery health with proper charging practices